> ## Documentation Index
> Fetch the complete documentation index at: https://www.activepieces.com/docs/llms.txt
> Use this file to discover all available pages before exploring further.
# SCIM with Microsoft Entra ID
> Configure SCIM provisioning from Microsoft Entra ID to Activepieces.
## Prerequisites
Before you start, make sure you have:
* **Admin access** to your Activepieces platform
* **Admin access** to your Microsoft Entra ID
* SSO already configured (recommended): [SAML with Microsoft Entra ID](/admin-guide/guides/sso#saml-with-microsoft-entra-id-azure-ad)
* Generated an API key from `/platform/security/api-keys` route in the Activepieces app
## Configure SCIM Connection in Microsoft Entra ID
In Entra ID Admin Console, open your Activepieces application (created in first [SSO step](/admin-guide/guides/sso#saml-with-microsoft-entra-id-azure-ad)).
Click on **provisioning** tab in the left menu, In the center of the page there will be **Create configuration** section, click on **Connect your application**.
**New provisioning configuration** page show with a form:
* **Authentication method** leave as deafult ( Bearer authentication )
* **Tenant URL** to `https://your-activepieces-domain/api/v1/scim/v2`
* **Secret token** to ``
Click **Test Connector Configuration** and confirm the test passes.
 Finally, **Save** the configuration. after saving, you should get redirected to overview page.
## Attributes mapping
Before you actually start provisioning, you need to map the attributes between Entra ID and Activepieces.
In the overview page, click on **Attribute mapping** in the left menu. then select **Provision Microsoft Entra ID Users**. It should show enabled switch and **Target Object Actions** should all be checked ( Create, Update, Delete )
First you need to map the **userName** attribute to the field that represent the email address. by default it's mapped to userPrincipalName which is considered as an email address. but there's also a **mail** attribute that represent the email address. so you should choose the one that represents the actuall email used by your users.
Map the **externalId** ( Target attribute) to objectId ( Source attribute )
By default ( if you skip this ), the platform role of provisioned users will be set to `Member`. but it can be also mapped to entra ID fields.
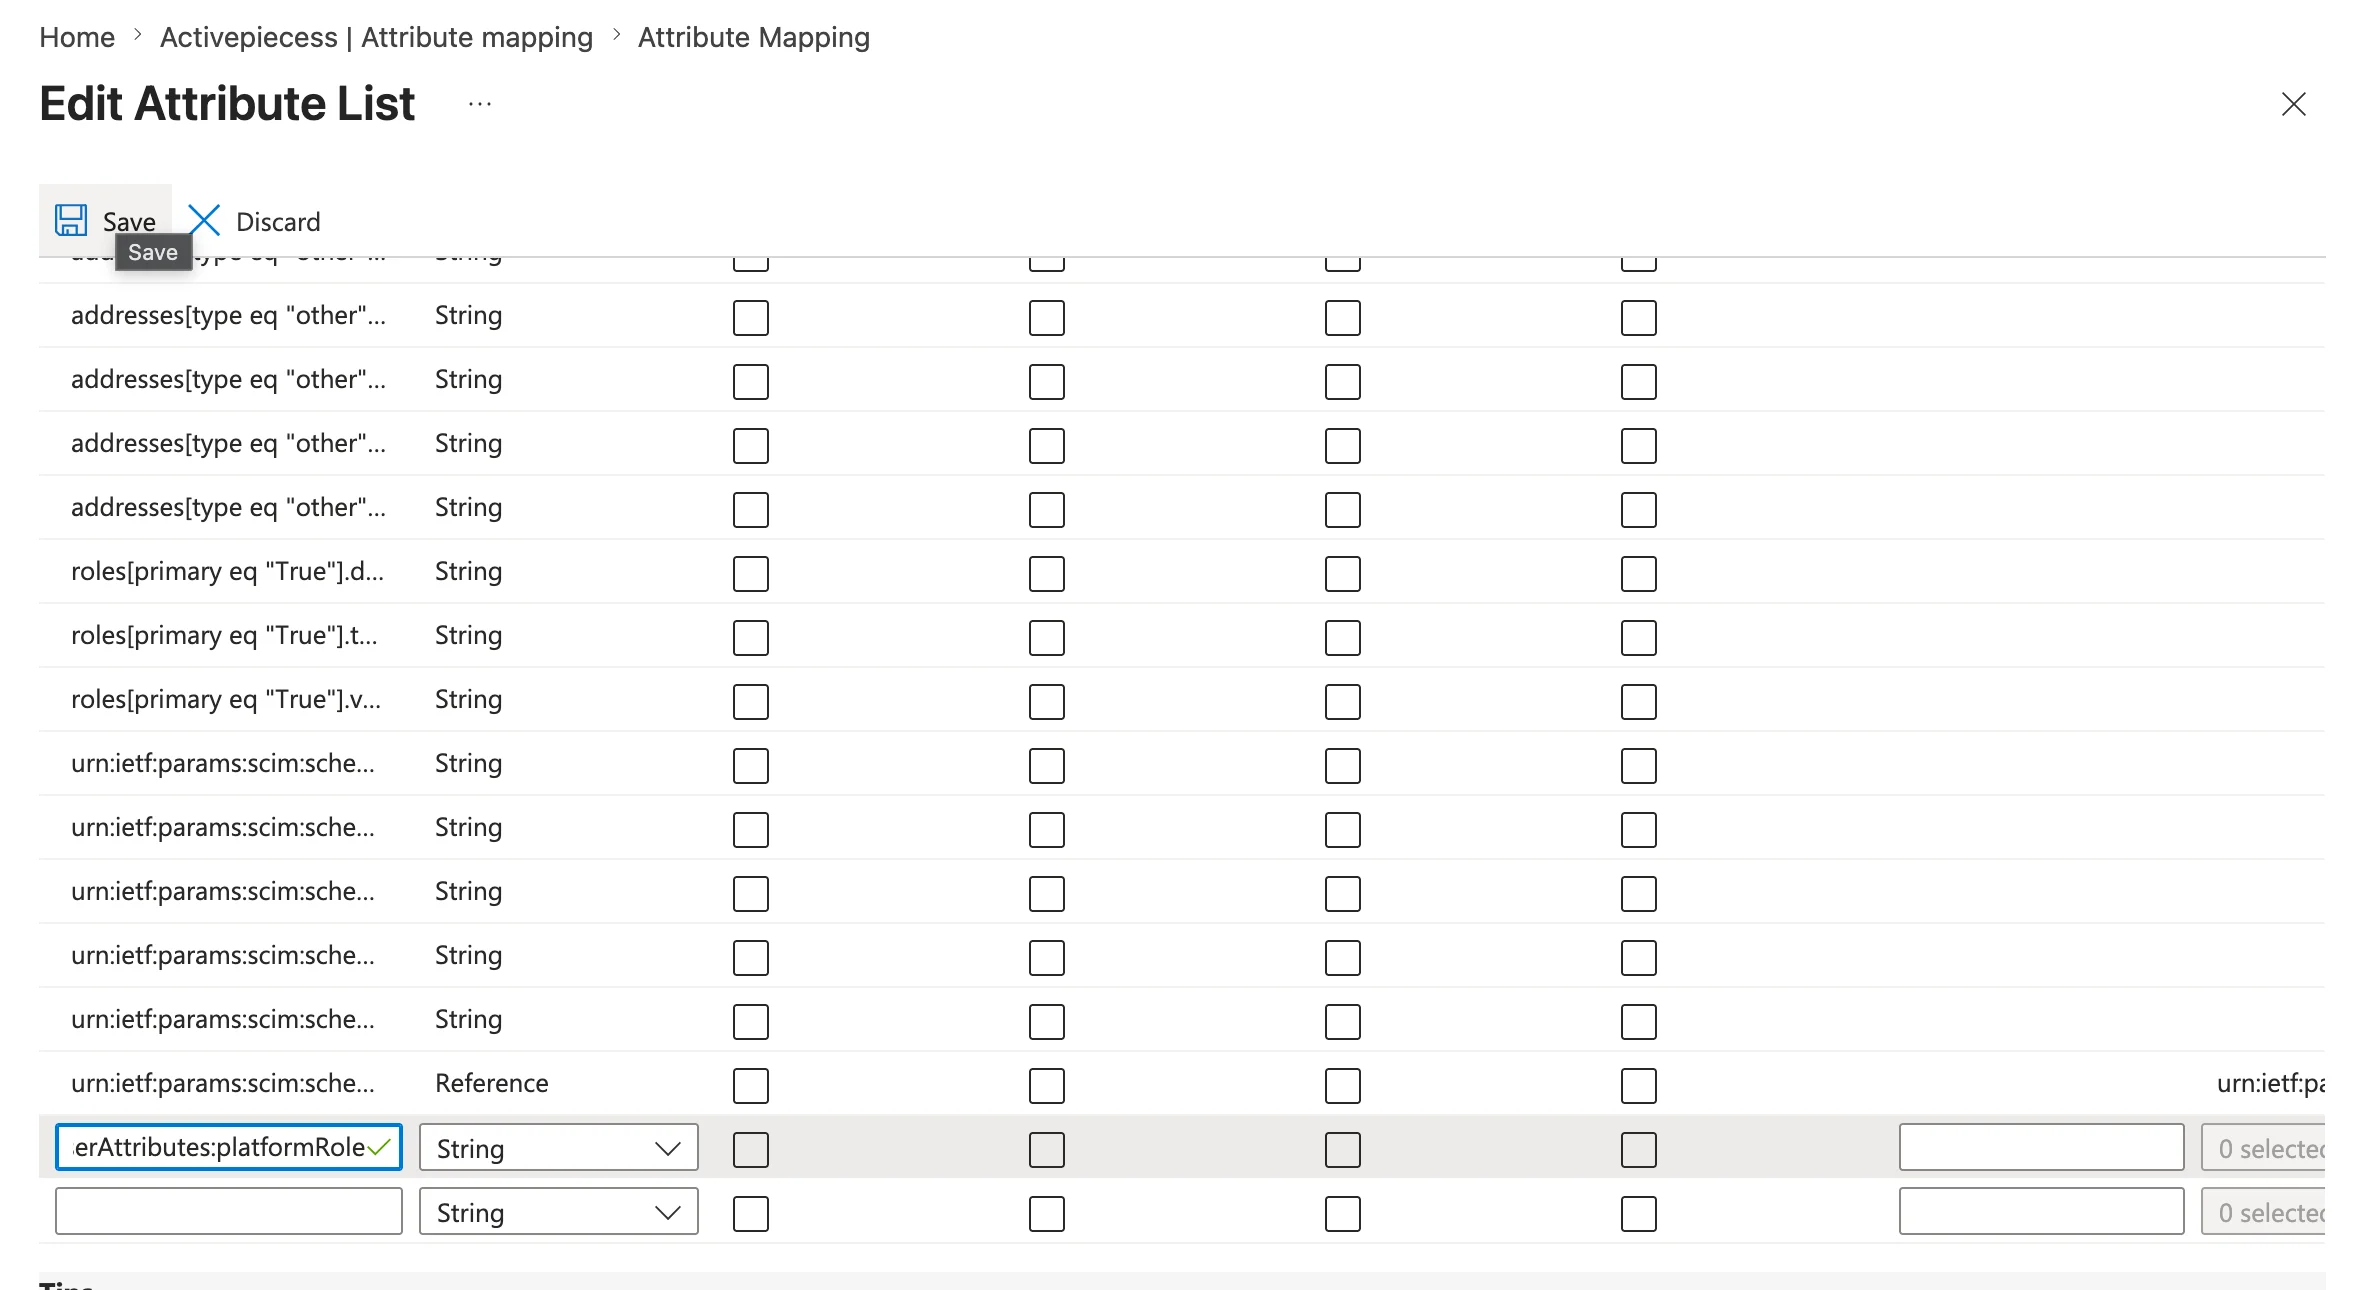
Scroll down to bottom of the page and check **Show advanced options** -> **Edit attribute list for customappsso**, A new page with attributes table will be opened.
Scroll down to bottom of the table where there is a row with an input field, paste `urn:ietf:params:scim:schemas:activepieces:1.0:CustomUserAttributes:platformRole` and save
Finally, **Save** the configuration. after saving, you should get redirected to overview page.
## Attributes mapping
Before you actually start provisioning, you need to map the attributes between Entra ID and Activepieces.
In the overview page, click on **Attribute mapping** in the left menu. then select **Provision Microsoft Entra ID Users**. It should show enabled switch and **Target Object Actions** should all be checked ( Create, Update, Delete )
First you need to map the **userName** attribute to the field that represent the email address. by default it's mapped to userPrincipalName which is considered as an email address. but there's also a **mail** attribute that represent the email address. so you should choose the one that represents the actuall email used by your users.
Map the **externalId** ( Target attribute) to objectId ( Source attribute )
By default ( if you skip this ), the platform role of provisioned users will be set to `Member`. but it can be also mapped to entra ID fields.
Scroll down to bottom of the page and check **Show advanced options** -> **Edit attribute list for customappsso**, A new page with attributes table will be opened.
Scroll down to bottom of the table where there is a row with an input field, paste `urn:ietf:params:scim:schemas:activepieces:1.0:CustomUserAttributes:platformRole` and save
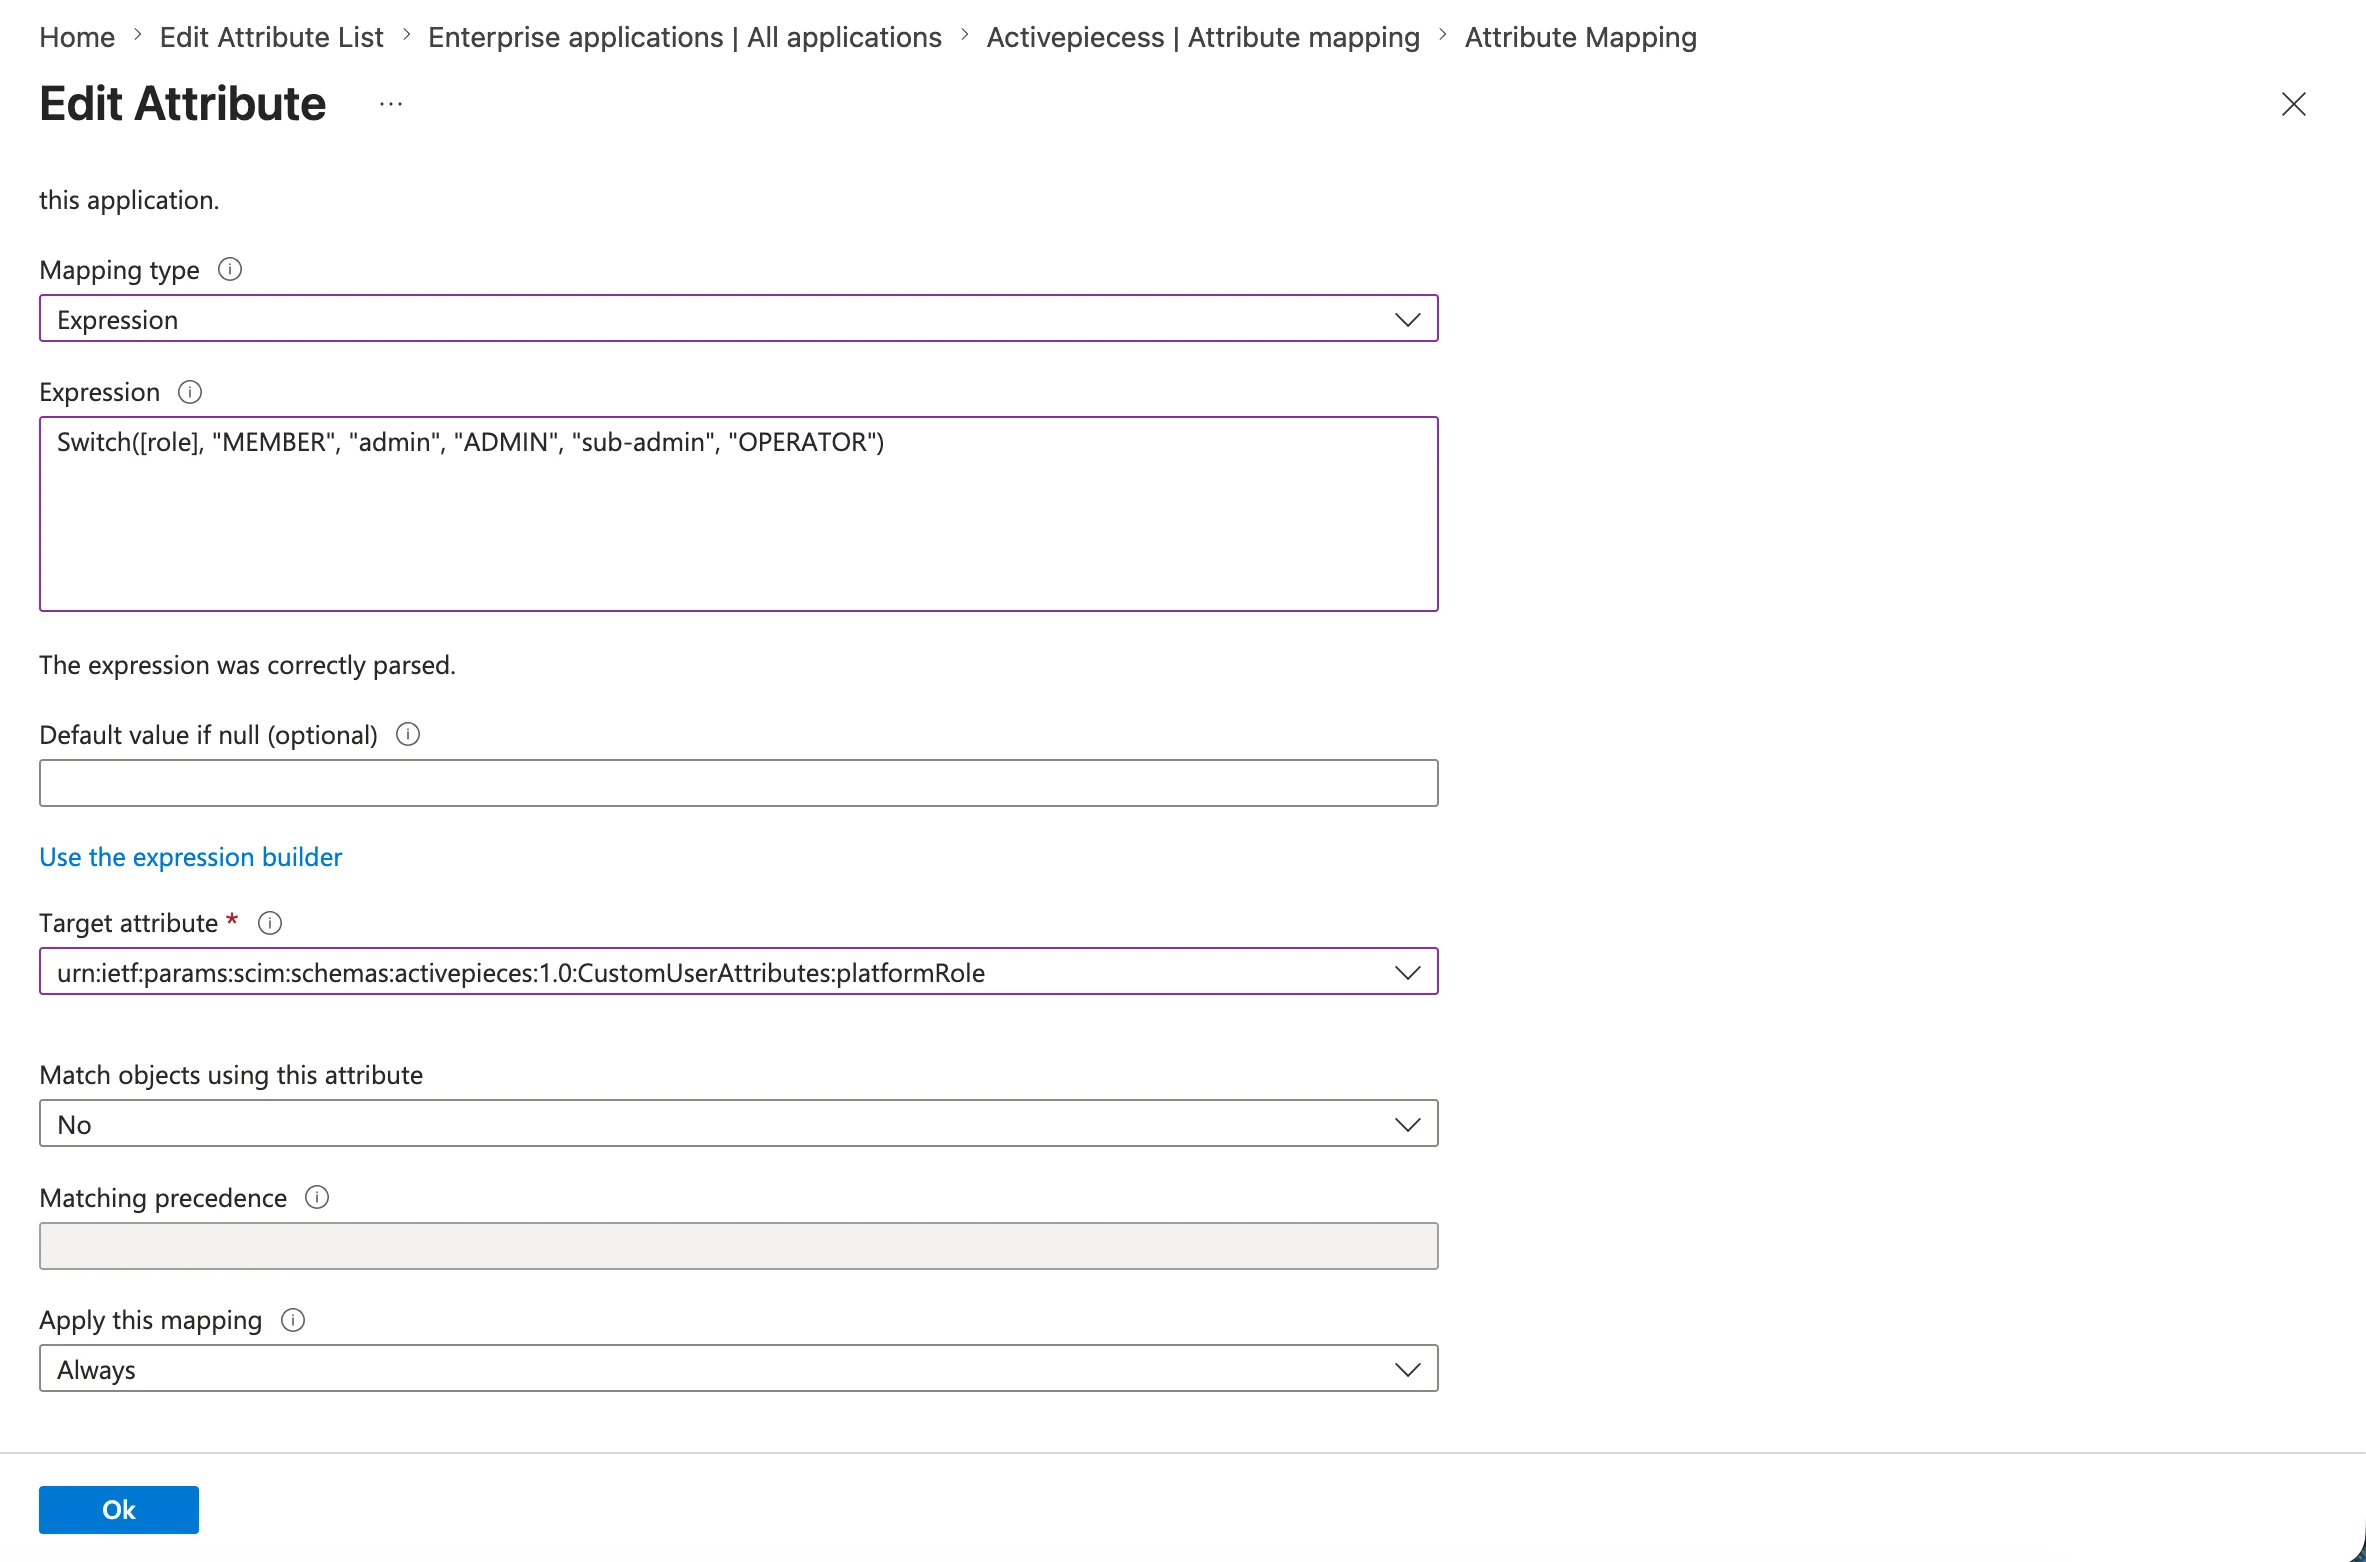
 * After adding the attribute, you will be redirected back to the attribute mapping page. on the bottom of the table click **Add new mapping**, a form will be opened to map the attribute to the field that represents the platform role.
* in the **Target attribute** field, select the attribute you just added (`urn:ietf:params:scim:schemas:activepieces:1.0:CustomUserAttributes:platformRole`)
* Now the mapping is going to rely on how roles are represented in your entra ID. in Activepieces Platform role can be one of `MEMBER`, `OPERATOR`, `ADMIN`. this means that you need to map your entra ID role fields to these values.
* if you already use a field ( which is probably not the case ) that has exactly these values, you can map it directly by selecting **Mapping type** to **Direct** and selecting the field from the **Source attribute** field.
* else, you can map it by selecting **Mapping type** to **Expression** and writing an expression that maps your entra ID field(s) to one of `MEMBER`, `OPERATOR`, `ADMIN`. see [Expression mapping](https://learn.microsoft.com/en-us/entra/identity/app-provisioning/functions-for-customizing-application-data) for more details.
* After adding the attribute, you will be redirected back to the attribute mapping page. on the bottom of the table click **Add new mapping**, a form will be opened to map the attribute to the field that represents the platform role.
* in the **Target attribute** field, select the attribute you just added (`urn:ietf:params:scim:schemas:activepieces:1.0:CustomUserAttributes:platformRole`)
* Now the mapping is going to rely on how roles are represented in your entra ID. in Activepieces Platform role can be one of `MEMBER`, `OPERATOR`, `ADMIN`. this means that you need to map your entra ID role fields to these values.
* if you already use a field ( which is probably not the case ) that has exactly these values, you can map it directly by selecting **Mapping type** to **Direct** and selecting the field from the **Source attribute** field.
* else, you can map it by selecting **Mapping type** to **Expression** and writing an expression that maps your entra ID field(s) to one of `MEMBER`, `OPERATOR`, `ADMIN`. see [Expression mapping](https://learn.microsoft.com/en-us/entra/identity/app-provisioning/functions-for-customizing-application-data) for more details.
 Finally, click **Save** above the table and confirm.
## Group provisioning
Groups are mapped to Activepieces projects. Members of the groups in entra ID will be added as members of the project in Activepieces. The name of the group will also be the display name of the project.
By default, all group memebers will have `Editor` role for the project. for now this can't be mapped like platform role. for self hosted customers they can change the env var `SCIM_DEFAULT_PROJECT_ROLE` to `Admin` or `Viewer`.
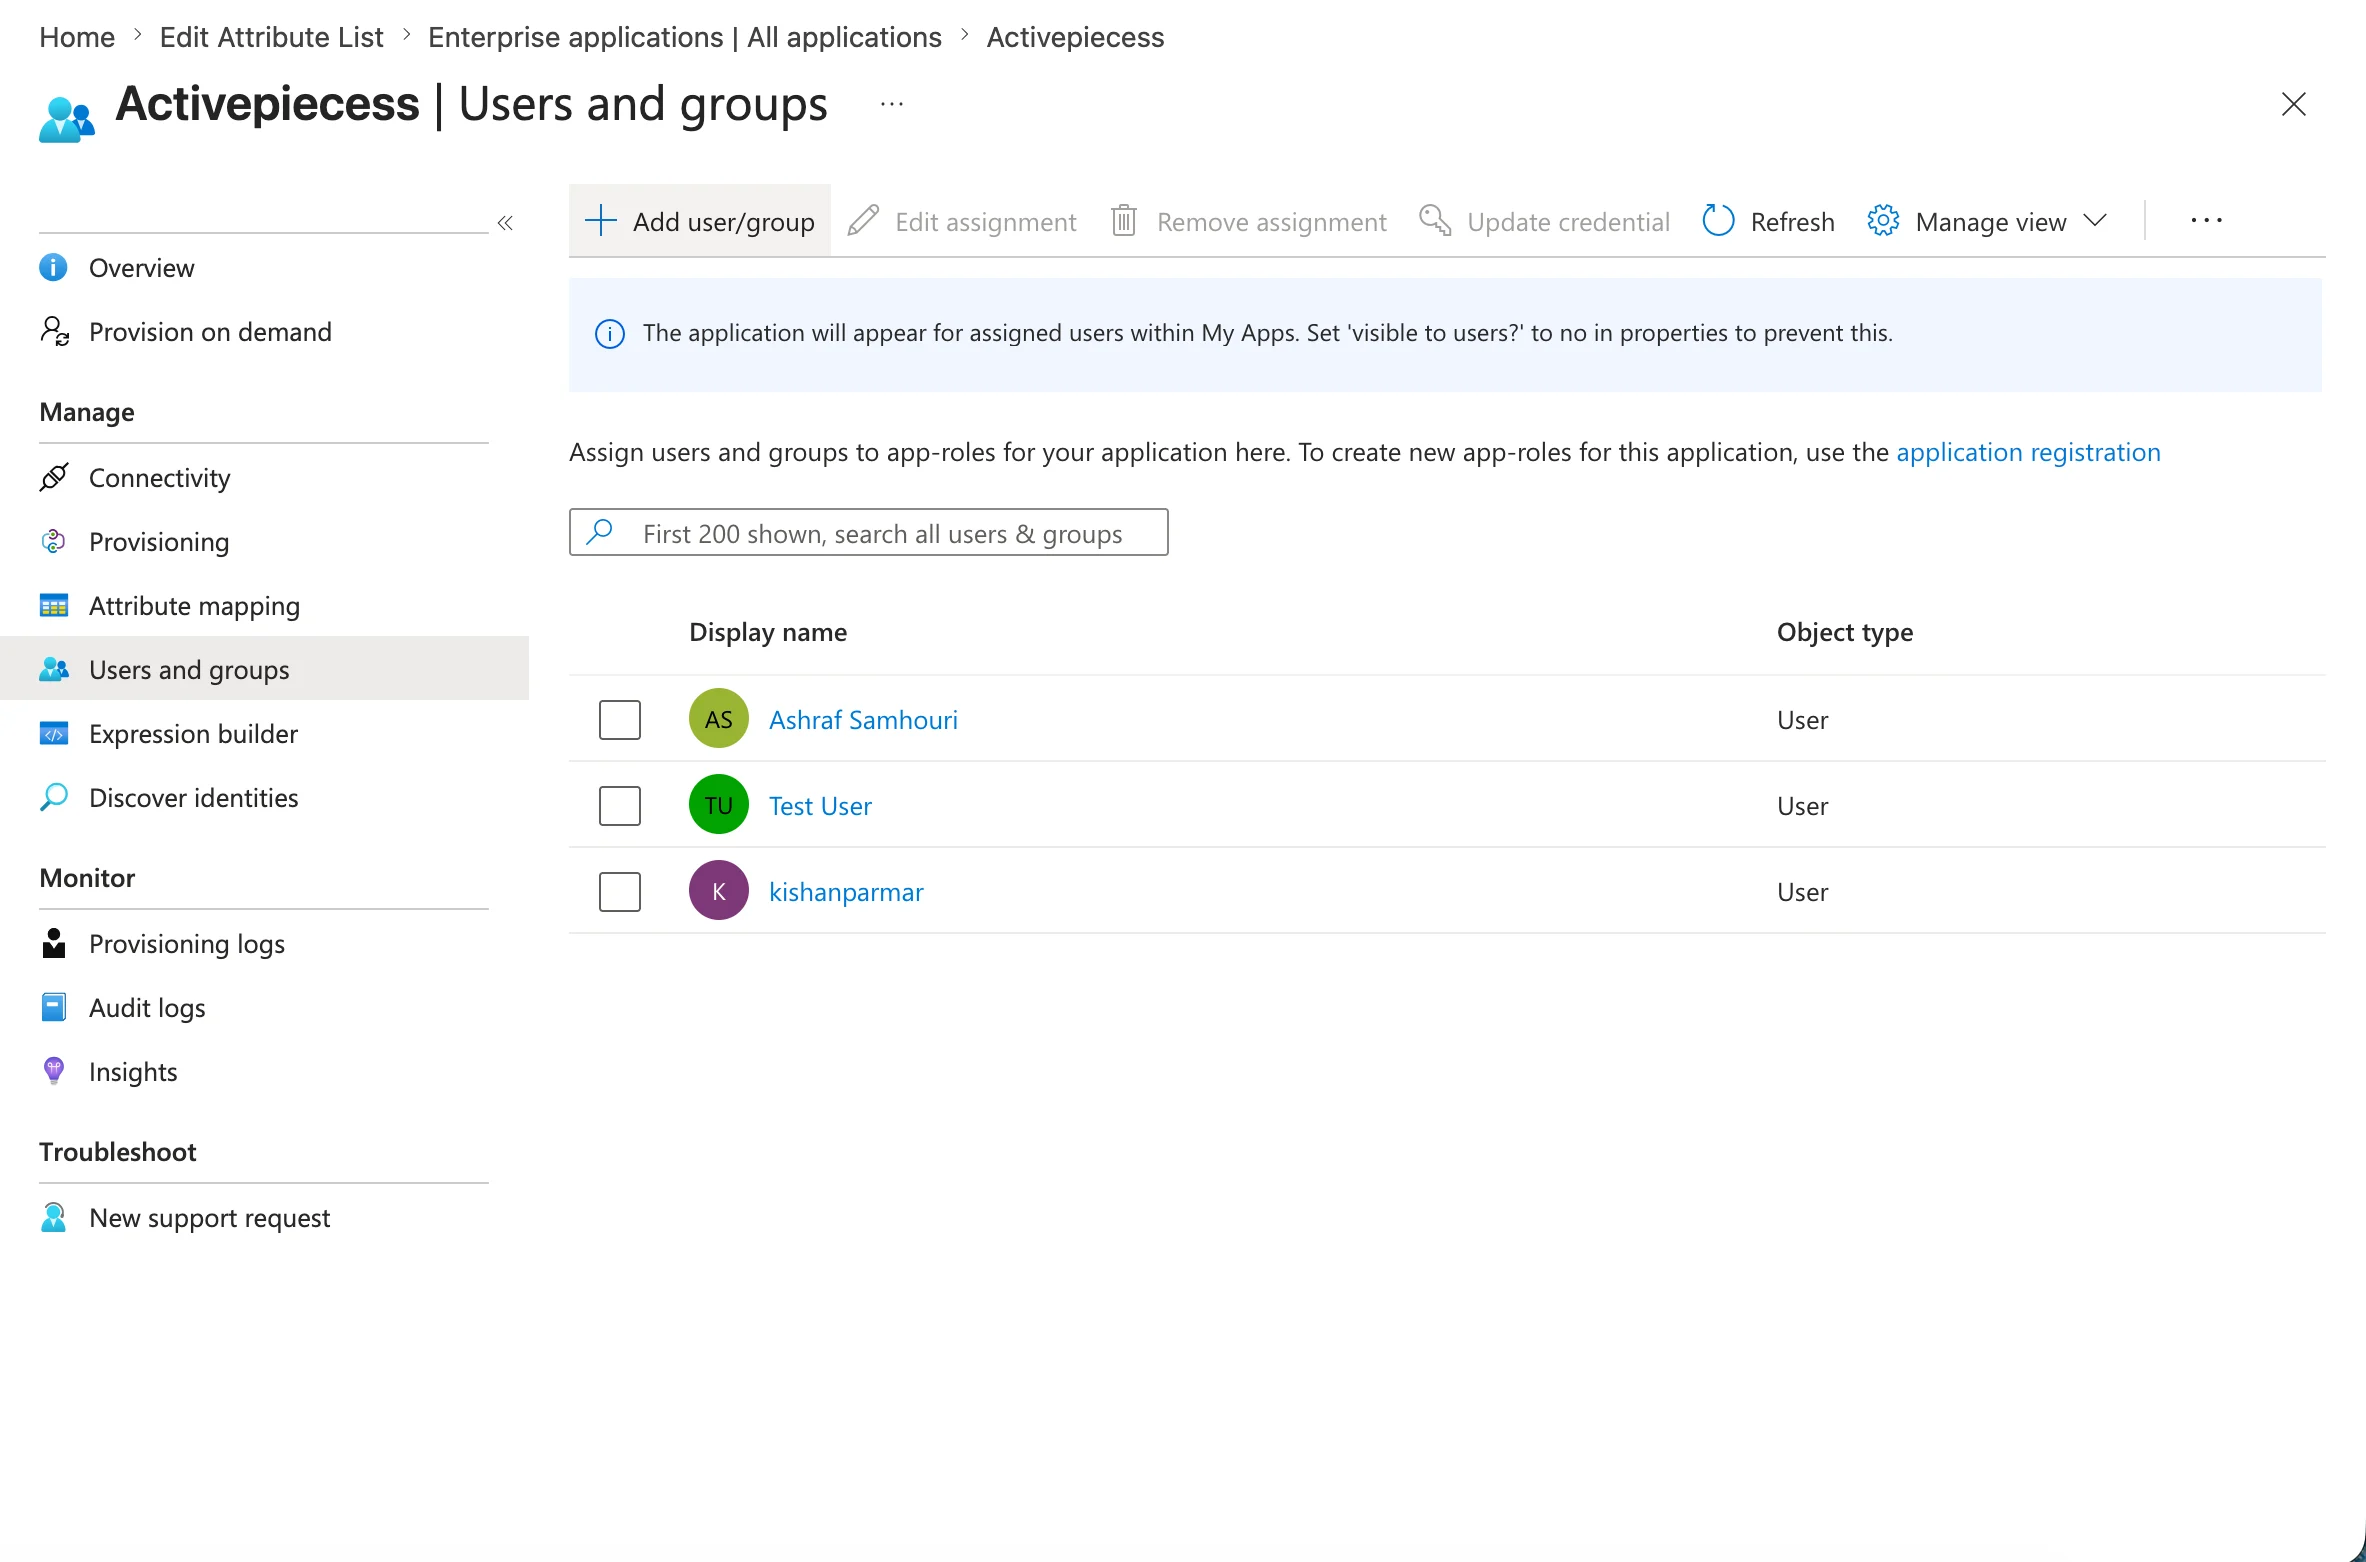
## Users and groups assignments
Assignments will allow you to select which users and groups that will be provisioned to Activepieces.
Finally, click **Save** above the table and confirm.
## Group provisioning
Groups are mapped to Activepieces projects. Members of the groups in entra ID will be added as members of the project in Activepieces. The name of the group will also be the display name of the project.
By default, all group memebers will have `Editor` role for the project. for now this can't be mapped like platform role. for self hosted customers they can change the env var `SCIM_DEFAULT_PROJECT_ROLE` to `Admin` or `Viewer`.
## Users and groups assignments
Assignments will allow you to select which users and groups that will be provisioned to Activepieces.
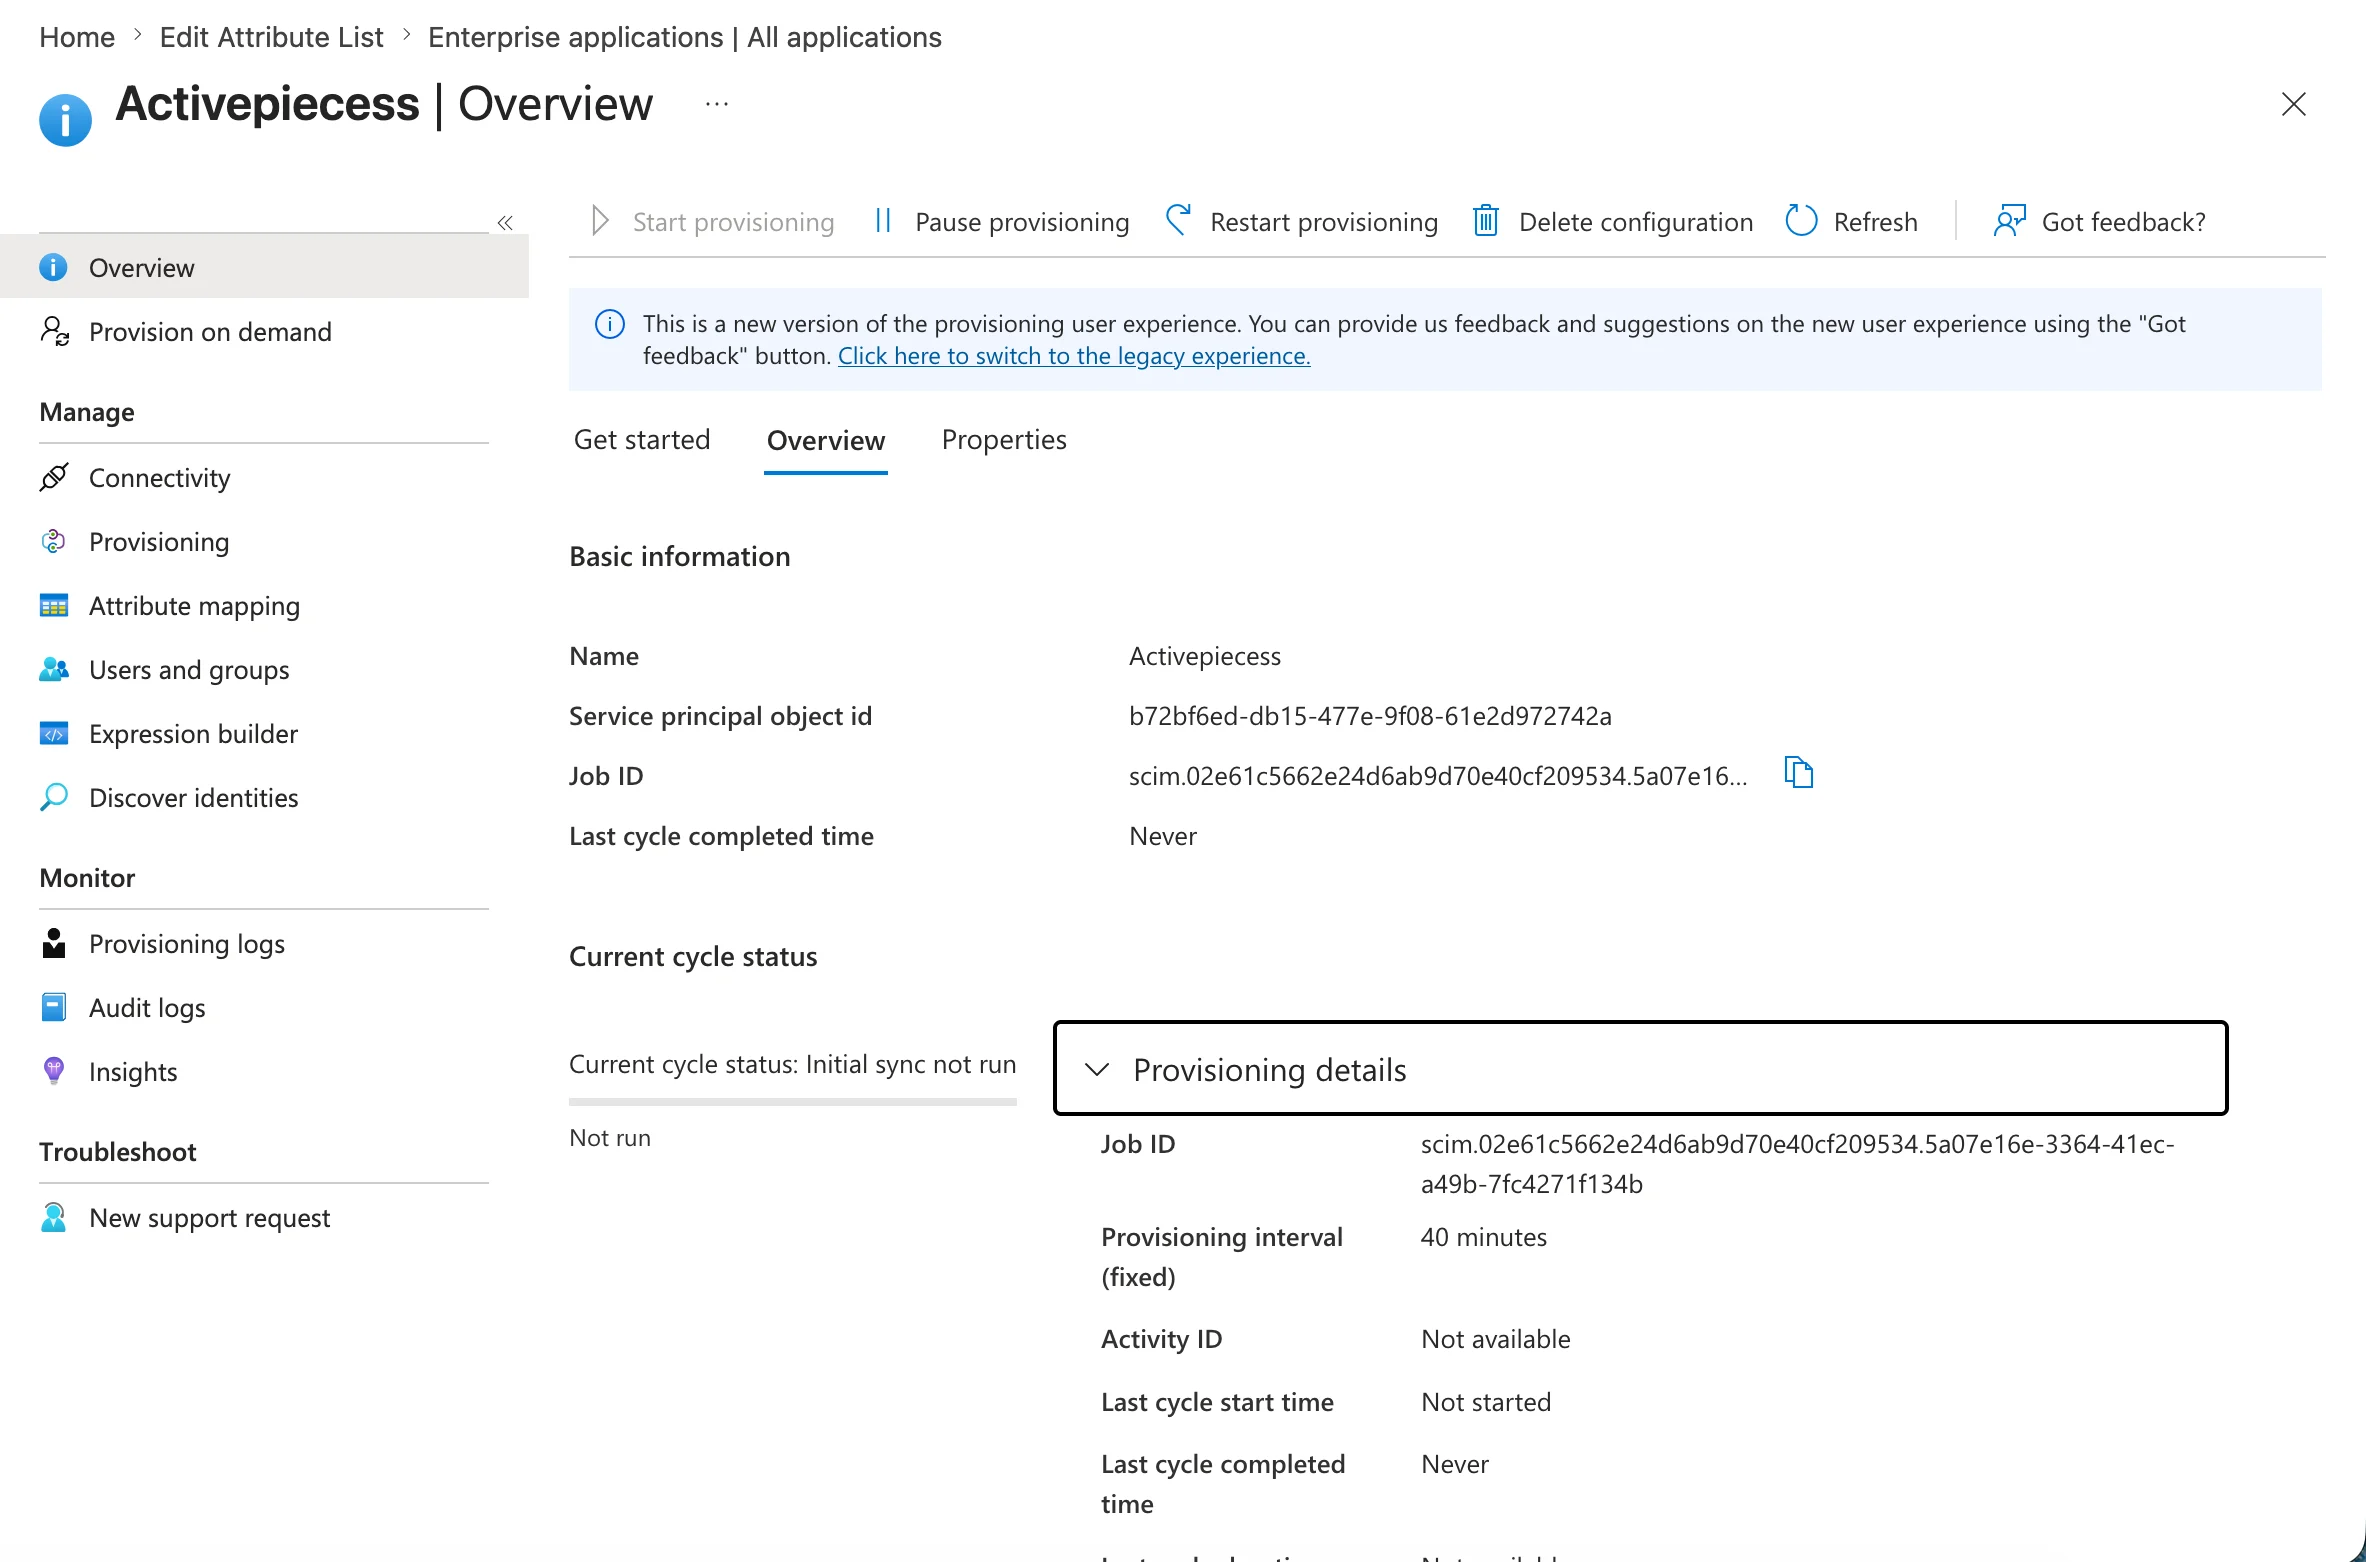
 ## Starting provisioning
Back at the overview page, click **Start provisioning** to enable it. it will happen automatically and periodically.
## Starting provisioning
Back at the overview page, click **Start provisioning** to enable it. it will happen automatically and periodically.
 Provision on demand can be used to trigger a one-time provisioning of any selected users and groups.