Overview
Pieces are the building blocks of Activepieces — they are integrations and connectors (like Google Sheets, Slack, OpenAI, etc.) that users can use in their automation flows. As a platform administrator, you have full control over which pieces are available to your users. This allows you to:- Enforce security policies by restricting access to certain integrations
- Simplify the user experience by showing only relevant pieces for your use case
- Deploy custom/private pieces that are specific to your organization
Pieces are standard npm packages — official pieces are auto-synced from the registry hourly, so you don’t need to upgrade the server to get new versions. Each step in a flow is pinned to a specific piece version, and drafts can be upgraded from the builder. See Piece Syncing & Versioning for the full pipeline.
Platform-Level Management
Platform administrators can manage pieces for the entire Activepieces instance from Platform Admin → Setup → Pieces.Project-Level Management
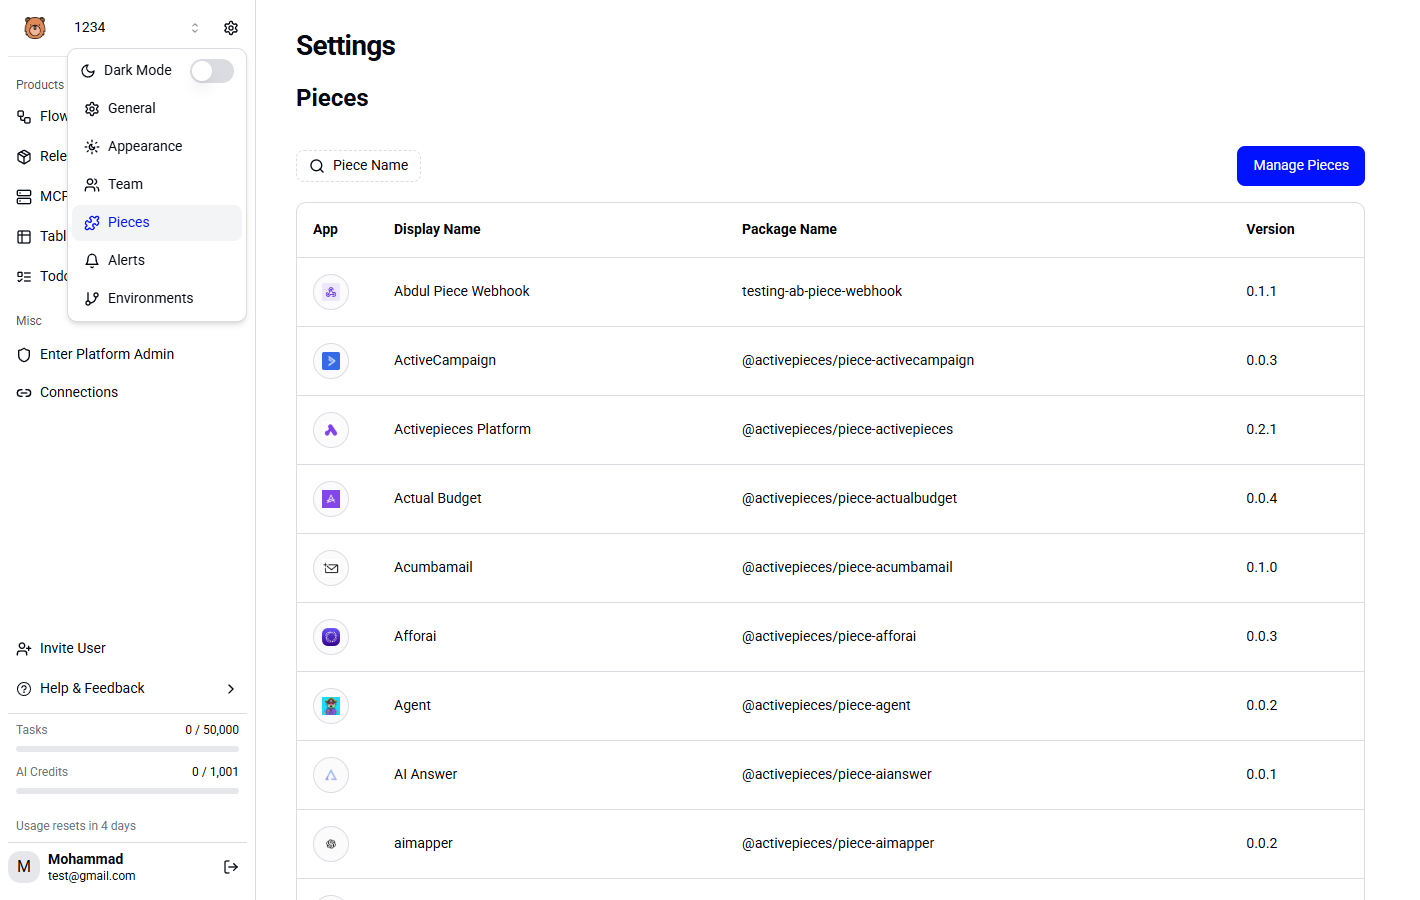
Project administrators can further restrict which pieces are available within their specific project. This is useful when different teams or projects need access to different integrations.Show/Hide Pieces in a Project
1
Open Project Settings
Navigate to your project and go to Settings → Pieces.
2
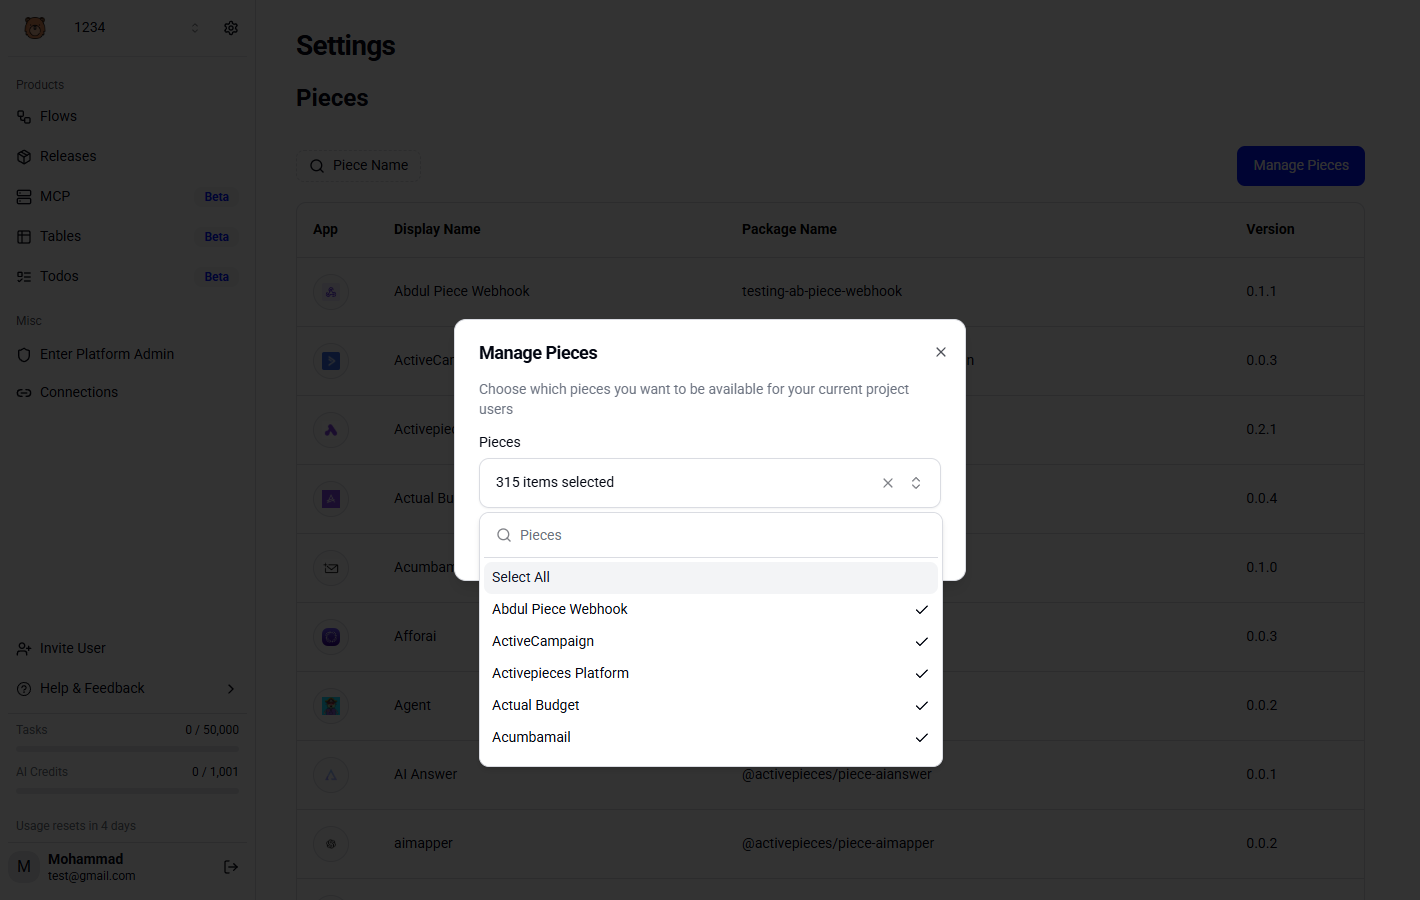
Configure Visibility
You’ll see a list of all pieces installed on the platform. Toggle the visibility for each piece:
- Enabled: Users in this project can use the piece
- Disabled: The piece is hidden from users in this project
3
Save Changes
Changes take effect immediately — users will only see the enabled pieces when building their flows.
Project-level settings can only hide pieces that are installed at the platform level. You cannot add pieces at the project level that aren’t already installed on the platform.
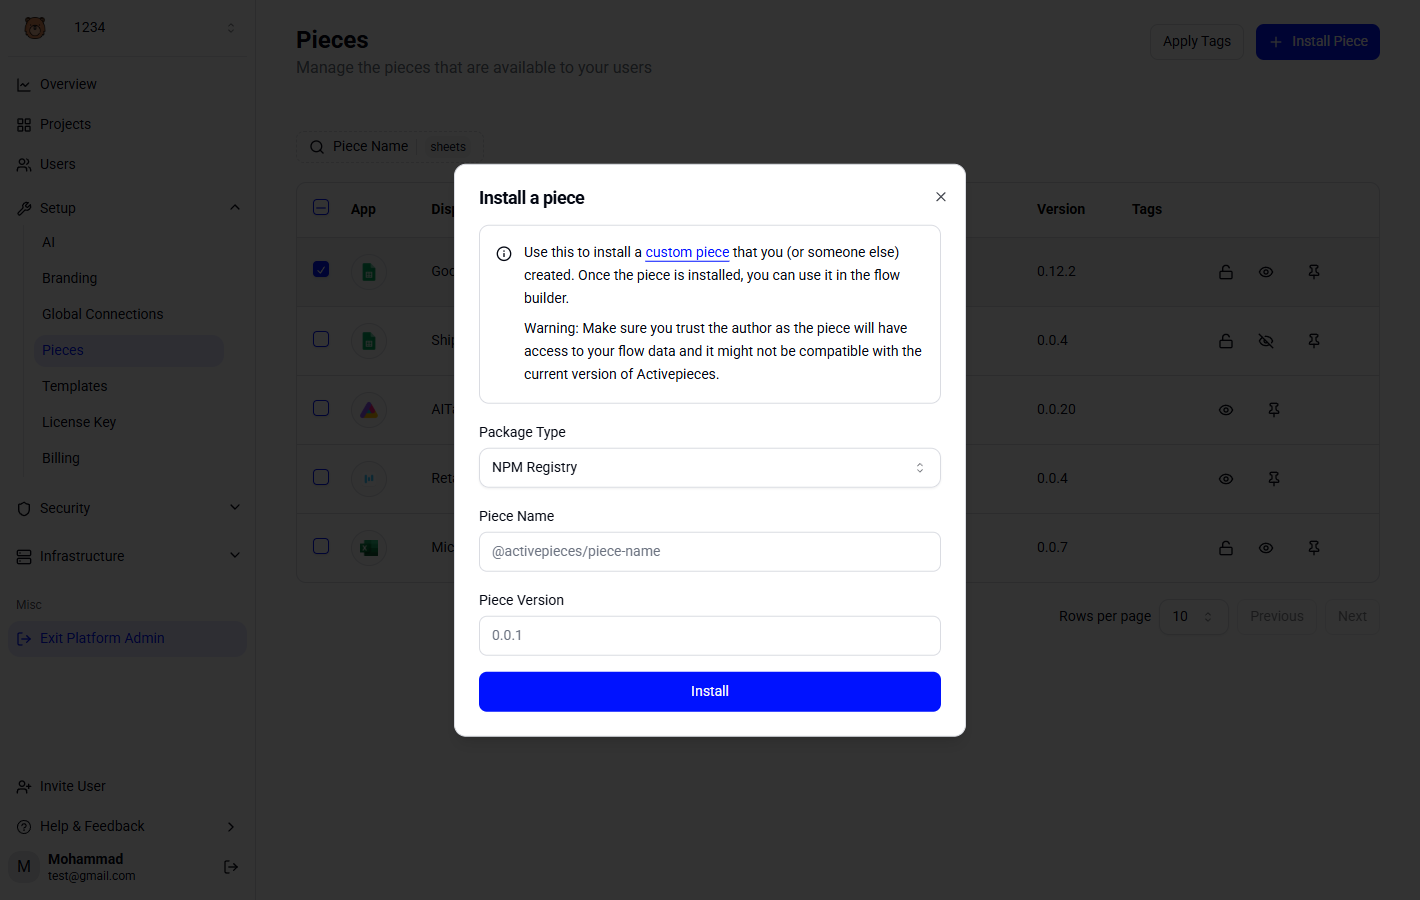
Install Private Pieces
If you’ve built a custom piece for your organization, you can upload it directly as a tarball (.tgz) file.
1
Build Your Piece
Build your piece using the Activepieces CLI:This generates a tarball in
dist/packages/pieces/your-piece-name.2
Navigate to Pieces Settings
Go to Platform Admin → Setup → Pieces and click Install Piece.
3
Select File Upload
Choose Upload File as the installation source.
4
Upload the Tarball
Select the
.tgz file from your build output and upload it.