Prerequisites
Before you start, make sure you have:- Admin access to your Activepieces platform
- Admin access to your Okta tenant
- SSO already configured (recommended): SAML with Okta
- Generated an API key from
/platform/security/api-keysroute in the Activepieces app
Configure SCIM Connection in Okta
1
Open your Okta app
In Okta Admin Console, open your Activepieces application (created in first SSO step).
2
Enable provisioning
In the app’s General tab, enable SCIM Provisioning.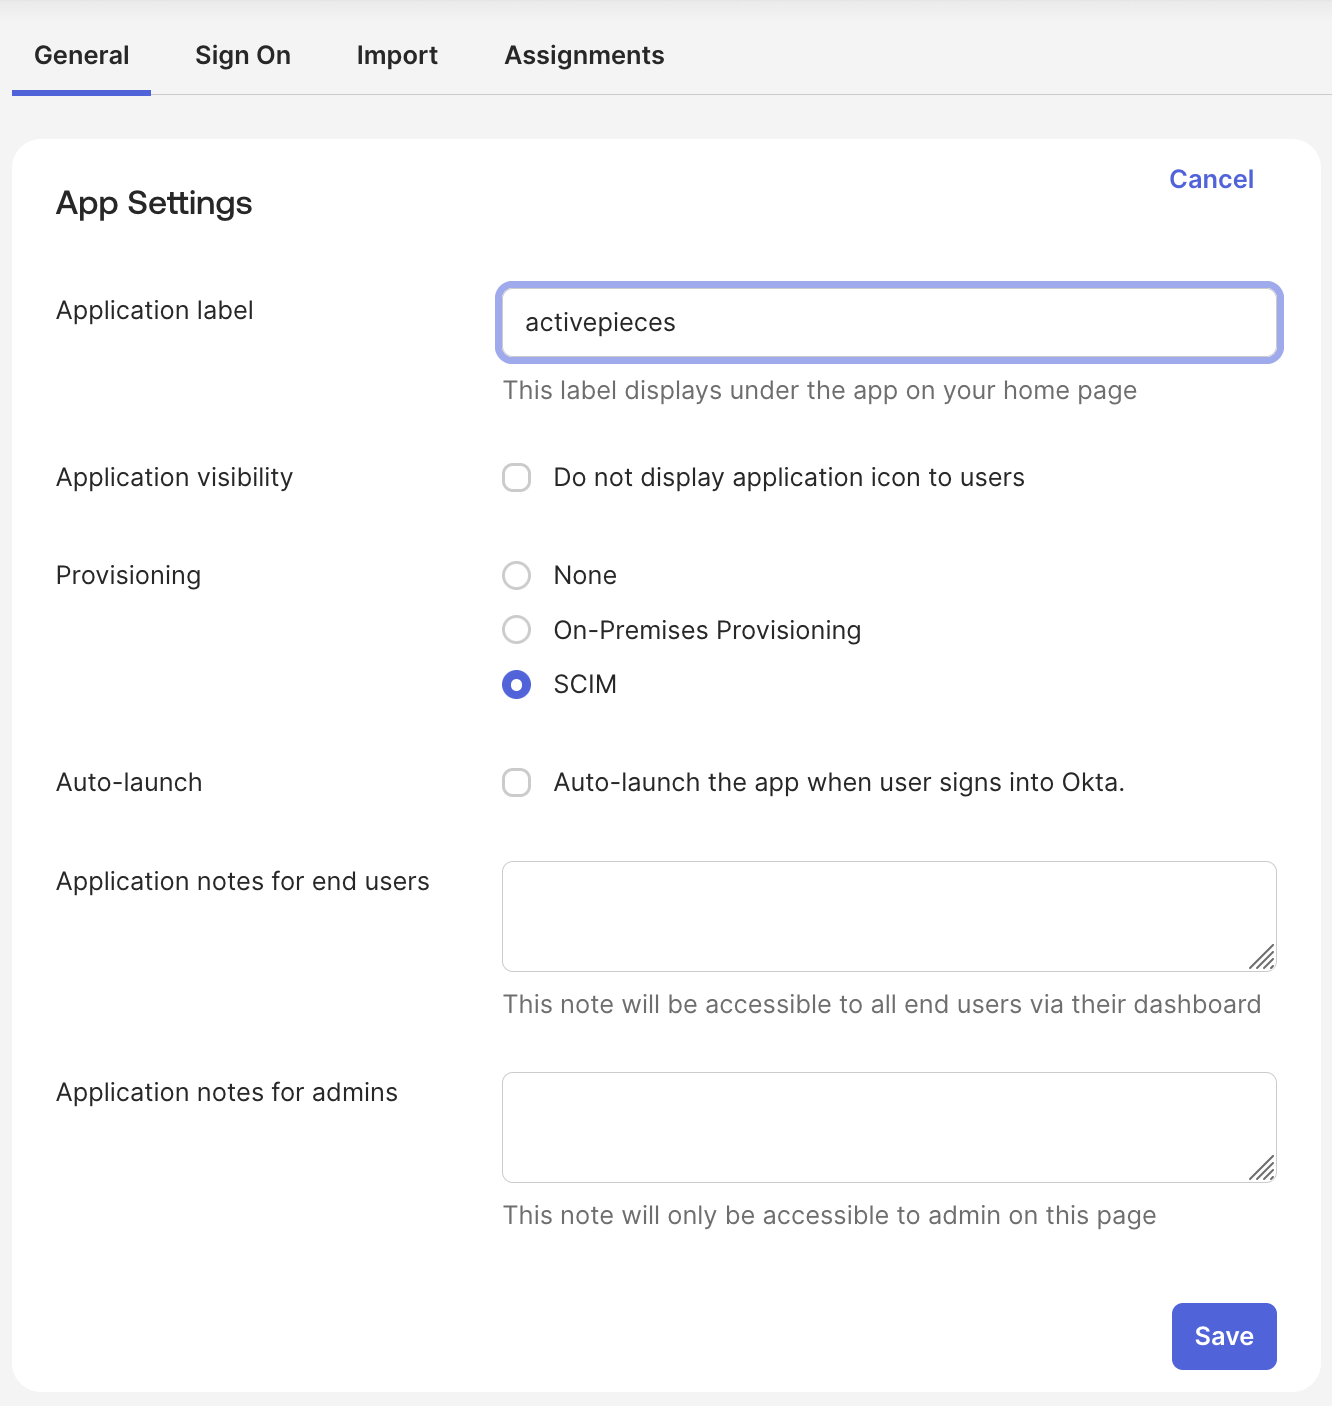
3
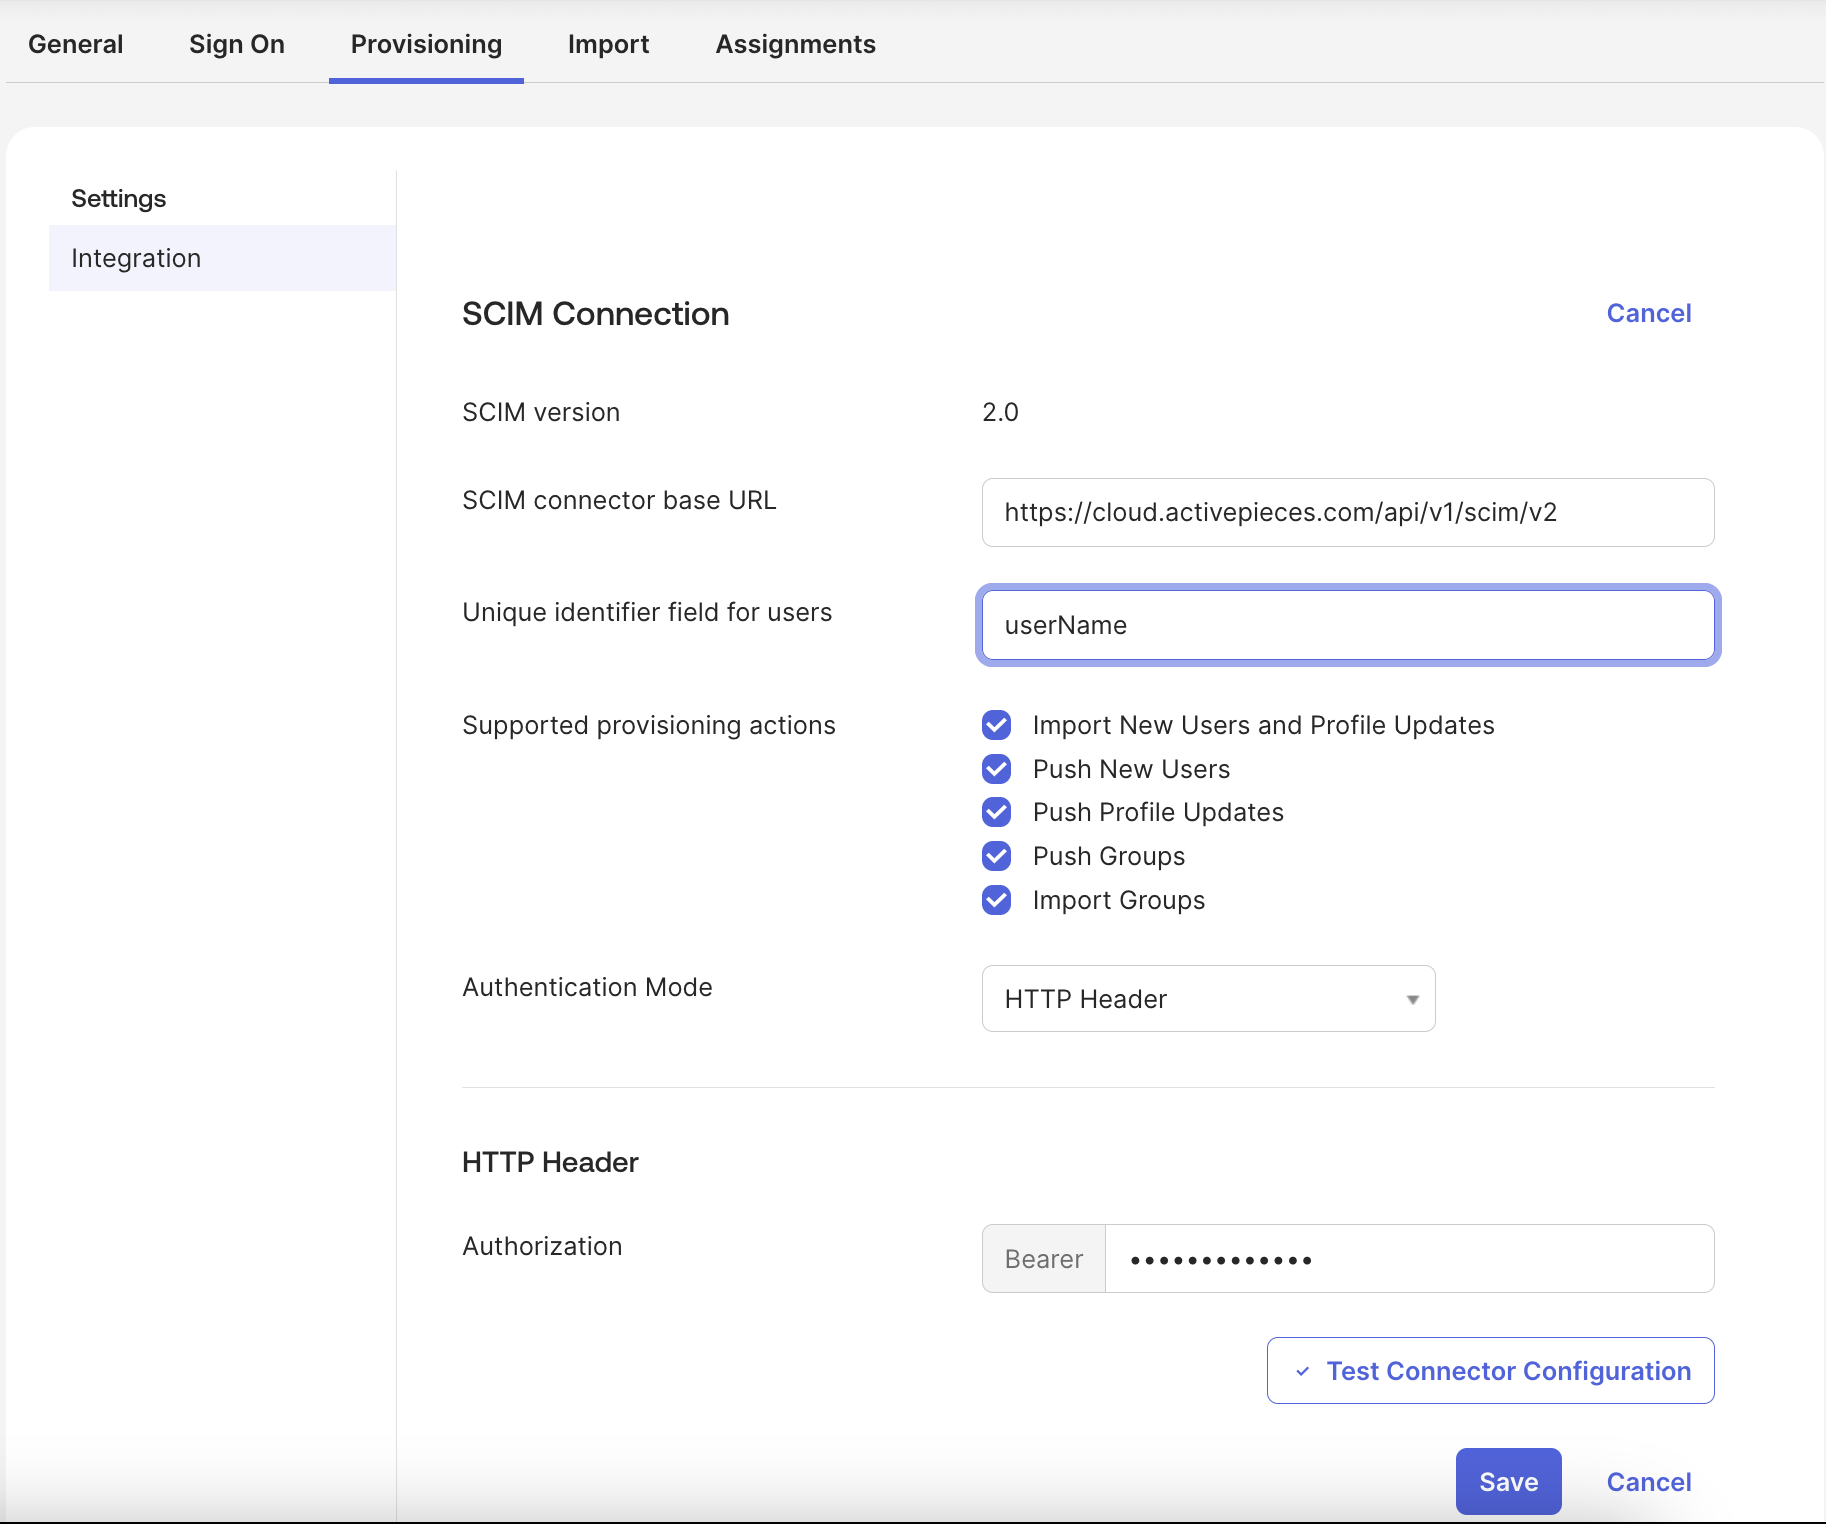
Add SCIM connection details
Provisioning will be visible, go to it and set:
- SCIM base URL to
https://your-activepieces-domain/api/v1/scim/v2 - Unique identifier field to
userName - Authentication mode to
HTTP Header - Authorization to
Bearer <generated-api-key>
4
Test the connector
Click Test Connector Configuration and confirm the test passes.
Configure Attribute Mapping
In Provisioning -> To App -> Attribute Mappings, map these fields:Platform role mapping
By default, provisioned users will haveMember role in the platform. In order to specify roles for users in Okta, follow these steps:
1
In Okta admin console, navigate to Directory -> Profile Editor -> Your-Application User.
2
Click Add Attribute and fill form with: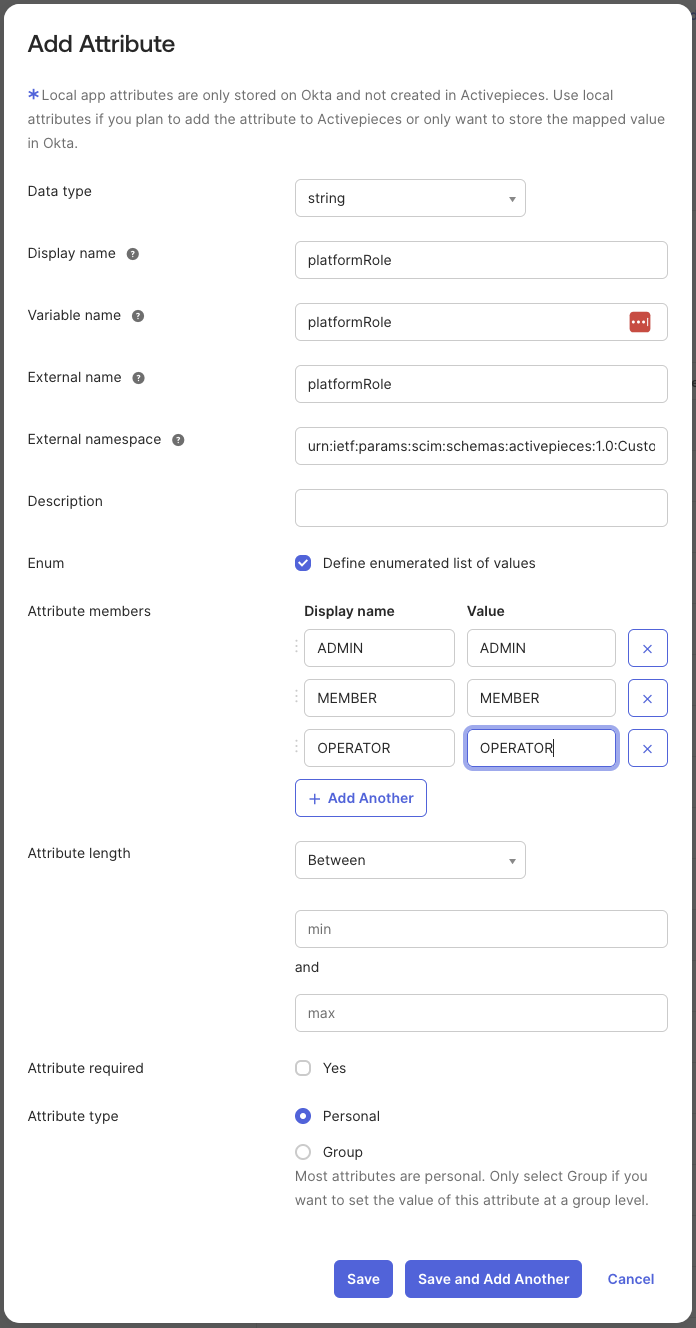
For Attribute members, add:
3
- Back to your Activepieces application page in Provisioning -> To App -> Attribute Mappings
- Scroll down and click Show Unmapped Attributes
-
Edit
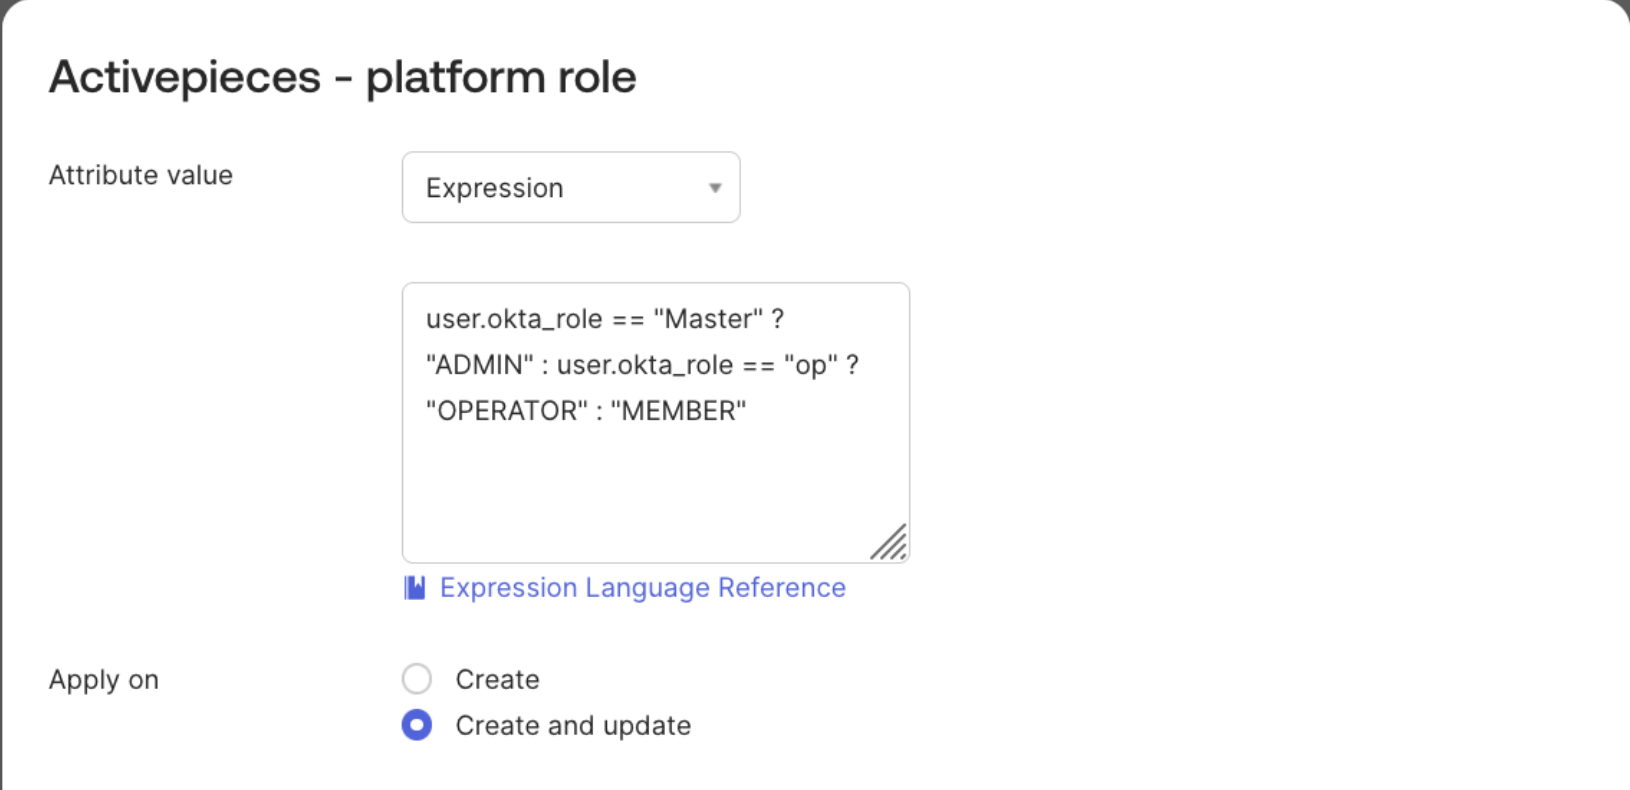
platformRolefield -
Here you need to map the attribute value from your Okta user profile. If you already have a role field in the Okta user profile that matches exactly with a platformRole value (
ADMIN,MEMBER,OPERATOR) then you can select it directly withMap from Okta Profileoption, otherwise you can use an Expression to return one of the 3 roles based on other fields in the Okta user profile.
Provision and Deprovision Users
Provision
In the Activepieces application page, go to Provisioning -> To App and enable the actions you want to be applied to Activepieces when changes occur in Okta.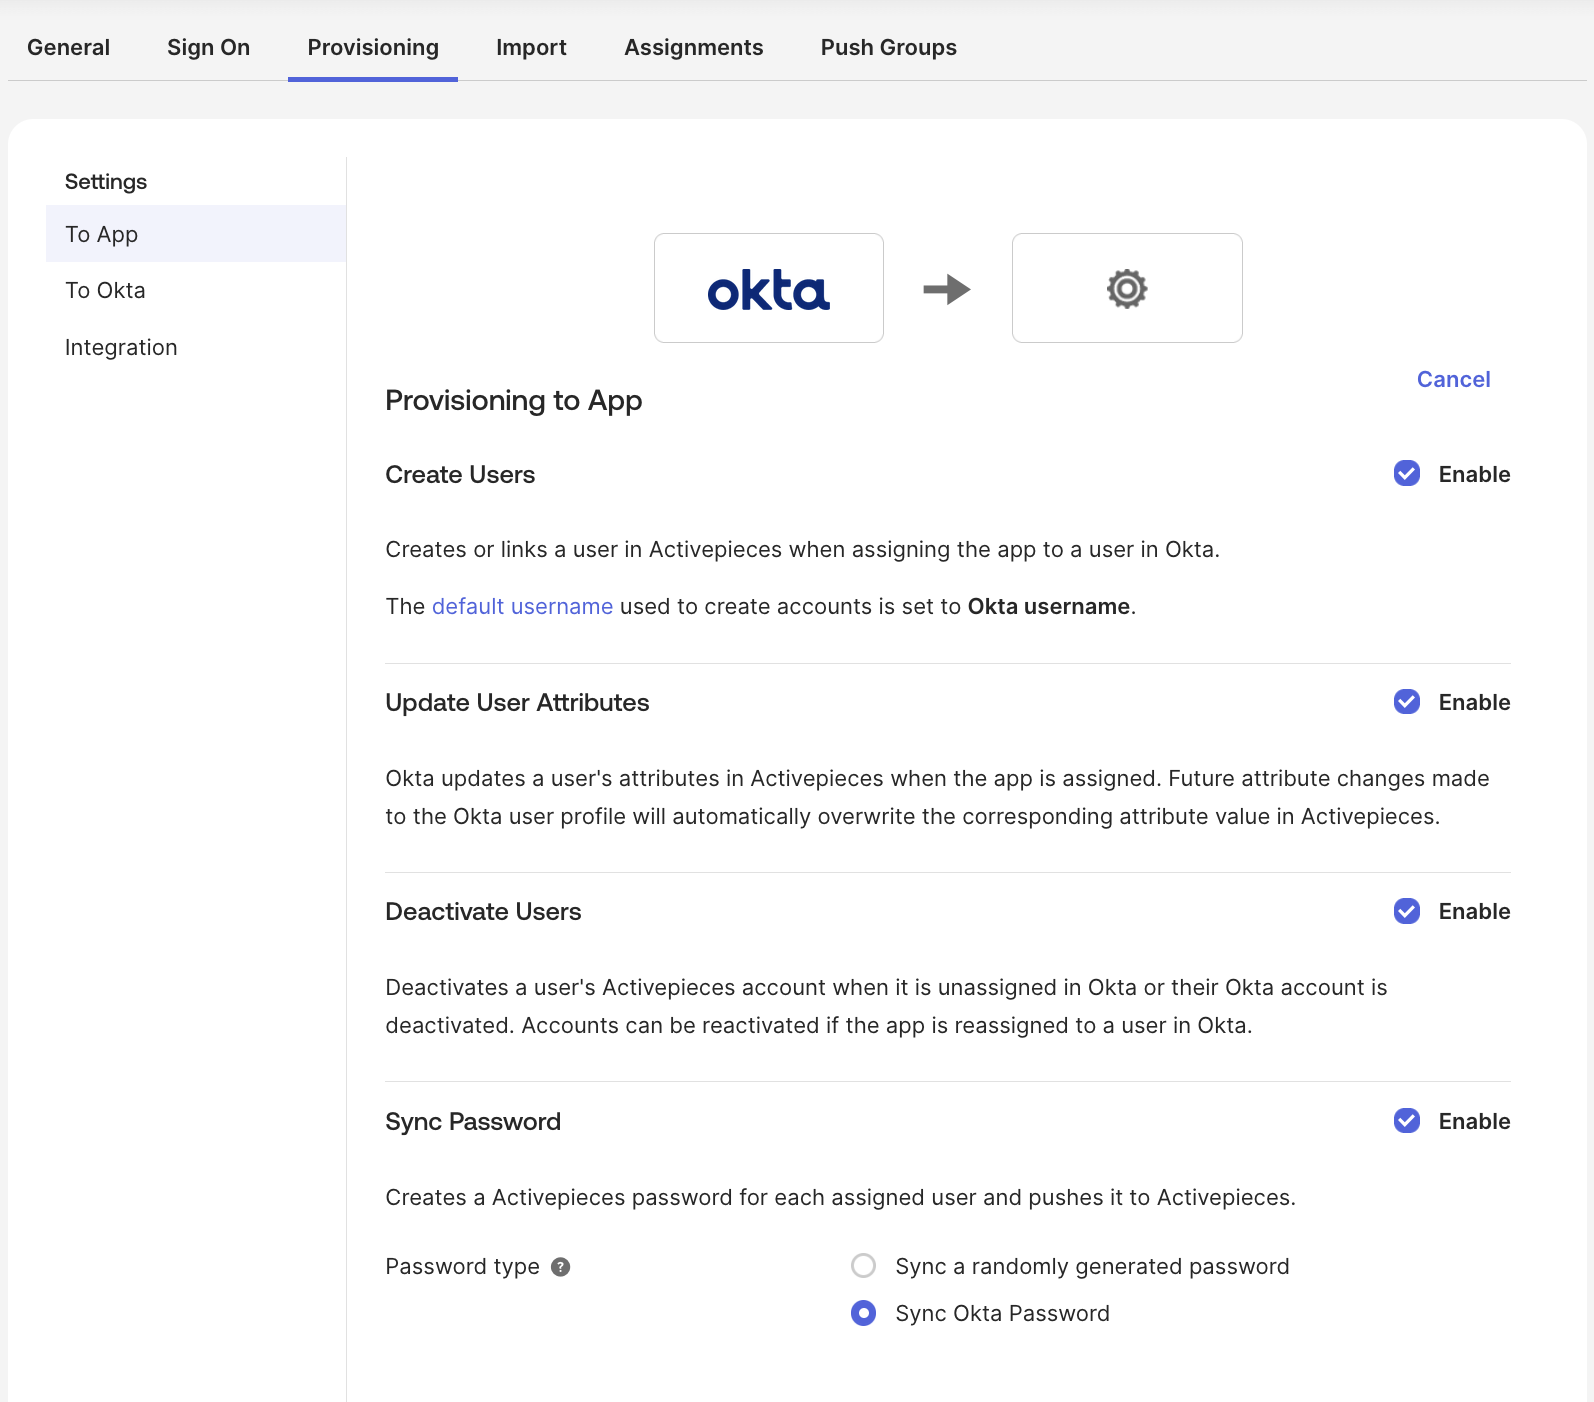
- Choose to provision individual users or groups. Note that groups in Okta will be projects in Activepieces.
-
In case you don’t have groups and you want to provision your Okta users at once, you can assign the
Everyonegroup. -
When editing/creating users in an assigned group (including
Everyone), they should be updated in Activepieces. - To push groups to Activepieces, go to the Push groups tab and click on the push button, find the group and save.
Default role for users in projects will be
Editor role, right now there is no way to link the project role with Okta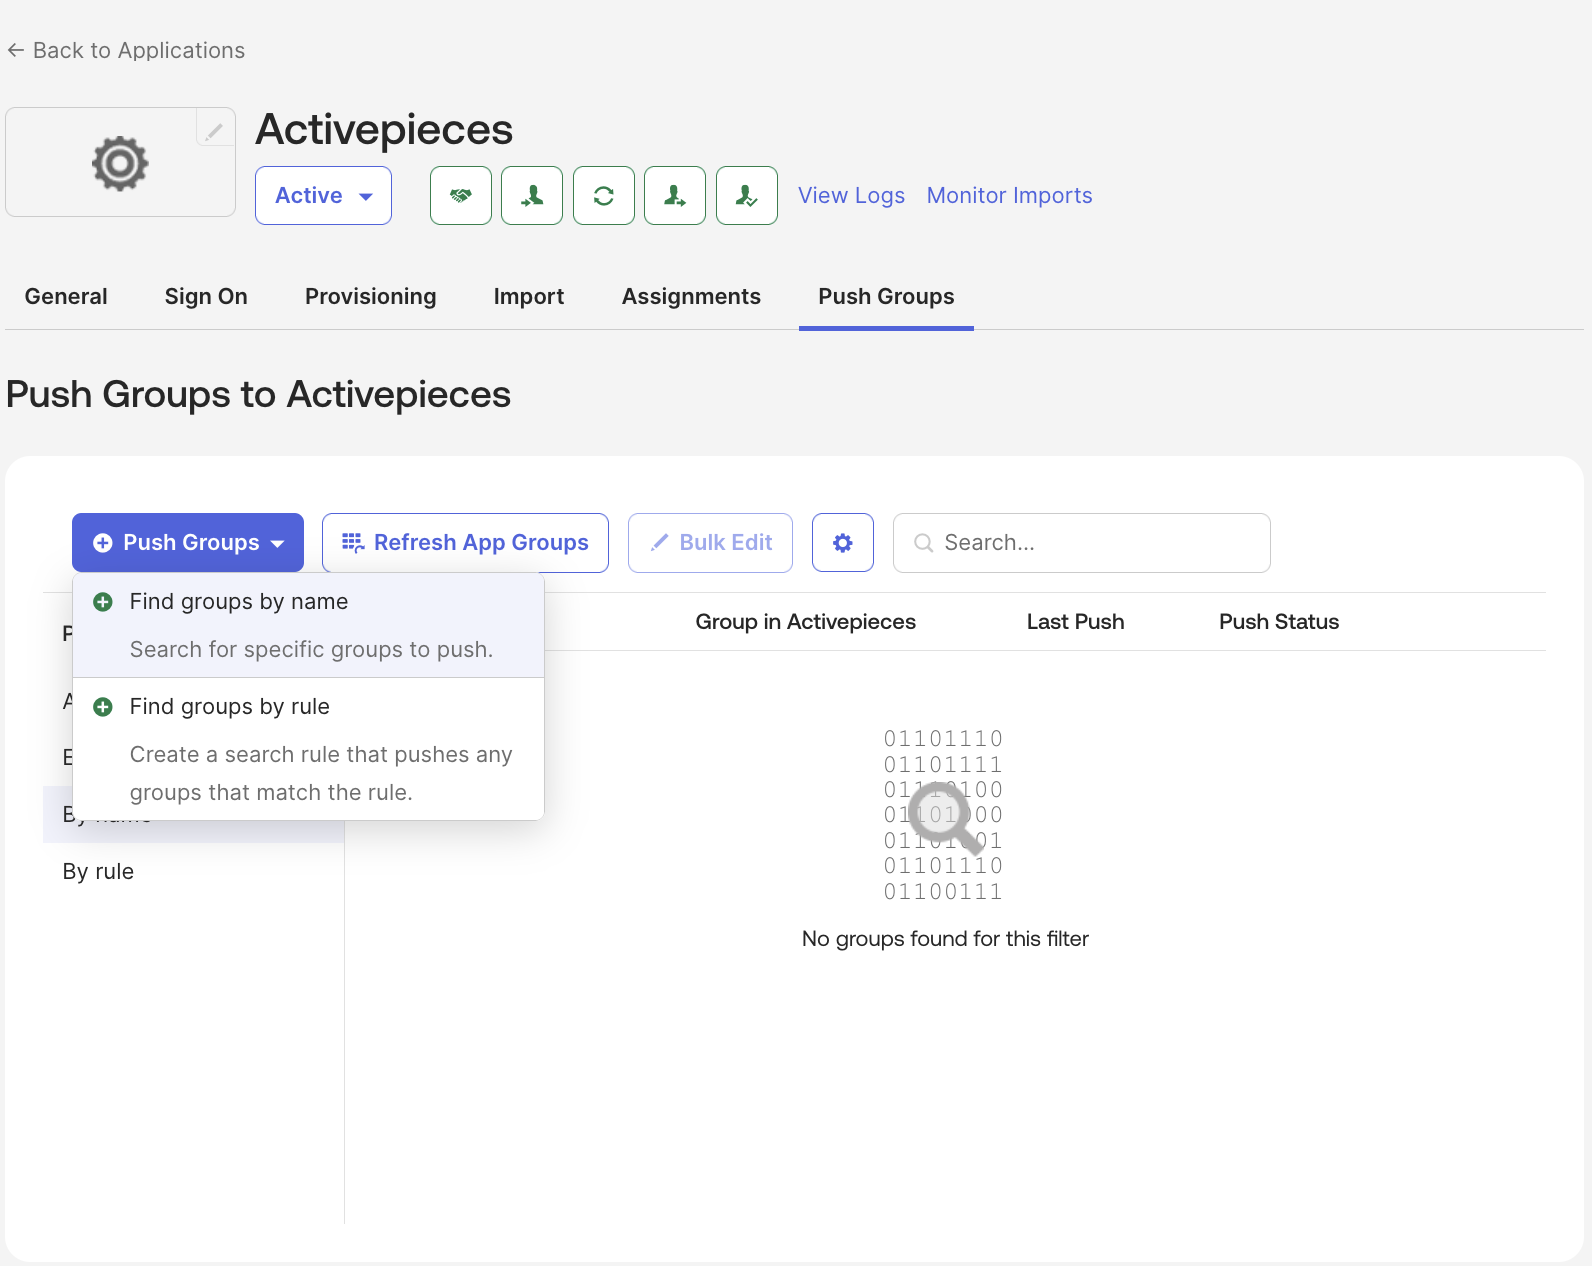
Deprovision
Users’ state switches toINACTIVE in Activepieces only when they are deactivated in Okta. Suspension or deletion in Okta does not reflect in Activepieces because of Okta’s design.
For groups you can delete them in Push groups tab -> click on button in Push Status column -> Unlink pushed group -> Delete the group in target
Troubleshooting
Connector test fails in Okta
Connector test fails in Okta
- Confirm SCIM base URL is correct.
- Ensure the
Authorizationheader usesBearerformat.
Users are not provisioned
Users are not provisioned
- Ensure users are assigned to the Okta app.
- Confirm provisioning actions are enabled in Okta.
Attributes are not updating
Attributes are not updating
- Recheck mappings in Provisioning -> To App.
- Ensure
userNameuses a stable unique value (usually email).