Automate Blog Writing with AI: A Step by Step Guide using OpenAI
Ashraf Samhouri
Jan 14, 20268 min read

ChatGPT is awesome, you can ask it to write a blog post for you, make some modifications and publish it. But if you have hundreds of ideas that you'd like to convert into blog posts, you will need something that runs in the background while you're on the beach (just kidding, you'll be buried under lots of other work 😳).
Automate Blog Writing with ChatGPT
We'll have a Google Sheet as a database of content ideas, when we add a new idea, the automation in the background will ask ChatGPT to generate a title and a blog post that are automatically posted to our WordPress blog site and an email will be sent to our team to notify them about the new post.
The team will be able to modify the content and make the post available to the public.
This way, you will have a machine that works in the background to scale up your content strategy while you're chilling by the beach (Just kidding, you'll be buried under the tons of other work that you have 😜).
Prerequisites
- An Activepieces account to set up this automation. Activepieces is a no-code business automation tool that will power the automation.
- A Google Sheet that acts as a database of our content ideas.
- An OpenAI account to use to generate content with AI.
- A WordPress blog to post the content to.
- A Gmail account to notify the team about new generated content on the blog.
Let's start now with building our blog automation engine.
Detailed steps to automate blog writing with ChatGPT
1. Create an Activepieces account
Create an account on Activepieces to build the automation if you don't have one. Activepieces is an open source no-code business automation tool that lets you take the heavy-lifting off your shoulders.
💡⚡ Quickest path: If you'd like to skip all the following steps and still get the same result - I prepared a template of this automation flow. After creating your Activepieces account, click here to clone my template into your account. You'll then have to fix the missing settings in the flow and you can jump to step 8 below.
2. Create a new automation
In your Activepieces account, create a new collection. This will land you on an empty collection with 1 flow. Let's call it "AI Blog Writer". Like this:

3. Set up the Google Sheets trigger
We'll go to Google Sheets and create a new Blank sheet. The idea of this sheet is to be our blog ideas database. If we'd like to post a new AI-generated blog post, we add the idea to this database.
For this guide, I'll set up the sheet to have the columns: Idea, and Guidelines, and I'll call the sheet "Blog Ideas Database". Here is a screenshot of my empty database:

Back to Activepieces, click on Select Trigger, search for "Google Sheets" on the right panel and choose it.
Now, select New Row as the trigger, create a New Connection and connect your Google account that has the sheet we previously created, select the Spreadsheet and the Sheet using the dropdowns in the panel.
This is how my trigger setup looked like:

Now this means this automation will run every time there is a new row in our sheet. See? For any new row in our database, some magic will happen! Let's define this magic.
4. Add an OpenAI step to generate the post title
Click on the + right below the Trigger in the builder. We'll add our first OpenAI step now, so search for OpenAI in the panel, and we'll choose the Ask ChatGPT action.
Add a New Connection, it will ask you for your OpenAI API Key.
Go to your OpenAI account, then to View API Keys page by clicking on your profile picture in the corner.

Create a new API Key, copy and keep it in a safe place for later, and copy it into the New Connection back on Activepieces.
Now, in the question field, our goal is to ask ChatGPT to generate a title for our blog post around the idea that was just added to our sheet.
The prompt I came up with is:
Write a title for a blog post about: "IDEA" - respond with the title without any quotation marks around it
The quotation marks part came after some testing when ChatGPT was returning the title in some cases wrapped by quotation marks.
This prompt is still static, there are no ideas or guidelines that were taken from the sheet. To make it dynamic, we'll use the autocomplete dropdown that opens up while writing in the Question field, we'll then remove IDEA (but keep the quotation marks around it), and select Trigger → Value → Value 0. This means the idea will be fetched from the data filled in the sheet, specifically from the first column in this row, which is in our case the Idea column.
Here is a screenshot of how I selected this value in the dropdown:

And here is a complete view of this OpenAI step settings:

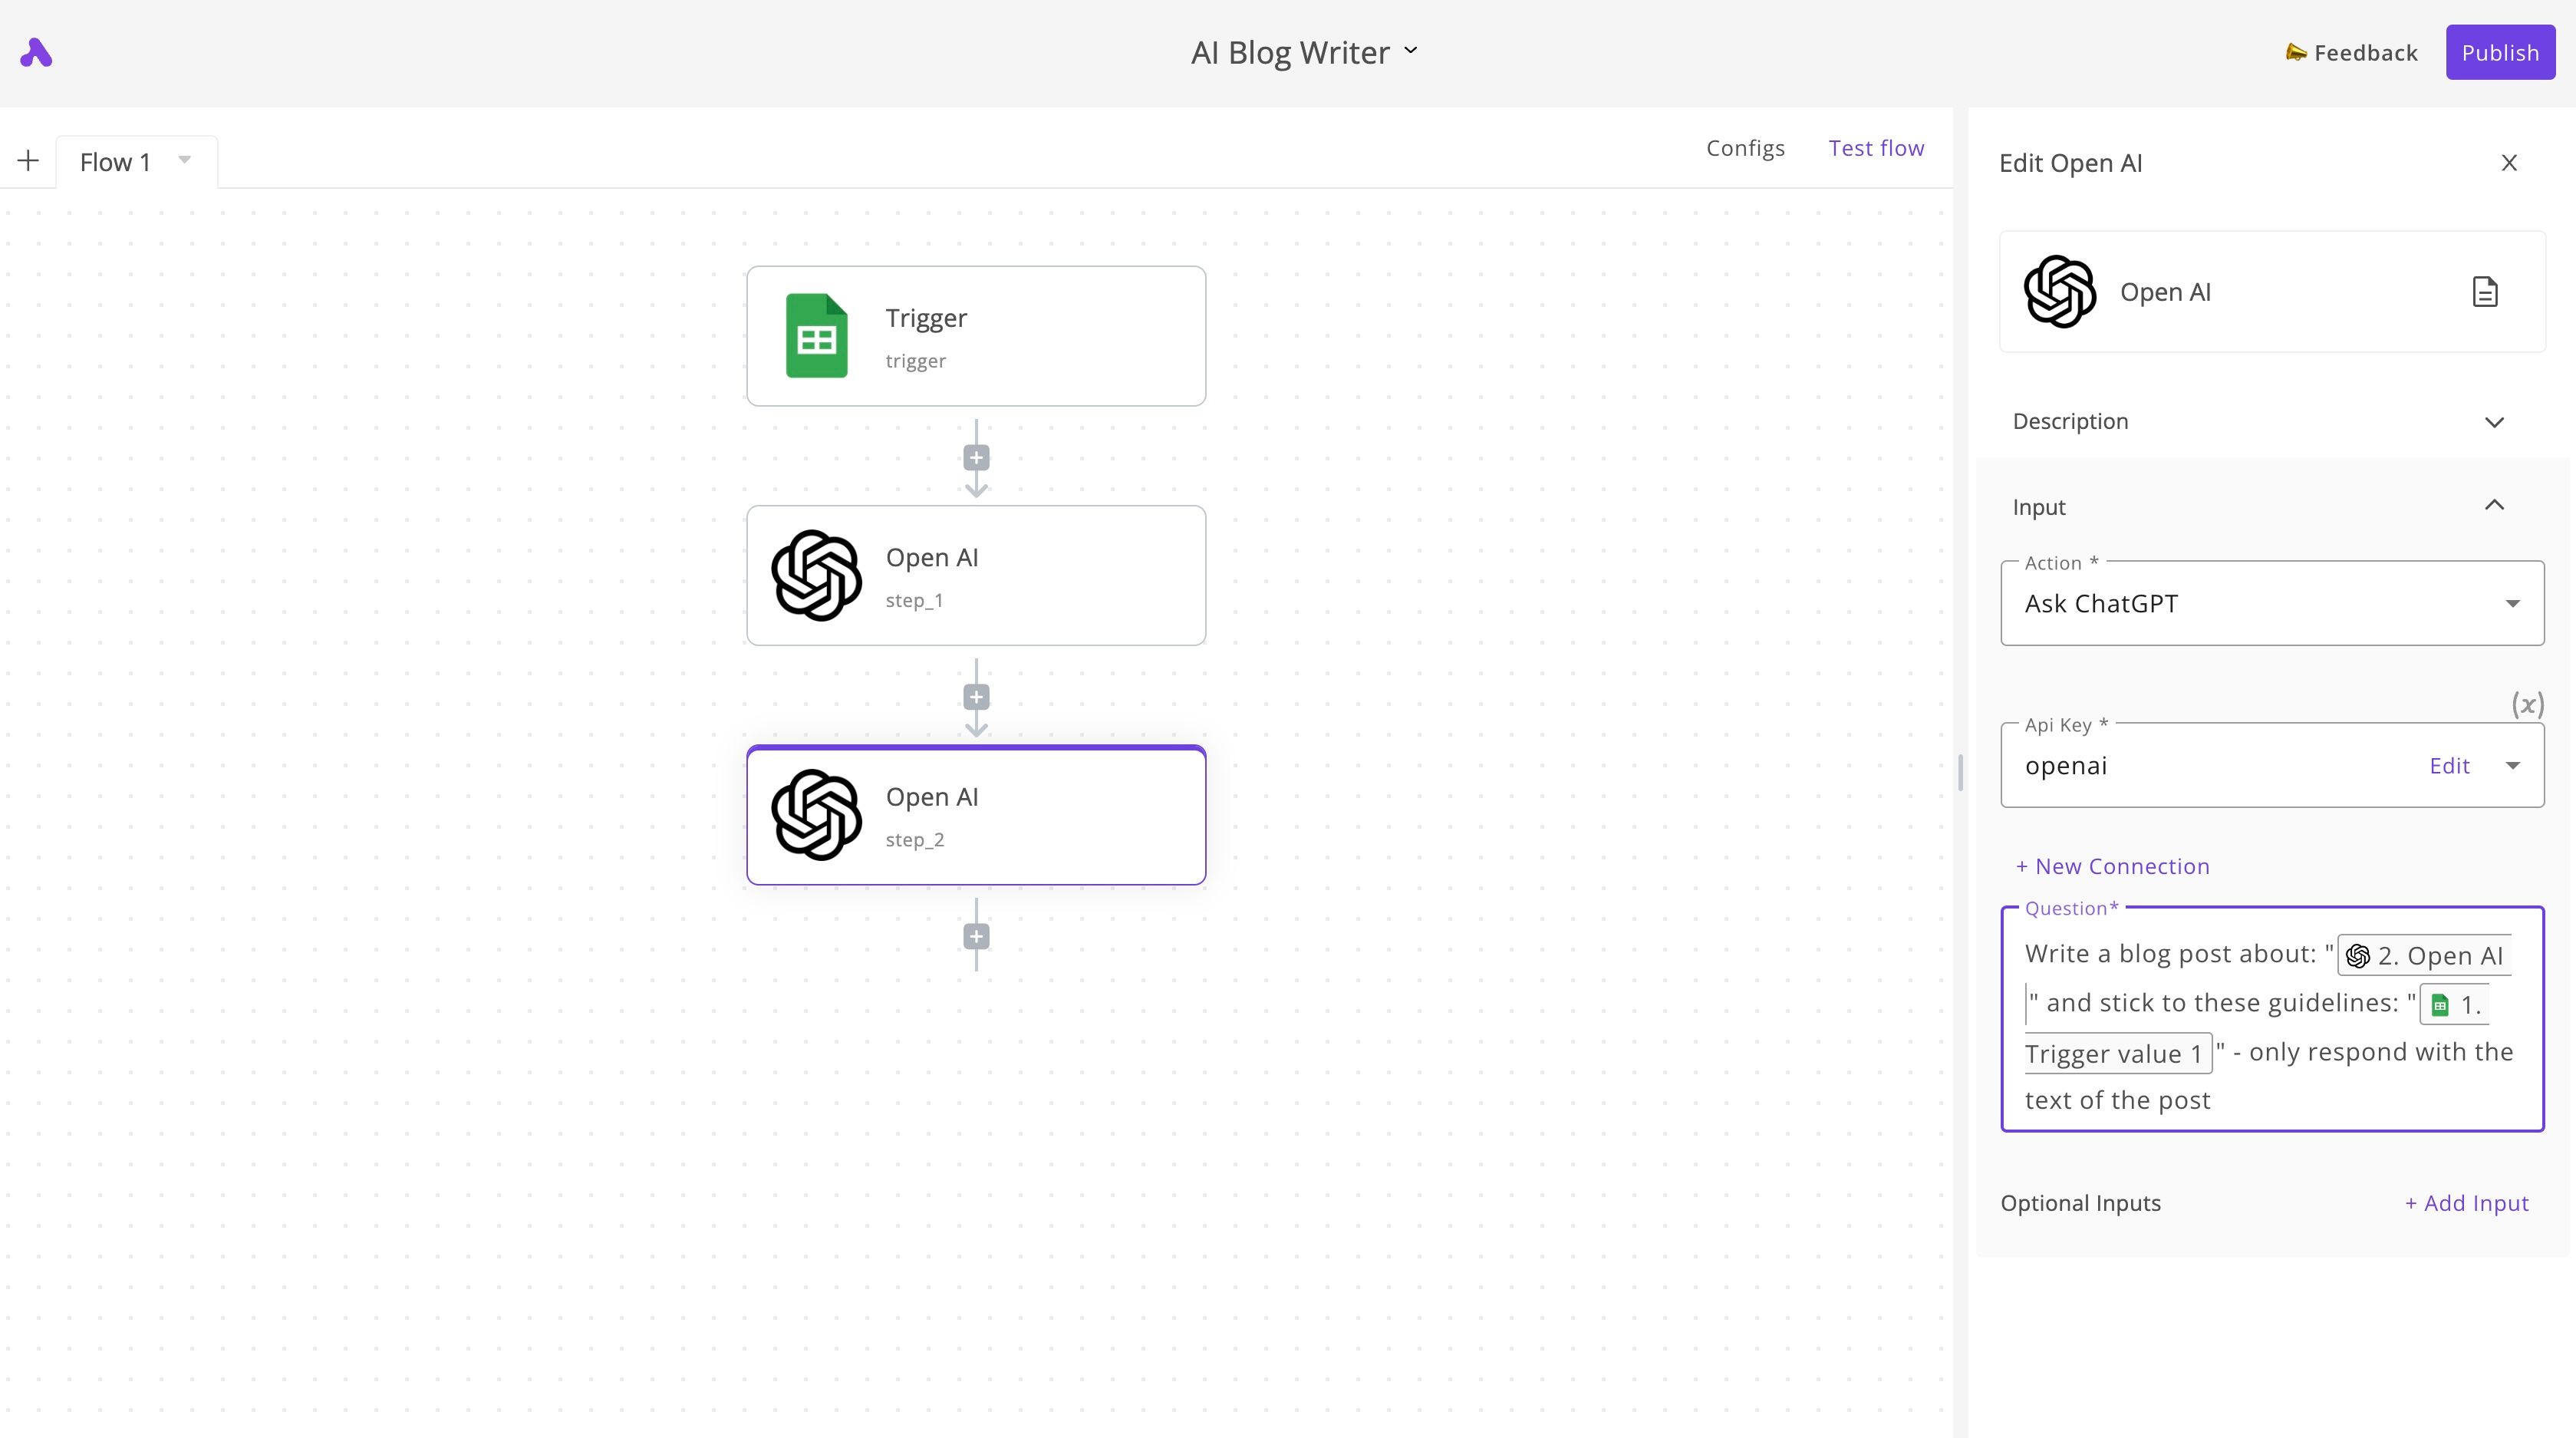
5. Add an OpenAI step to generate the post content
Now we know how to set up an OpenAI step in our automation, we'll add another one. The goal of this one is to generate the actual content of the blog post. We'll use the title from the previous OpenAI step along with the guidelines from the sheet in our question for ChatGPT.
Pro tip: For even more advanced content creation, you can use an AI copywriting assistant like Penn by Sintra AI. Penn generates blog posts, social media content, and marketing copy in seconds, helping you scale your writing with quality and consistency.
Now the prompt will be:
Write a blog post about: "TITLE" and stick to these guidelines: "GUIDELINES" - only respond with the text of the post
We'll replace TITLE with output of the previous step and GUIDELINES with the value of the second column from the sheet trigger. Here is how it should look like:
6. Post the content to our WordPress site
So according to the flow, the AI has taken the idea from the sheet, generated the blog title and content and we're now ready to post these to our WordPress site.
In order to connect to your WordPress site from Activepieces, you have to install this basic authentication plugin, by downloading it and uploading it on your WordPress site in the admin panel. Don't forget to enable it too.
So back to Activepieces, we'll click on the + once again and search for WordPress in the panel. We'll choose it and select the Create Post action.
We'll now add a New Connection which is our WordPress Username and Password. This type of connection will only be possible if you completed the Basic Authentication handler plugin.
In the Website URL field, we'll write down the URL of our WordPress site. Under Title we'll use the output of Step #2 (OpenAI), and under Content we'll use the output of Step #3 (OpenAI).
This is my WordPress step setup:

7. Notify the team about the new AI-generated post on email
Our very main flow is done! Now as the new ChatGPT-generated post submitted to our WordPress website, we're going to send an email to notify our team about the new post.
Click on the + again and search for Gmail. Create a New Connection and connect your Gmail account.
Set the Subject field to: "TITLE" is ready for your review!
Then replace the TITLE with the output of Step #2 (OpenAI).
Set the Body to:
Hi content team,
A new blog post is ready for your review, here is the link: BLOG_URL/wp-admin/post.php?post=${step_3.body.id}&action=edit
Replace BLOG_URL with the url of your WordPress site.
This is how the settings of Gmail look at my end:

8. Enable your AI blog writing engine
You can click on Test flow to try it out. Then click on Publish, the automation will go live immediately.
Since this is an AI based automation, if things go wrong in the future, you don't have to remove all the work you've done, just go back to this automation and turn it off using the toggle right next to the Publish button.
9. Start producing blog articles with your automated engine
It's time for some fun! We'll go to our database, and add any number of blog ideas. I'll add 3 as follows:

The Google Sheets trigger runs every 5 minutes, so it can take a couple of minutes until our flow runs for these 3 rows. You can check their status under the Runs tab in your main Activepieces dashboard.
These are my runs for these 3 content ideas:

It went well! I'll go check my email and see if I received links to review the 3 new blog posts.

Woohoo! I have these in my inbox. I'll go to one of these emails and click on the received link. Here is the middle one:

I can now make any changes to the article and give it some styling, and finally publish it! 🥳

Written by
Ashraf Samhouri