Tweet about new WordPress blogs using ChatGPT automatically

Let's see if you can relate to this: Your organization runs a blog website, your content team (and maybe some ChatGPT) is adding tons of content to the blog every month. You manage the Twitter account of the organization and you have to keep up with all the new posts on your blog and Tweet about them.
Doing this task manually is often insane in the today world of automation and AI. Let's explore what this exactly means.
Is it possible to automate creating Tweets about new WordPress blogs and post them to my Twitter account?
Yes! It is indeed possible. However, if you are using the web interface of ChatGPT, it would be impractical to monitor your blog, copy the content to ChatGPT's interface to ask it to summarize the blog then go to your Twitter account to Tweet about it with the new content generated by ChatGPT.
Thanks to Activepieces you will have to do none of this. You can automate this task end to end, from WordPress to Twitter (and ChatGPT in the center of the automation), without a single intervention from you after setting it up.
How to automate Tweets about new WordPress blogs with ChatGPT?
We prepared a ready automation template to do this task (it's also customizable). So all what you have to do is to use this template and your WordPress blogs will be automated through ChatGPT to Twitter.
Prerequisites
Make sure you have the required accounts in hand before starting with this task:
- An Activepieces account: The automation flow will live in this tool.
- A WordPress blog and Basic Auth plugin: You need your blog to be up and running, and the Basic Auth plugin installed and activated on it (you will read more about this in the instructions moving forward).
- Your OpenAI API Key: To allow ChatGPT to work through the API, also make sure you have a valid credit card on your OpenAI account.
- Your Twitter account, and a developer account on Twitter: This is how we'll connect to Twitter, you'll also learn this as you go.
Steps to Tweet new blogs automatically with ChatGPT
I've put this step by step guide to take you through the fastest way to build an automation that reads your new WordPress posts, brief them with ChatGPT and post them to your Twitter account.
1. Get a copy of the WordPress ChatGPT Twitter template.
Head to this template on Activepieces, and use it. Once you do so, you will see a copy of it in your account. That means you will need to sign up or login to your Activepieces account on the way.
The template is ready to use but will need minimal configurations to make it work specifically for your accounts. You can also modify or extend the functionality of this automation flow as fits your need.
2. Understand the WordPress to Twitter automation template.
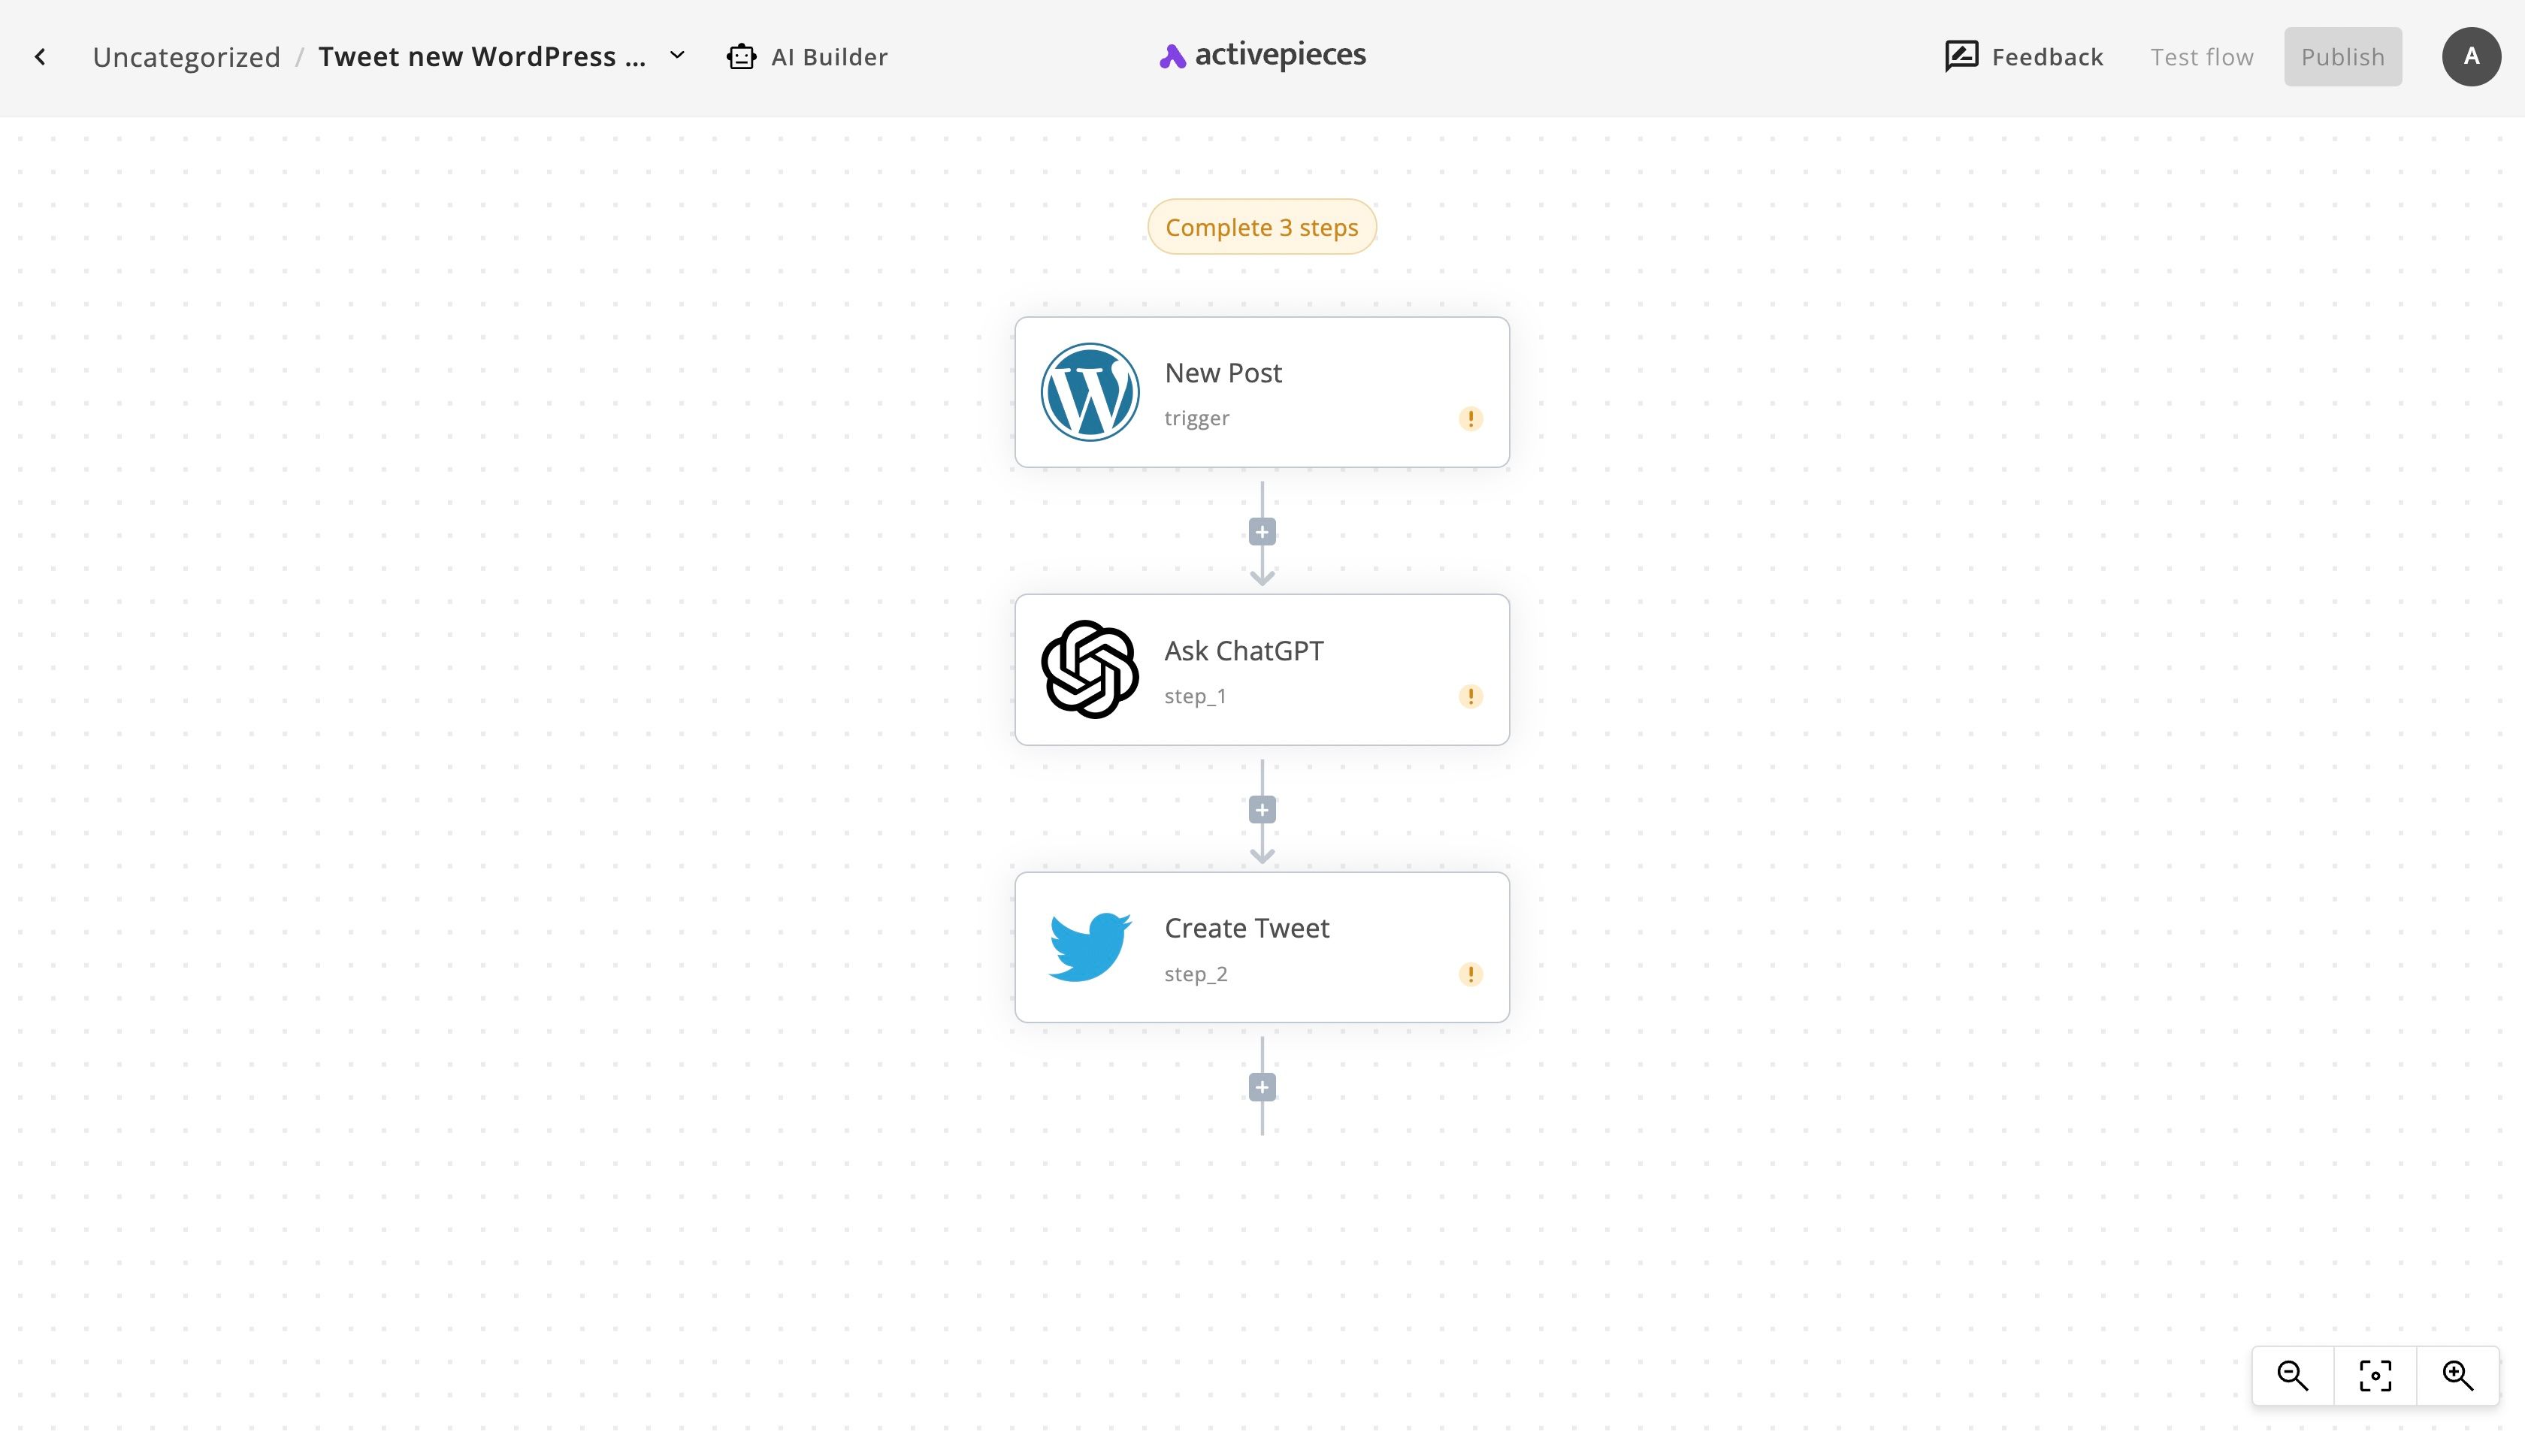
When you make a copy of this template, you will see the following flow on your screen:

It's a pretty straightforward flow. We call the first step in a flow the trigger. The trigger controls when and how frequently this automation will run. As you can see in the name of the step "New Post". That means, the flow will run whenever a new post is added to your WordPress site (we'll configure it later).
When the flow runs taking the new WordPress post as its input, it makes a request to ChatGPT's API to ask it to create a Tweet out of the WordPress post content. This happens because of the second step in the flow, the Ask ChatGPT step.
When the post is summarized in the form of a Tweet, we finally send it over to Twitter to post it in our connected account. That's it! The new post went through ChatGPT until it was posted to Twitter, which is our ultimate goal.
3. Fix the settings of the WordPress ChatGPT Twitter automation.
In order to get this automation flow running for us, we'll need to visit a couple of steps and configure them to work with our accounts and according to our need.
(1) Set up the WordPress connection
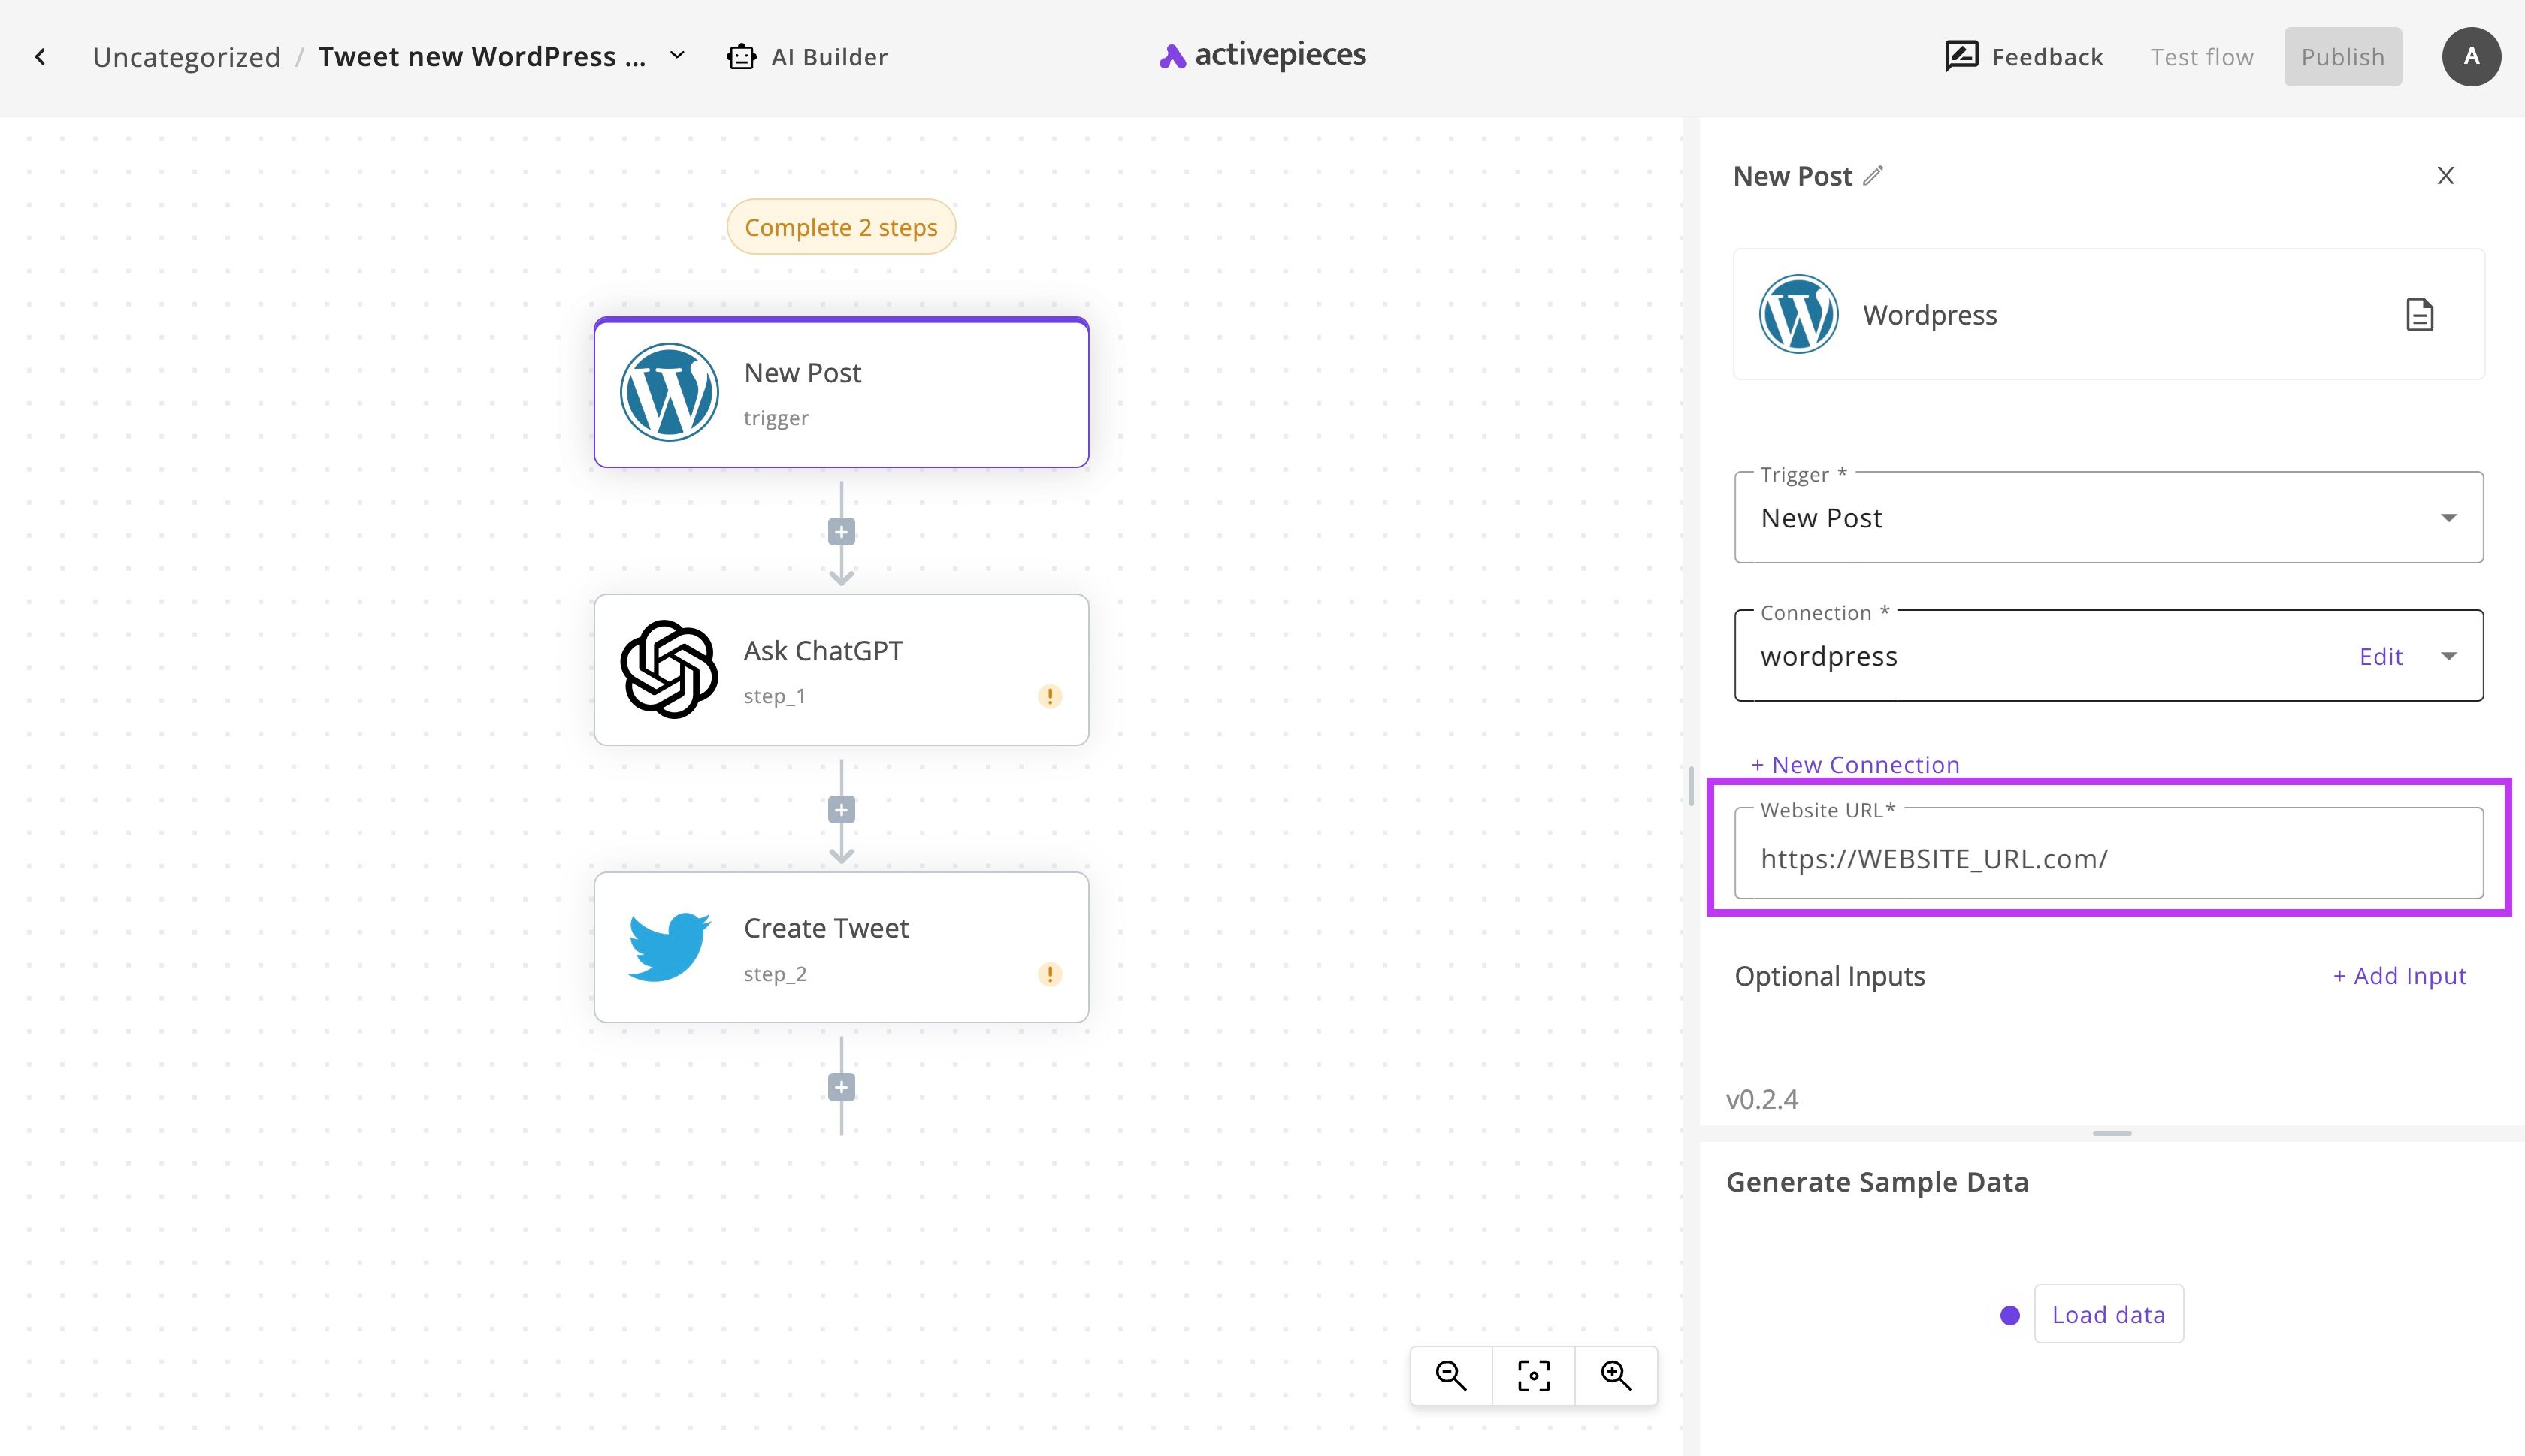
Click on New Post, then click on + New Connection to connect your WordPress account with Activepieces. Read the instructions in the connection popup as you'll need to install the Basic Auth plugin to your WordPress site and activate it for the connection to work.
Once you connect your WordPress there, copy your WordPress website link in the highlighted input as follows:

Now you can click on Load data to get real data from your WordPress site to use as test data in the next steps of the flow. This will allow you to test the flow as you go and make sure each step works properly.
(2) Connect your OpenAI account
Now click on the Ask ChatGPT step in your flow. If there is no connection in place, click on + New Connection to link your OpenAI account with Activepieces. You will need your OpenAI API Key, you can get it from here. Also, make sure your account has a valid credit card on it as the API will require paying as you consume it.
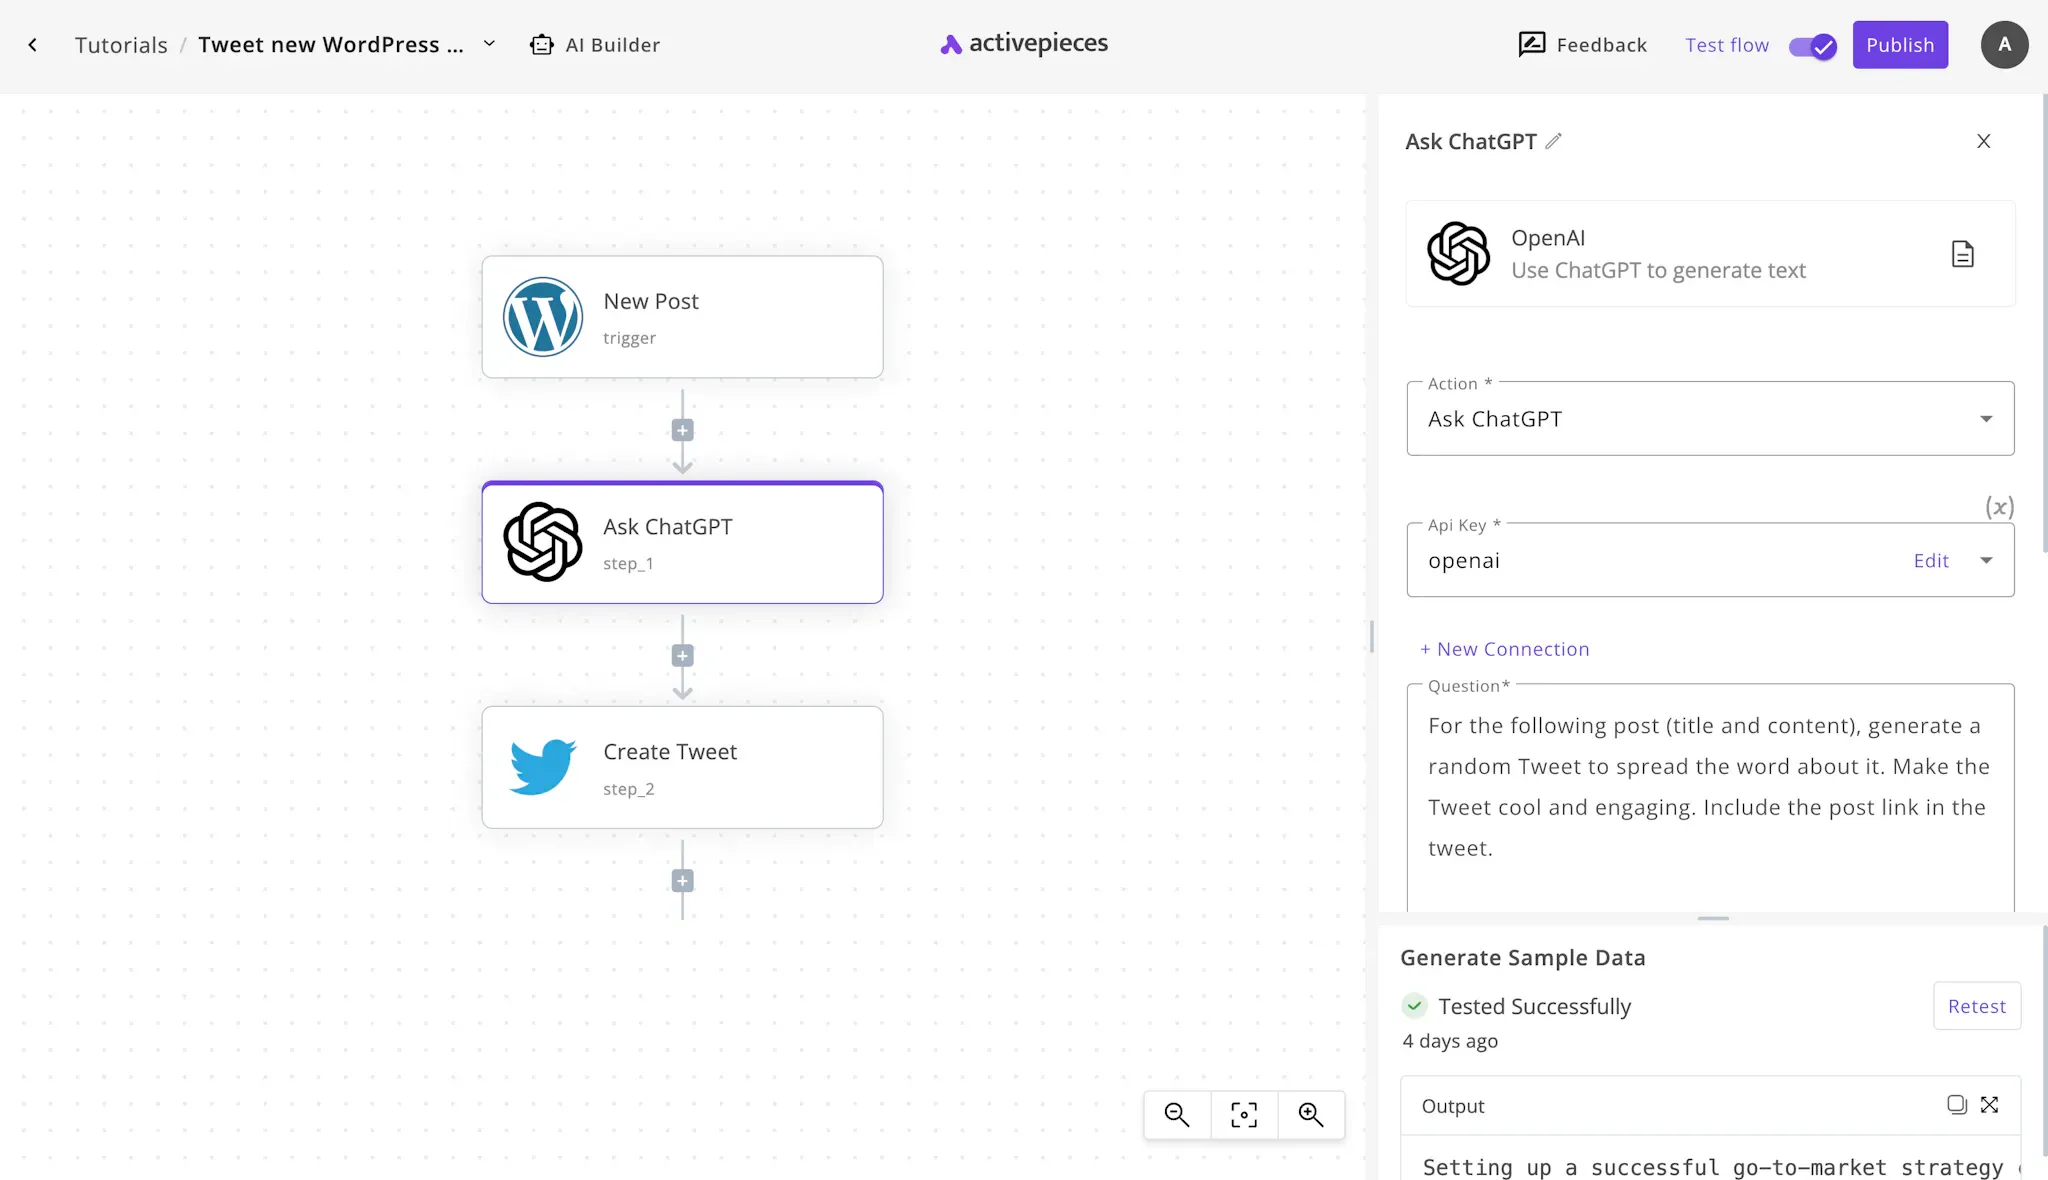
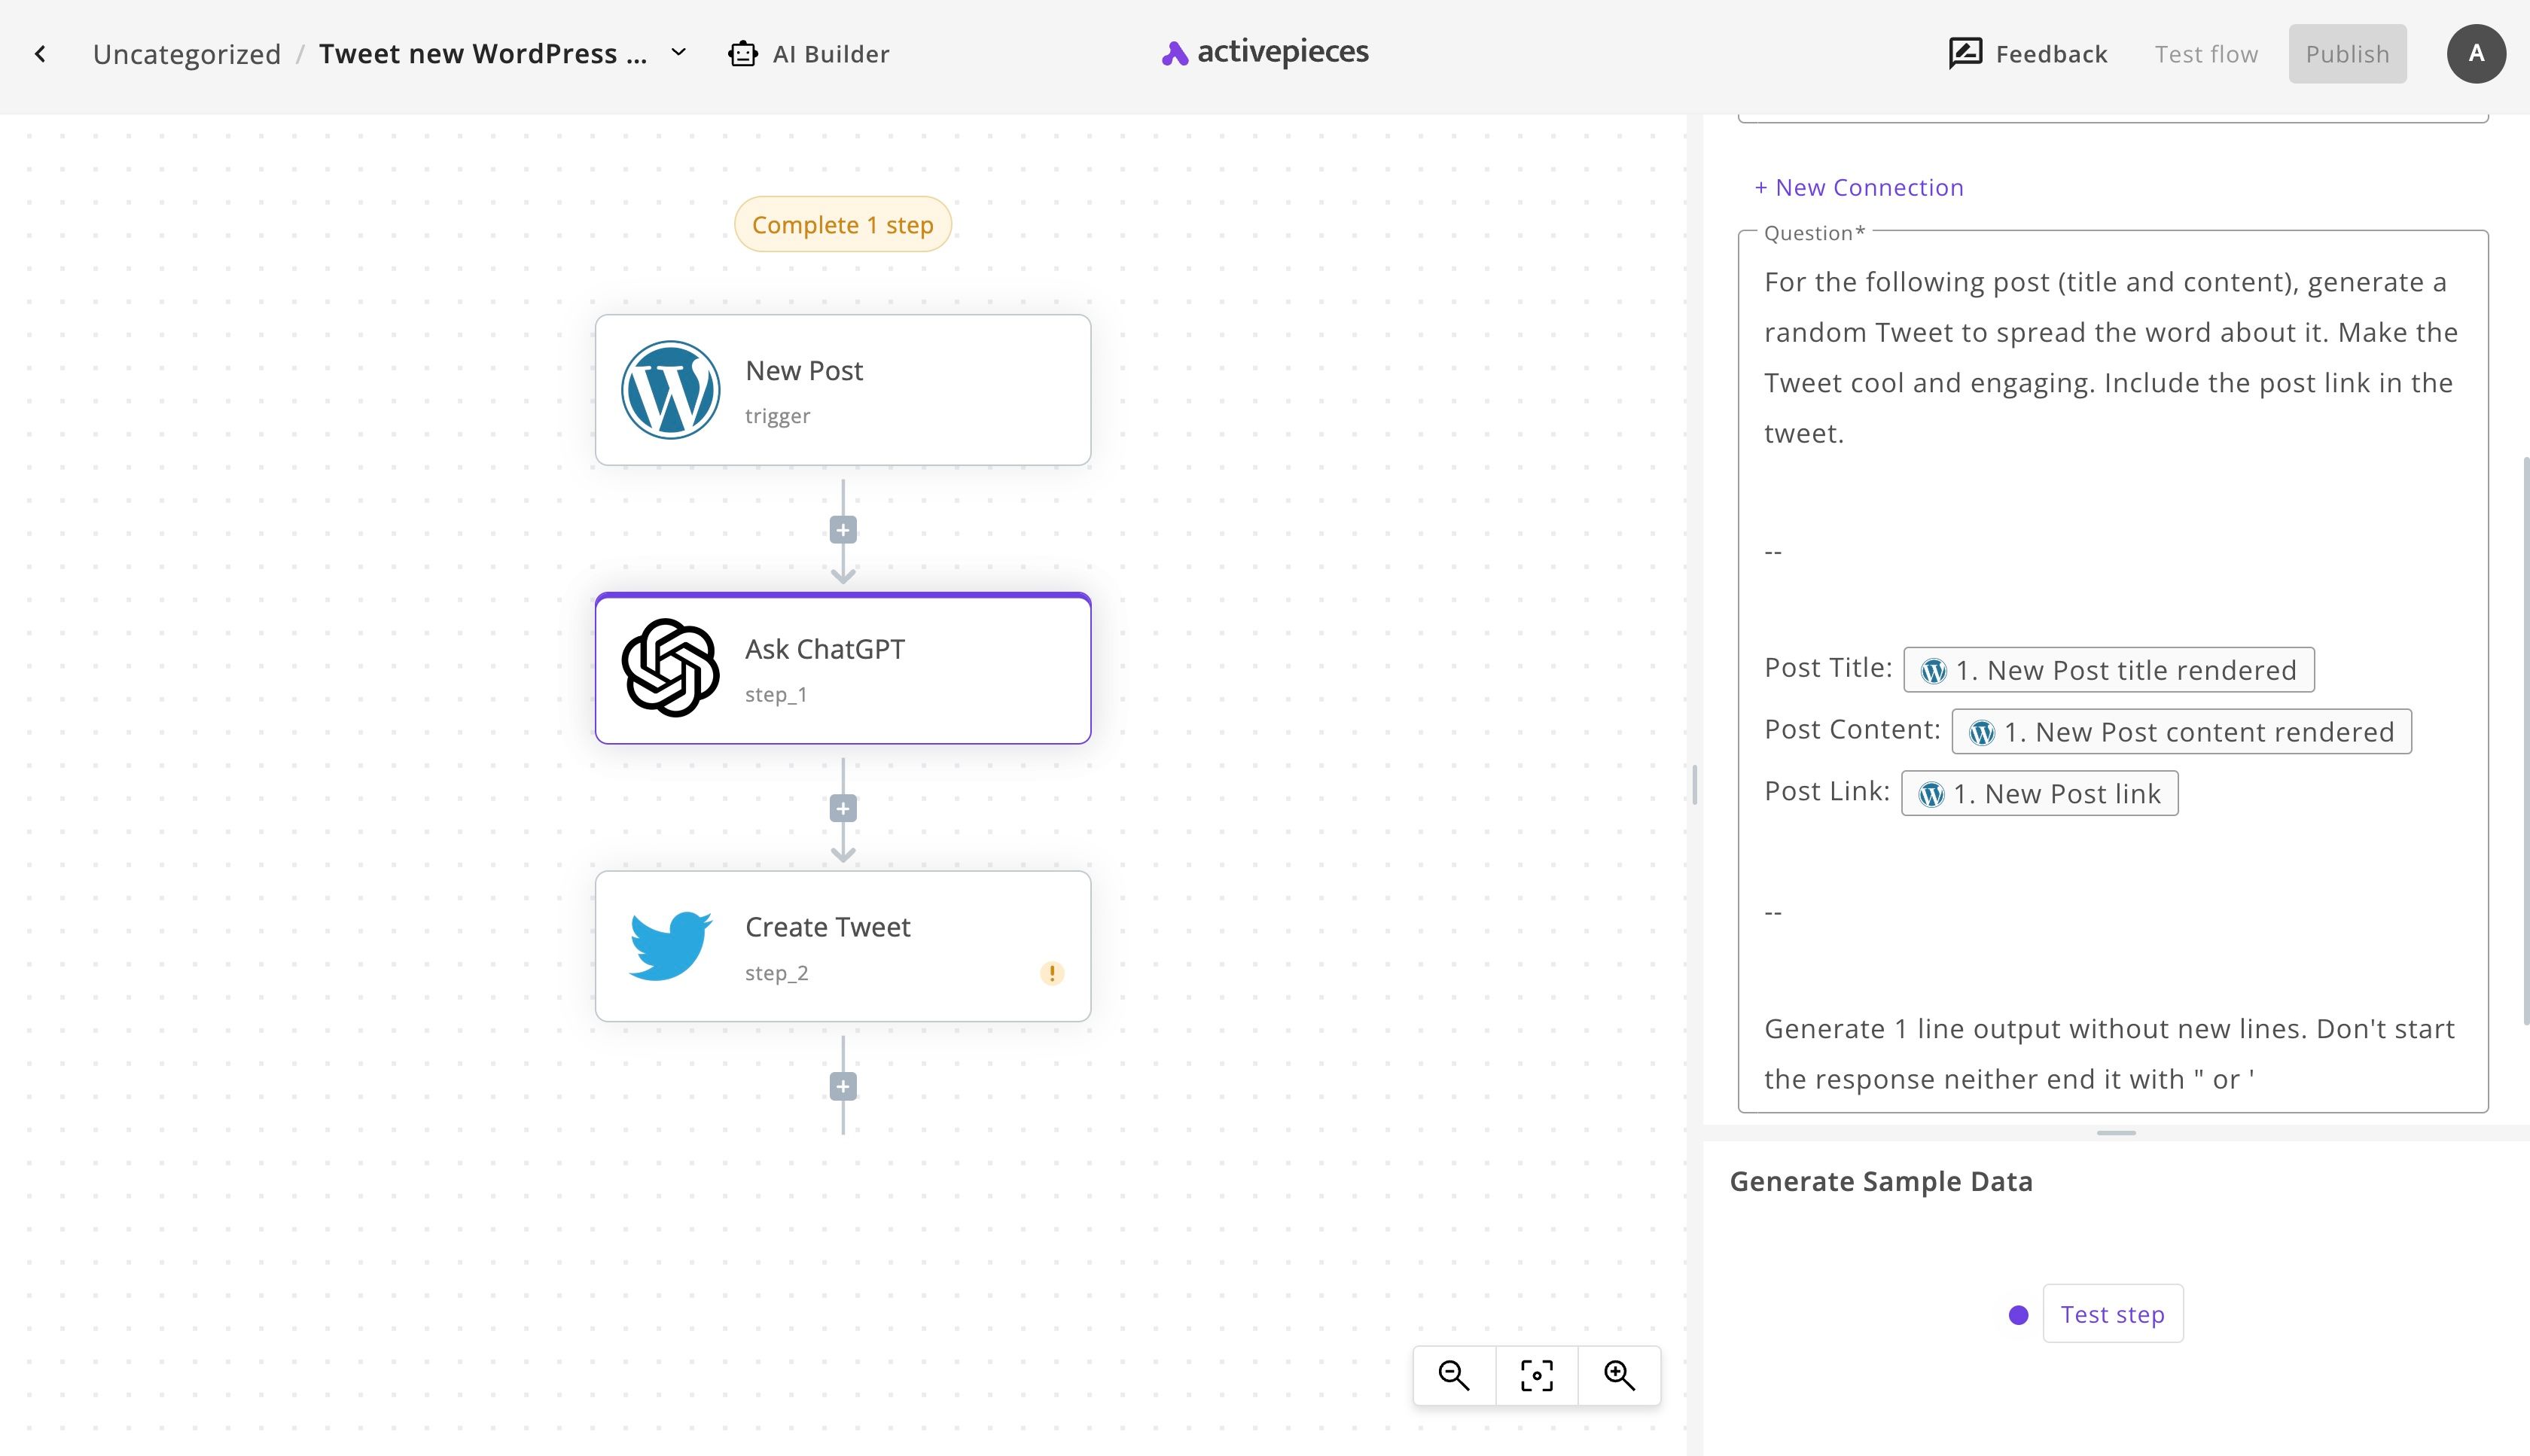
While you're at it, you can also review the prompt that we are using to generate the Tweet out of the original blog post content. You will find it in the Question input like this:

If you'd like to check the expected output of this prompt, click on Test step and see what output ChatGPT will return. Make sure that the previous step is also tested if you'd like to see real results about a blog post that exists in your WordPress site.
(3) Connect your Twitter account
Click on the Create Tweet step now and click on + New Connection to connect your Twitter account. This will require some setup on Twitter. Follow the instructions in the connection popup until your account is successfully connected.
(4) Enable your WordPress, ChatGPT and Twitter automation
Congratulations! Your flow is complete and you can go live now. Click on the main Publish button on the screen and your flow will go live and turn on. You can see it in action by posting a new WordPress post and see the Tweet posted automatically in your connected Twitter account.


