Create Trello cards from ClickUp Tasks (Step by Step)
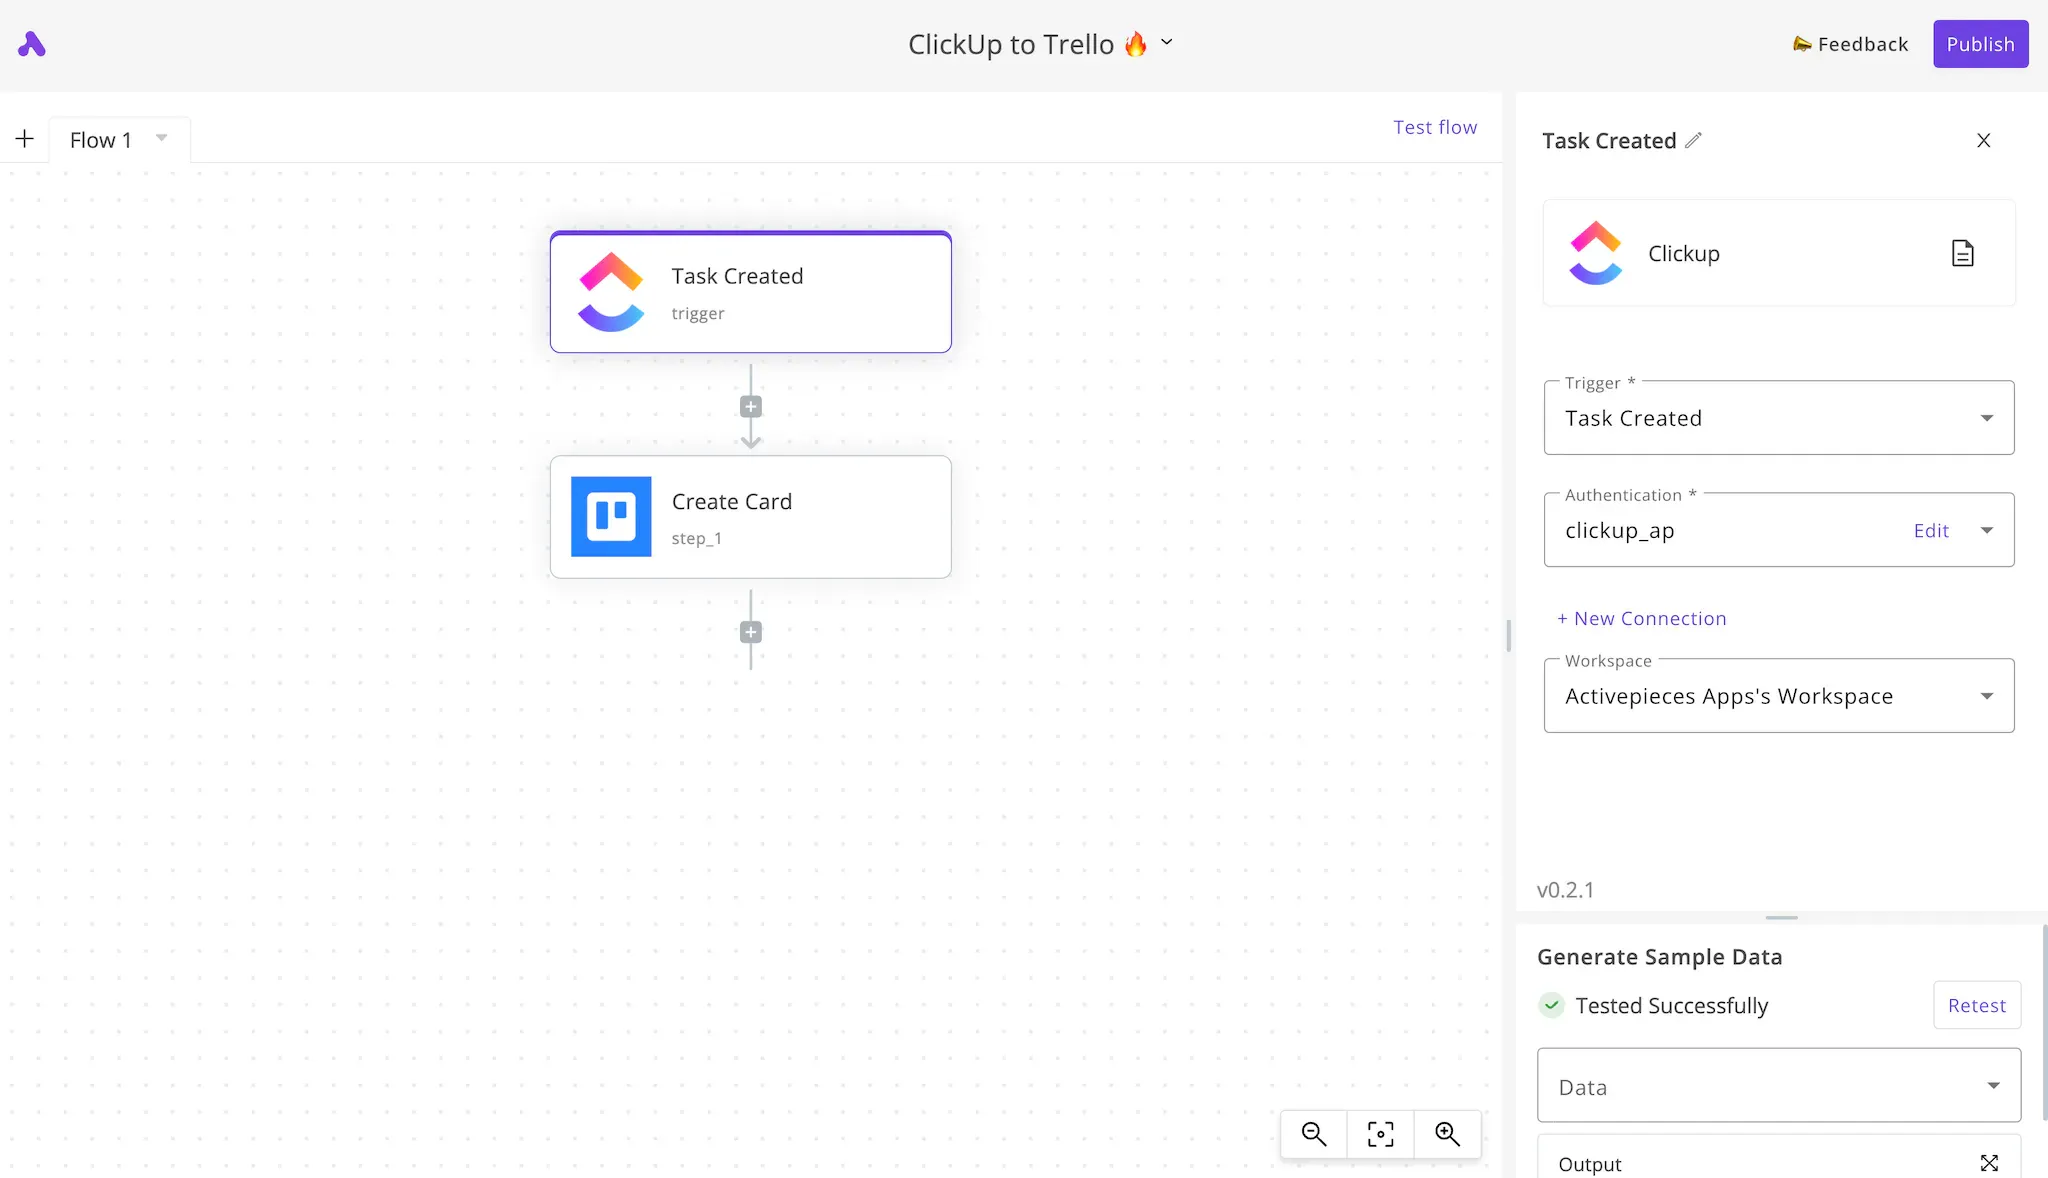
If you have teams using both ClickUp and Trello for project management, for example, a team who reports issues on ClickUp but a technical team who uses Trello, you’ll need a tool that helps you copy the tasks in realtime between these two apps.
In this guide, we’ll take you step by step through the process of building an automation that creates Trello cards from ClickUp tasks.
Prerequisites
Since you plan to copy tasks from ClickUp to Trello, you'll need the following:
- An Activepieces account: You will build your automation on Activepieces.
- A ClickUp account.
- A Trello account.
Steps to sync ClickUp Tasks to Trello Cards
In order to keep your Trello in sync with your ClickUp, you will need to follow these steps:
1. Create an Activepieces account
If you have an Activepieces account, you can skip this step. Otherwise, go ahead and create a new account. You will build your automation in this account.
2. Create a new automation
If you have flows in your account, click on New flow, or click Start building if this is your first one. Give your flow a name, something like "ClickUp to Trello 🔥".
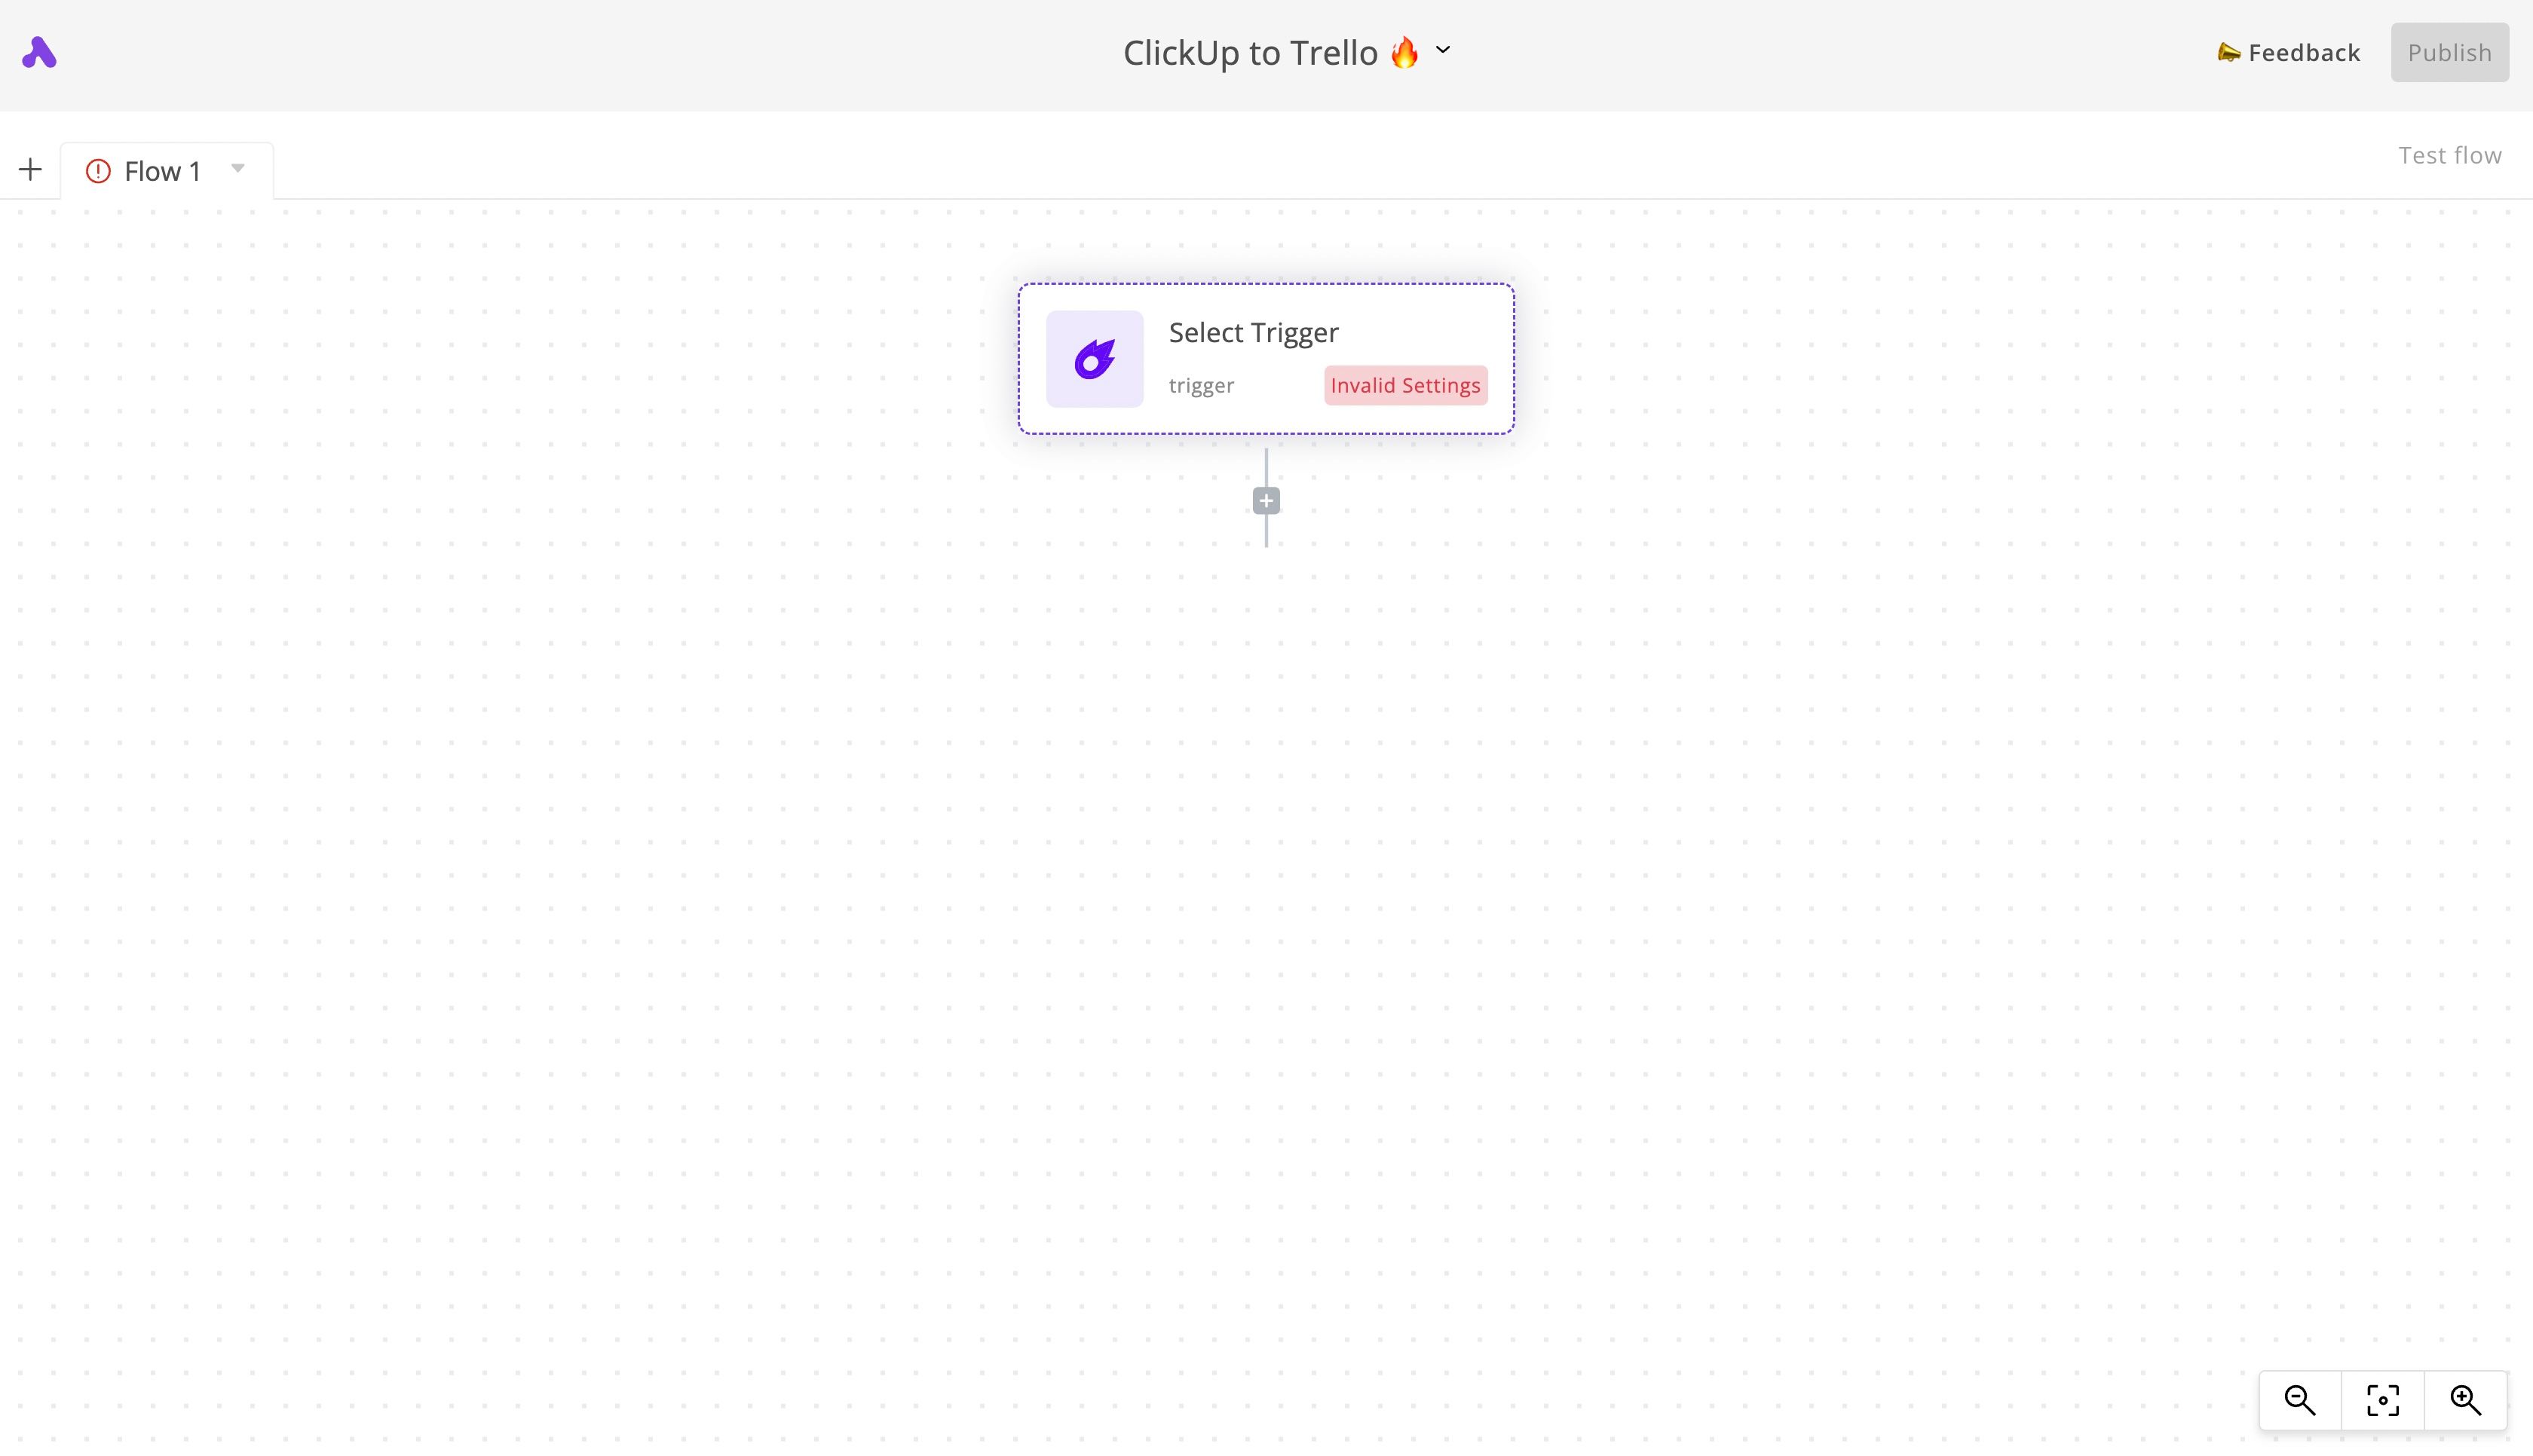
This is how my flow looks like before I start adding or modifying the steps:
3. Set up the ClickUp trigger
Click on Select Trigger, the sidebar to the right will slide out. Find the ClickUp app and choose the Task Created trigger. This means your flow will run whenever a new task is added in your ClickUp.
Click on + New Connection to connect your ClickUp account. Once connected, you will see a list of the Workspaces in your ClickUp account. Choose the one you'd like to listen to new tasks from.
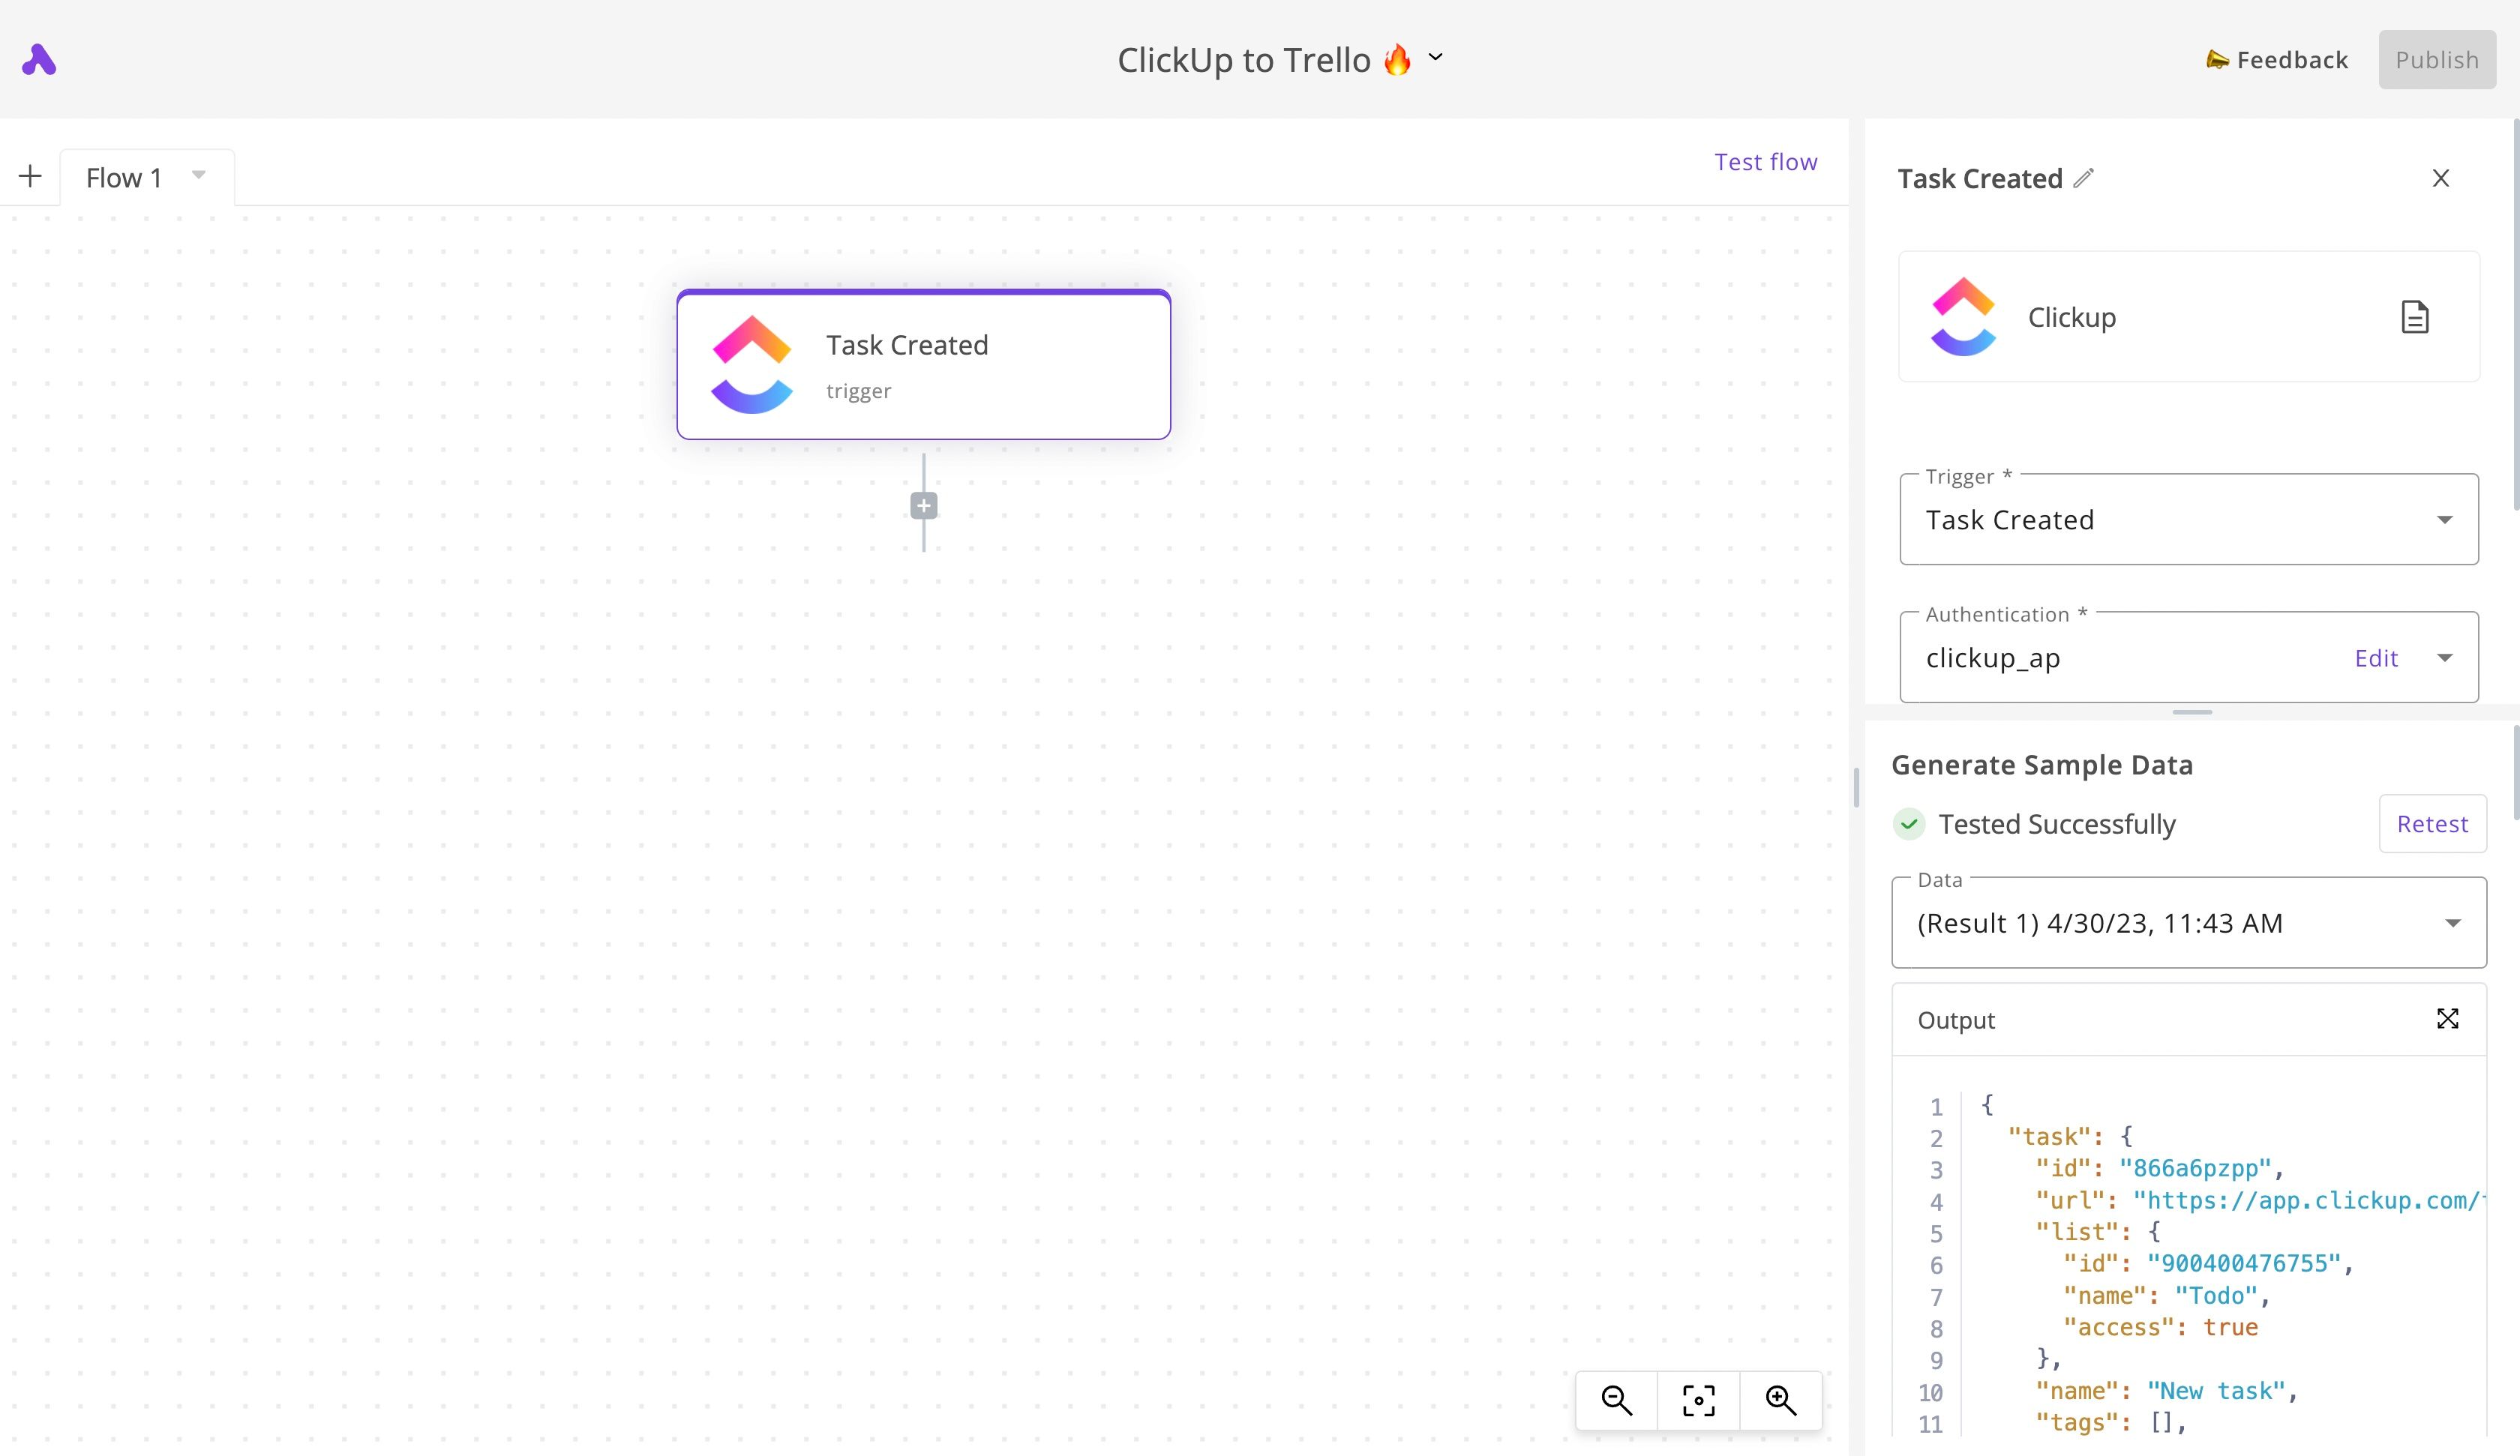
Below these settings, you'll see a Test trigger button, click on it. This will initiate the process of testing the trigger to generate sample data from ClickUp to use in the next steps in your flow. To test it, head to your ClickUp account in another window, go to the Workspace you selected previously, and add a new Task there.
Once the task is added, the testing panel will show you the data from the new task, my screen looked like this at this point:
4. Add a step to create a Trello card
Click on the + button right under the trigger step in your flow. The sidebar will ask you to choose a piece to use for the new step. Find the Trello app, select it and select the Create Card action.
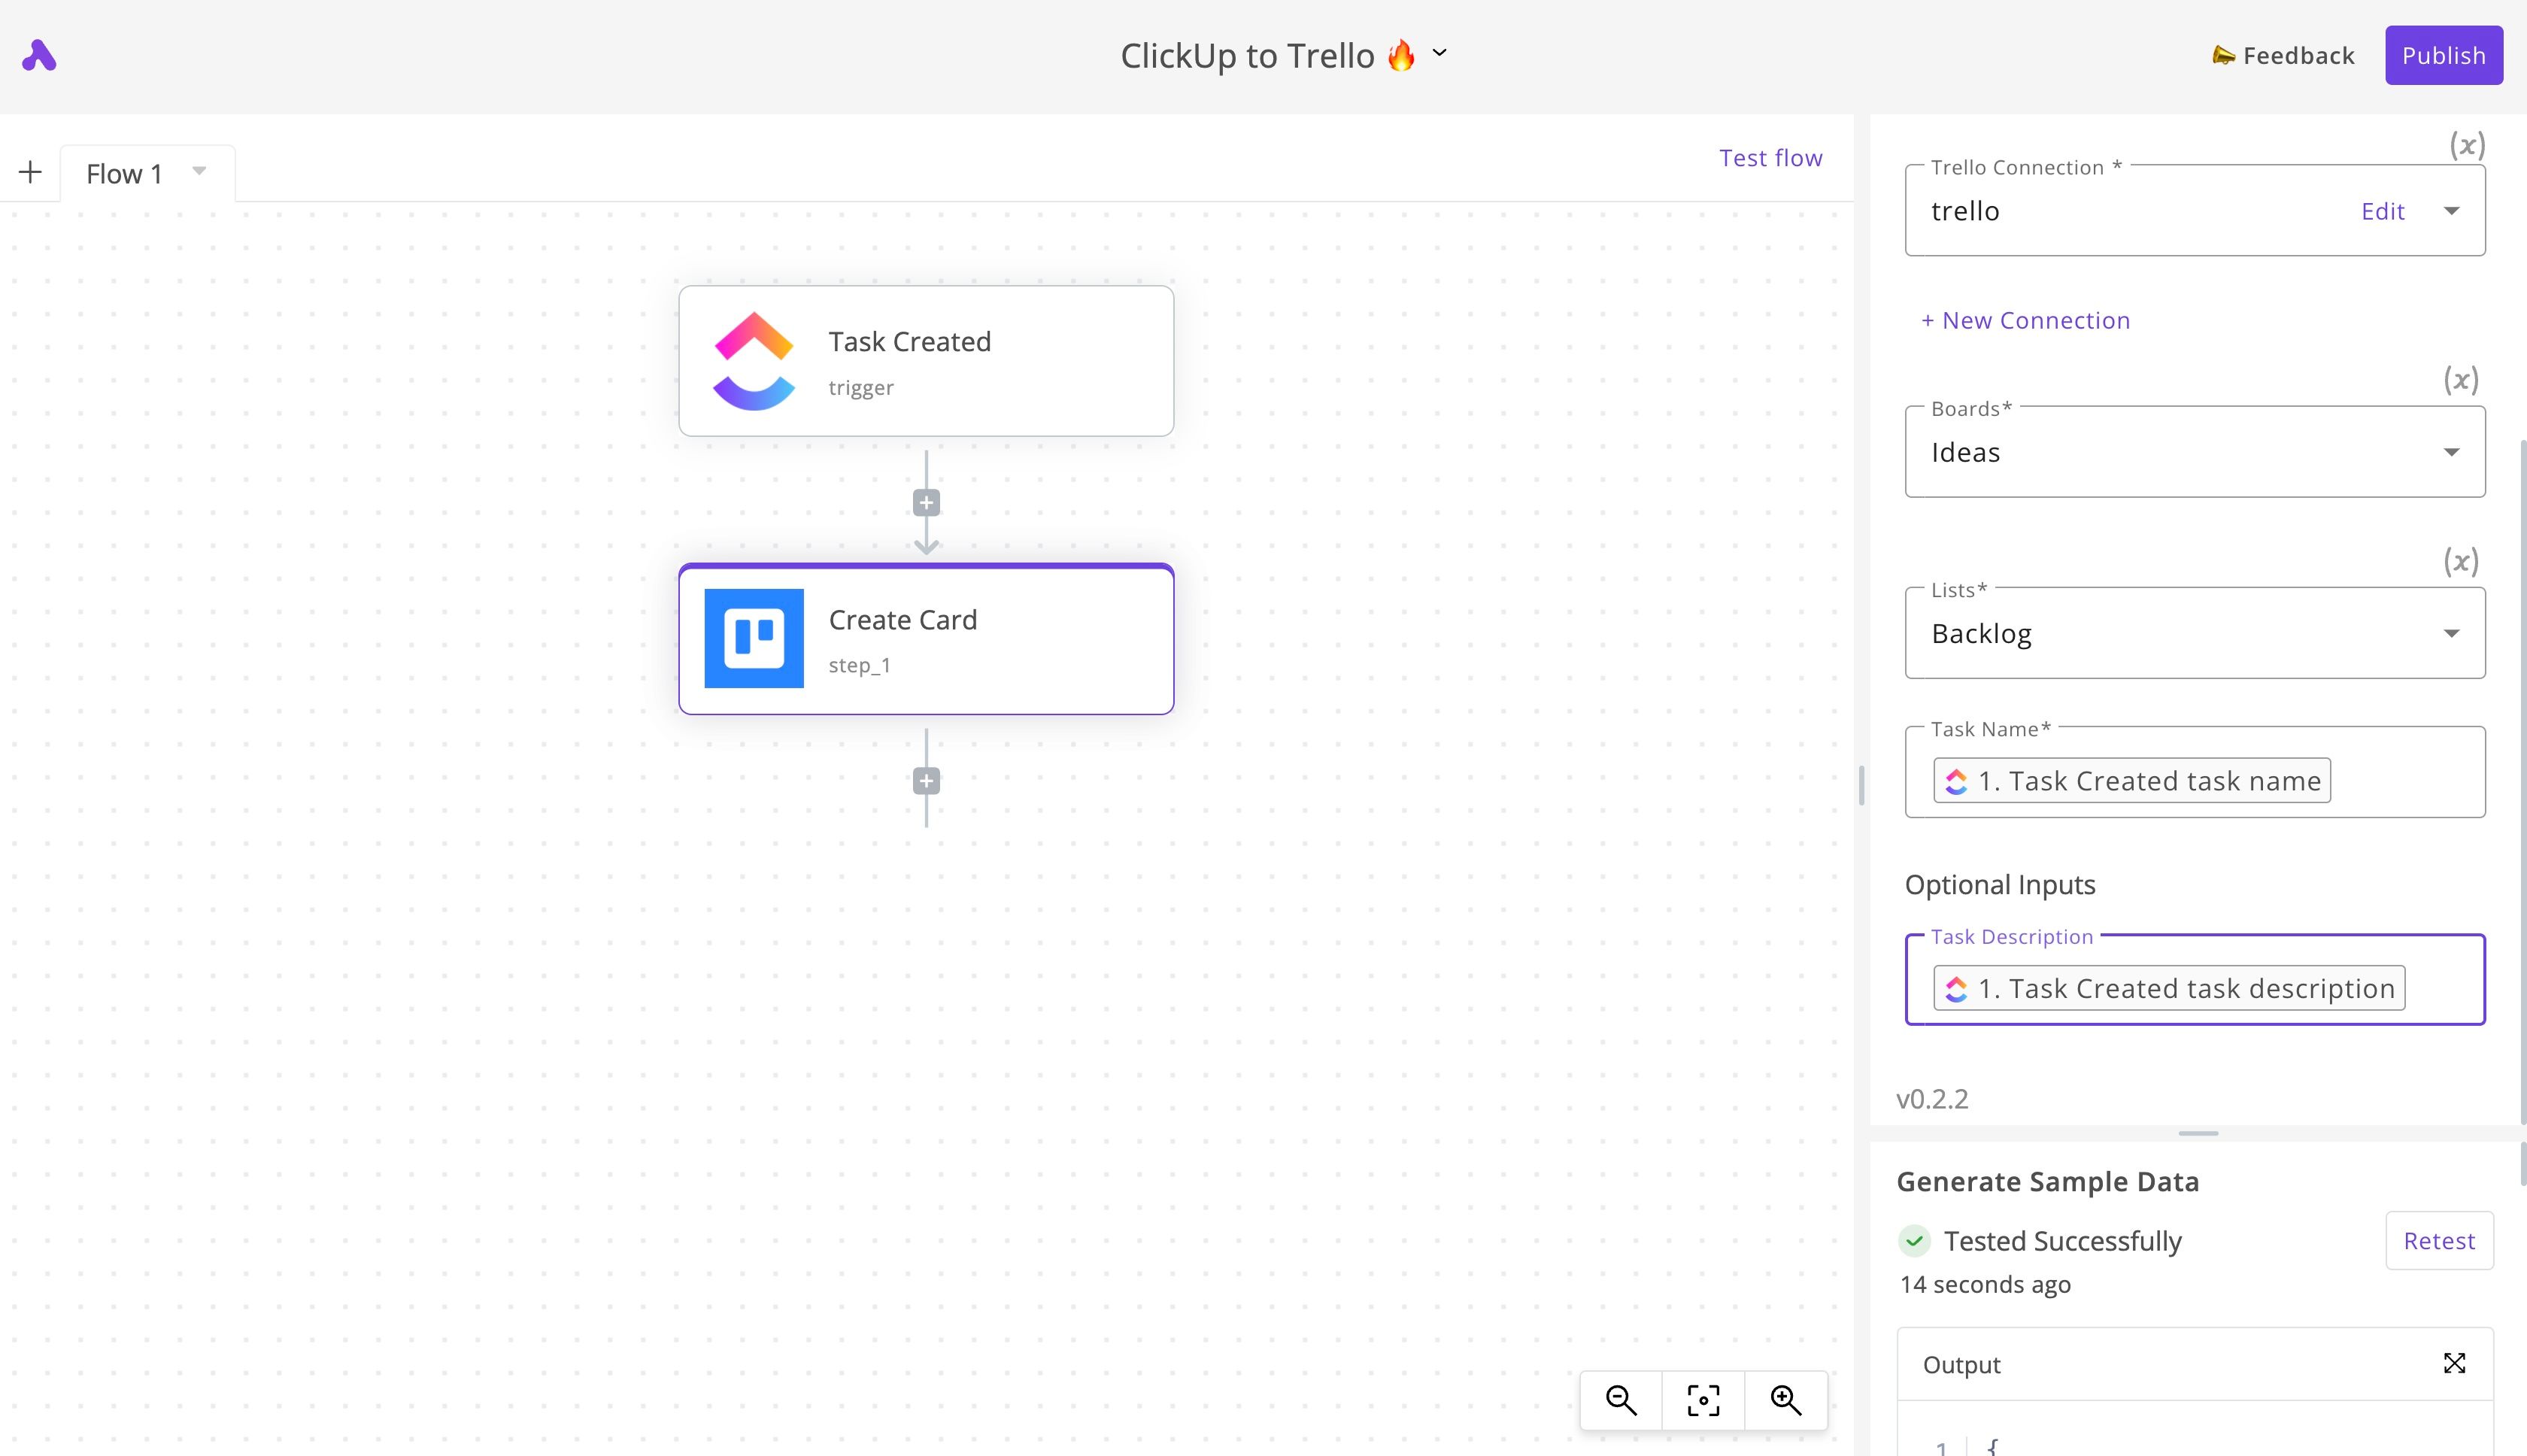
Click the + New Connection button to connect your Trello account. Follow the instructions in the connection popup. Once your account is connected, you will see a list of your existing Trello Boards. Choose the one you'd like to add the new card to. The second dropdown will display the Lists in this board. Choose the list you'd like to add the card to.
In the Task Name, we'll use the value from the ClickUp step. Use the Insert Data dropdown to find the ClickUp step, and choose task name from it. This is how I did it:
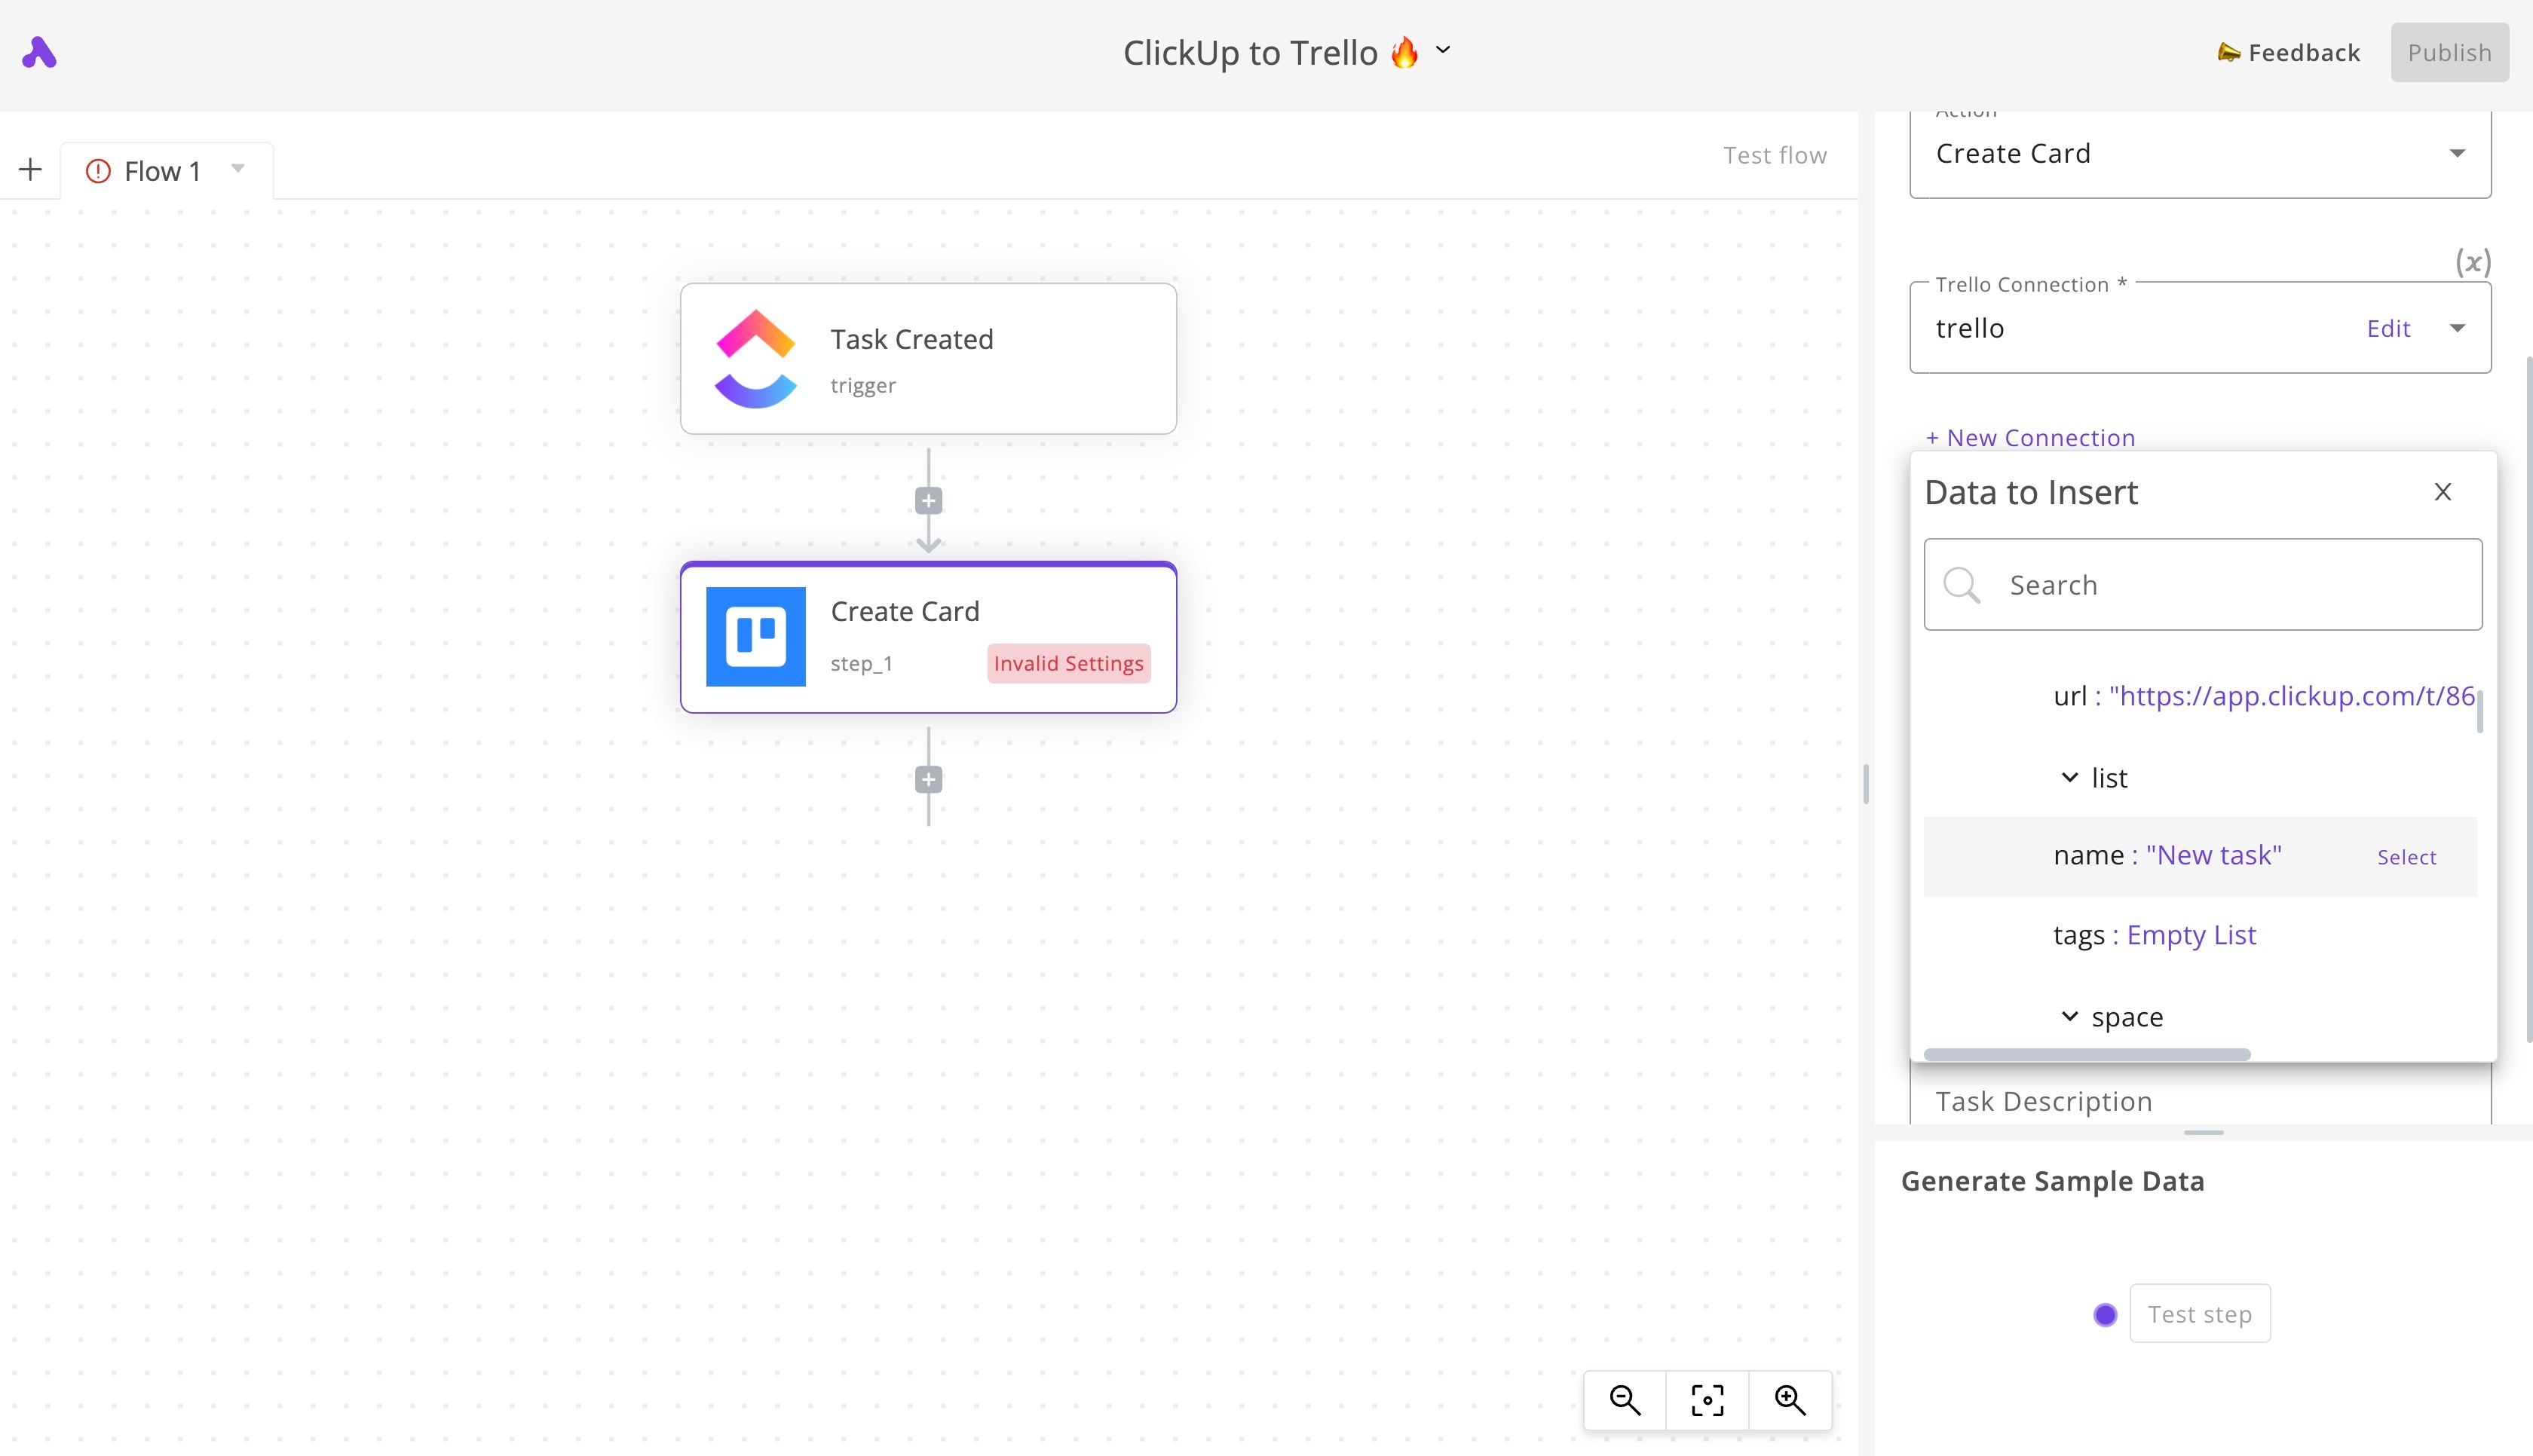
The same way, go to the Optional Inputs, choose Task Description if you'd like to add a description to the new card. Use the Insert Data dropdown again to select the description property from the ClickUp step. Once you're done, you can test the step to ensure that it works.
This is how my Trello step set up looked like:
5. Test your ClickUp and Trello automation
You're done building, now click on Test flow to see if everything is going well. This will show you step by step execution and will tell you if there is any issues and where they come from.
6. Launch your sync between ClickUp and Trello
Congrats! Everything is as planned. Click on the main Publish button and your automation flow will launch and start running in the background. Once it's published, you'll see a toggle button that allows you to turn on and off the flow at any time.


