Automate Web Browsing With Skyvern 🤝 Activepieces
Ginikachukwu Nwibe
Jul 21, 20256 min read
Browser automation has always been tricky. Login forms with pop-ups, 2FA roadblocks, and dynamic UIs make regular browser automation feel fragile at best and impossible at worst.
But that’s exactly the problem Skyvern is solving.
As you already know, Activepieces is on a mission to simplify automation and make it accessible to everyone, from solopreneurs to large enterprises. Therefore, we are more than excited to introduce Skyvern as part of our ecosystem.
In a recent video interview, Skyvern’s CEO sat down with Jordan from Activepieces to talk about where browser automation is today, where it's headed, and how a powerful flow combining both Skyvern and Activepieces is already helping companies scale large-scale browser activities
Check out the short video on YouTube: https://youtu.be/YtiYrmAdJ5g?si=4vCrtohlET5ss-_f
🔍 What Is Skyvern?
Skyvern is an AI agent platform built to navigate the web like a human. It doesn’t just scrape data, it interacts with websites. Here is an overview of the browser actions that Skyvern automates for you
- Logging into websites
- Handling 2FA
- Filling and submitting forms
- Navigating popups and dynamic flows
As the Skyvern CEO, Suchintan Singh puts it:
“The hardest part for most companies is logging into a site with automation. With Skyvern, something that takes engineers 3 days is reduced to 20 seconds.”
But what truly sets Skyvern apart is the benchmark it's setting. Most AI agents claim 90%+ accuracy using benchmarks like WebVoyager, which only tests 15 websites. Skyvern created WebBench, a more rigorous benchmark spanning 452 websites and 7,000 tasks.
The results?
Most agents struggle with actual interactions, filling out forms, downloading files, or clicking elements. Skyvern is currently leading and actively improving.
What Actions Are Possible With Skyvern and Activepieces?
- Run Agent Task
Runs task with specified prompt.
- Cancel Run
Cancels a workflow or task run by ID.
- Find Workflow
Finds workflow based on title.
- Run Workflow
Runs the workflow.
- Get Workflow/Task Run
Retrieves a workflow or task run by ID.
- Custom API Call
Make a custom API call to a specific endpoint
💡Use Case Spotlight
In this section, I am going to show you a sample flow that can be built with Skyvern and Activepieces
Workflow Overview: Submit Contact Form
This automation starts when a new company is added to HubSpot. It then uses AI to draft a contact message and requests human approval via Slack. Once the message is approved, it runs a task to submit the company's contact form. After an eight-minute delay, it checks if the task is completed and updates the 'Sales Properties: Lead Status' field in HubSpot to 'Attempted to Contact'.
Here is the template that you can use immediately on Activepieces:
https://cloud.activepieces.com/templates/1eaFdq3kyl1u9s4uolvWc
Now, let's get to the full tutorial on building the flow
Prerequisites for this flow
- A Skyvern Account
- A Skyvern API key: When you sign up on Skyvern, go to the General tab on the left > Settings, you will find your API key
- An Activepieces Account
Step 1: Login/Sign Up on Activepieces
Step 2: Go to Flow > Create Flow > From Scratch if you want to build this workflow from scratch

Step 3: Select a Trigger.
For this automation system, the trigger will be New Company from the Hubspot piece

Step 4: Select The Text AI Step
How to use it
- Click on the plus (+) sign under your trigger
- Click AI and Agents > Text AI > Ask AI
- Select your provider and model
- Give your AI a prompt
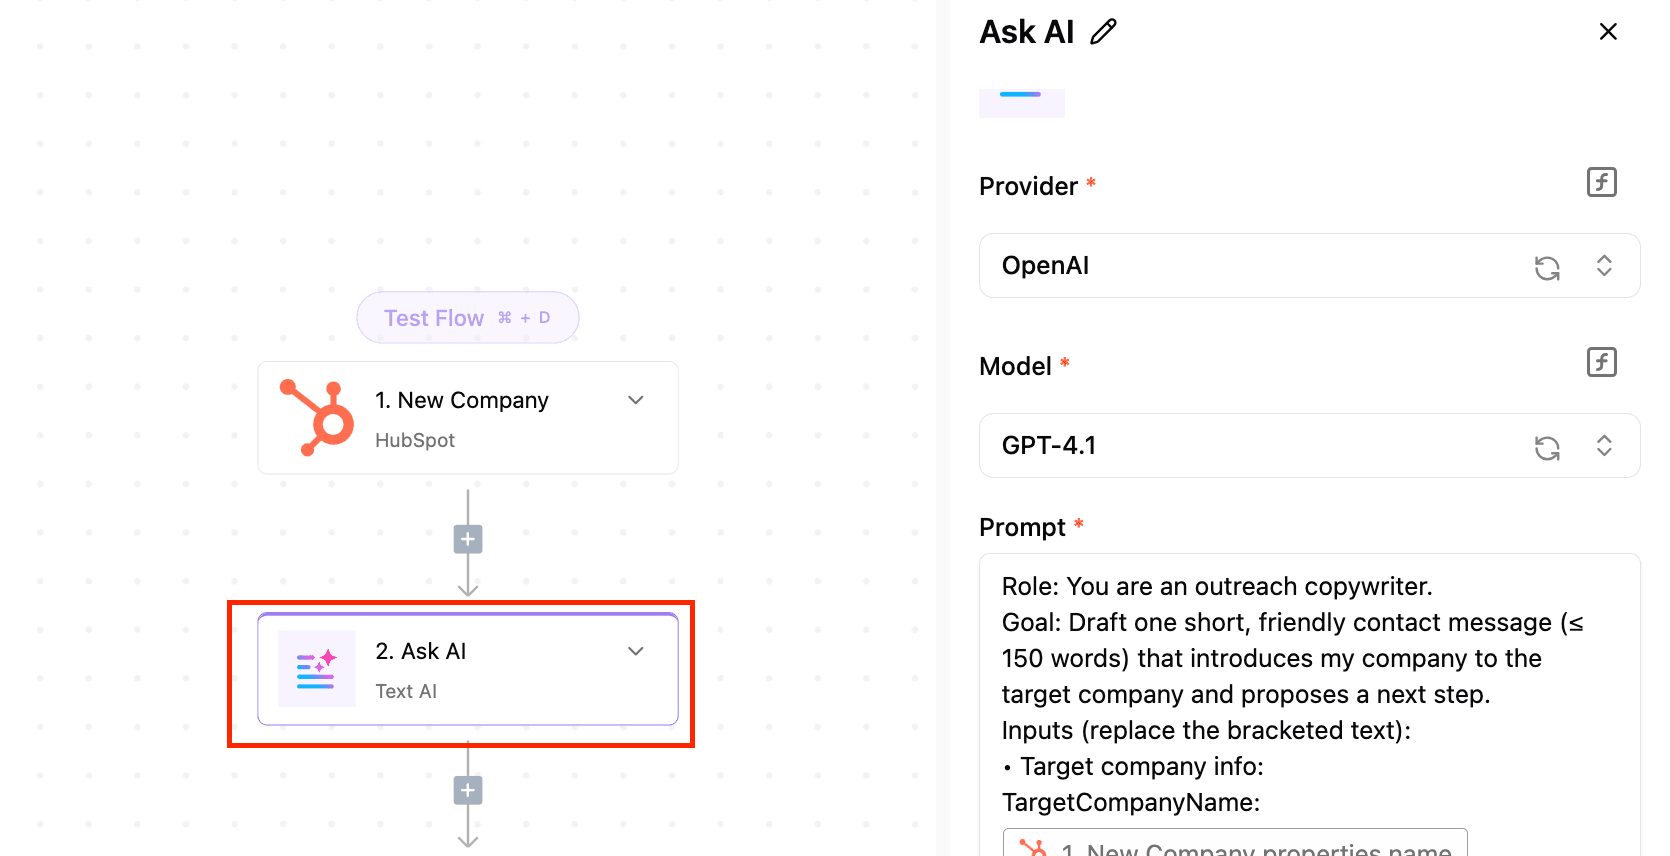
Here is the prompt that was used for this flow
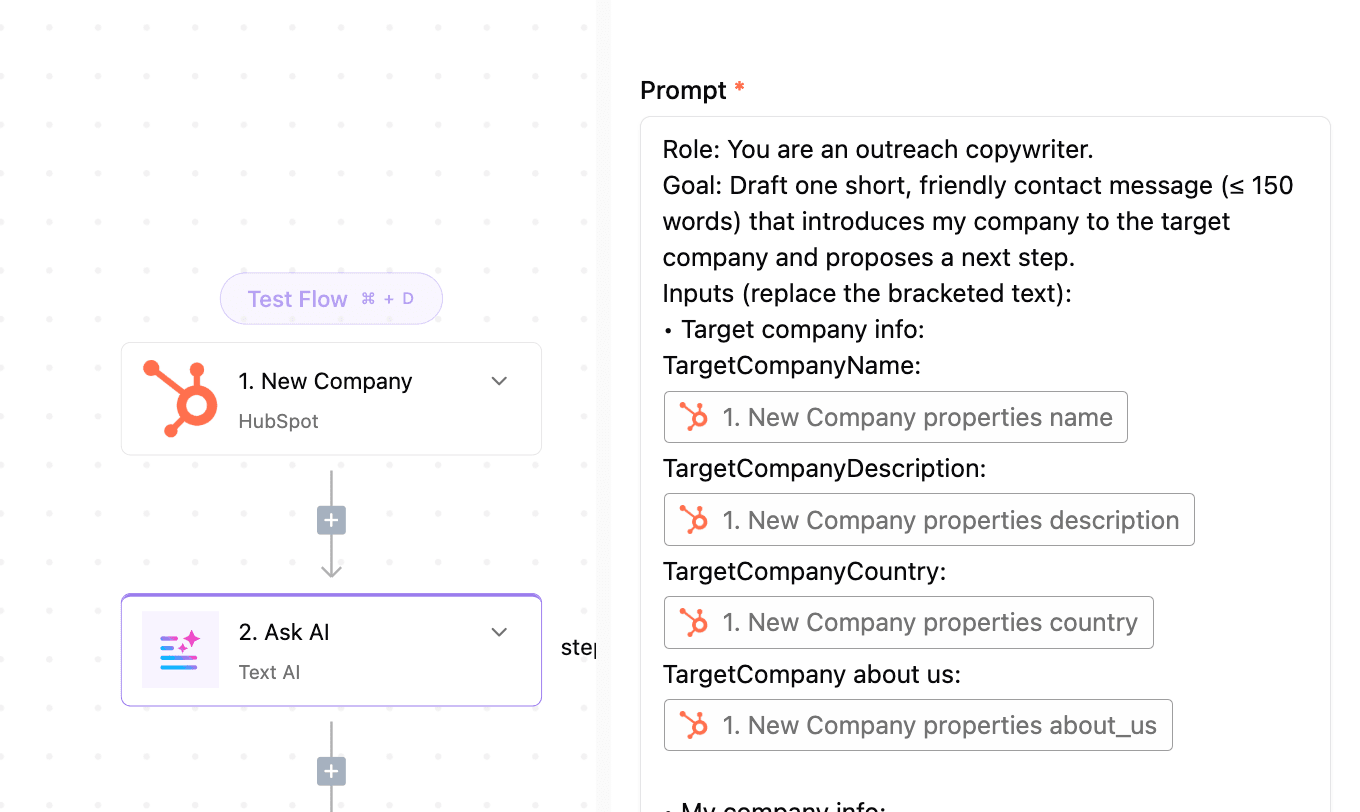
Role: You are an outreach copywriter.
Goal: Draft one short, friendly contact message (≤ 150 words) that introduces my company to the target company and proposes a next step.
Inputs (replace the bracketed text):
- Target company info:
TargetCompanyName:
TargetCompanyDescription:
TargetCompanyCountry:
TargetCompany about us:
My company info:
MyCompanyName:
MyCompanDescription:
MyCompanCountry:
MyCompanservices :
Instructions:
Open with a personalized line that shows you understand the target company or its recent activity.
Introduce my company and the specific solution that aligns with the target company’s needs.
Highlight one clear benefit or outcome for the target company.
End with a concise call-to-action (e.g., “Can we schedule a 15-minute call next week?”) and include my contact info.
Keep the tone professional-yet-warm; avoid jargon; use one short paragraph or up to three crisp sentences.
Output: Only the completed contact message, in plain text, no headers, labels, or additional commentary.
Don’t forget to pass in the necessary data from the previous step
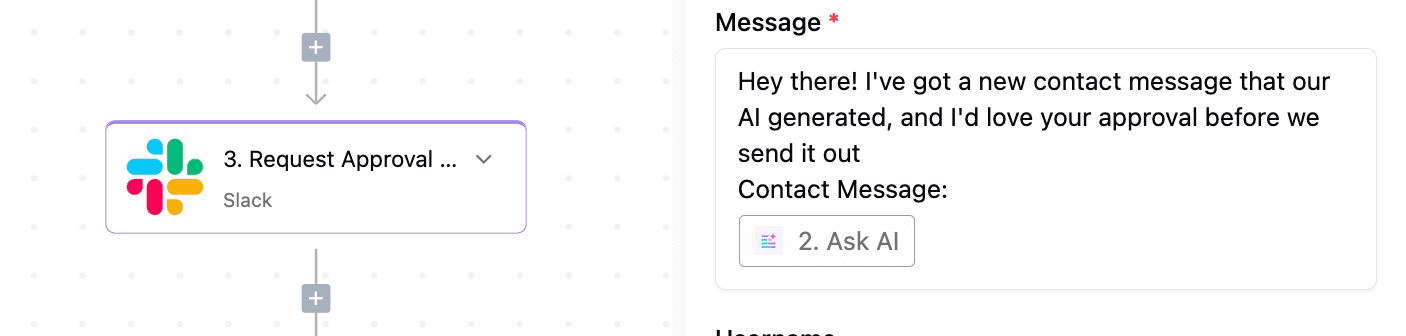
Step 5: Request Approval on Slack
This step aims to send the AI-generated contact message to a human on Slack for approval. You can achieve this by selecting the Request Approval action from the Slack piece. Add your Slack connection, select the user you want to send the message to, and type your message
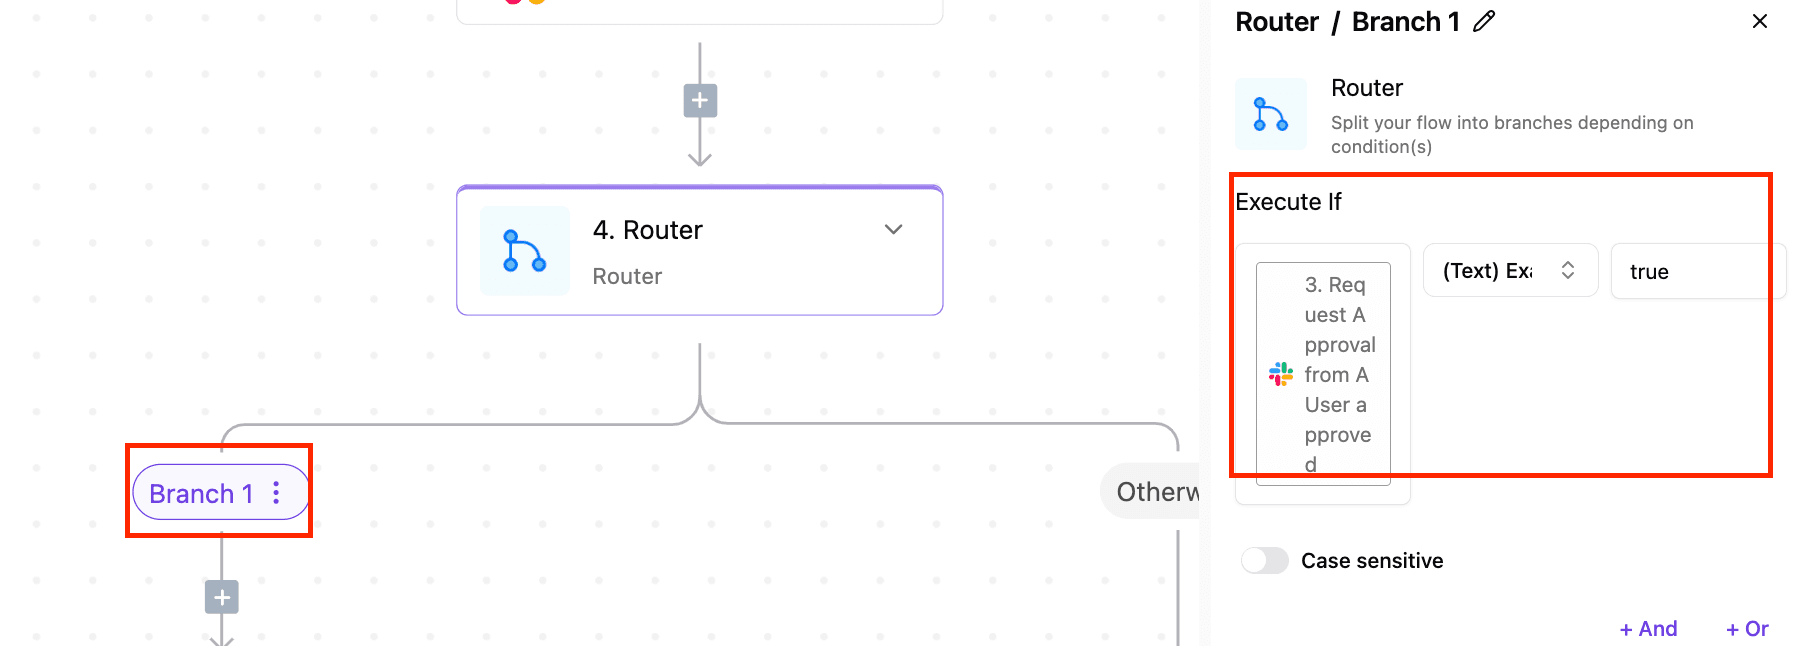
Step 6: Add the Router
This piece enables you to check if the content was approved and then trigger the next set of actions depending on the approval status.
Branch 1 of the router is used to execute the next set of actions if the content was approved on Slack. Here we set the conditions for approval to True
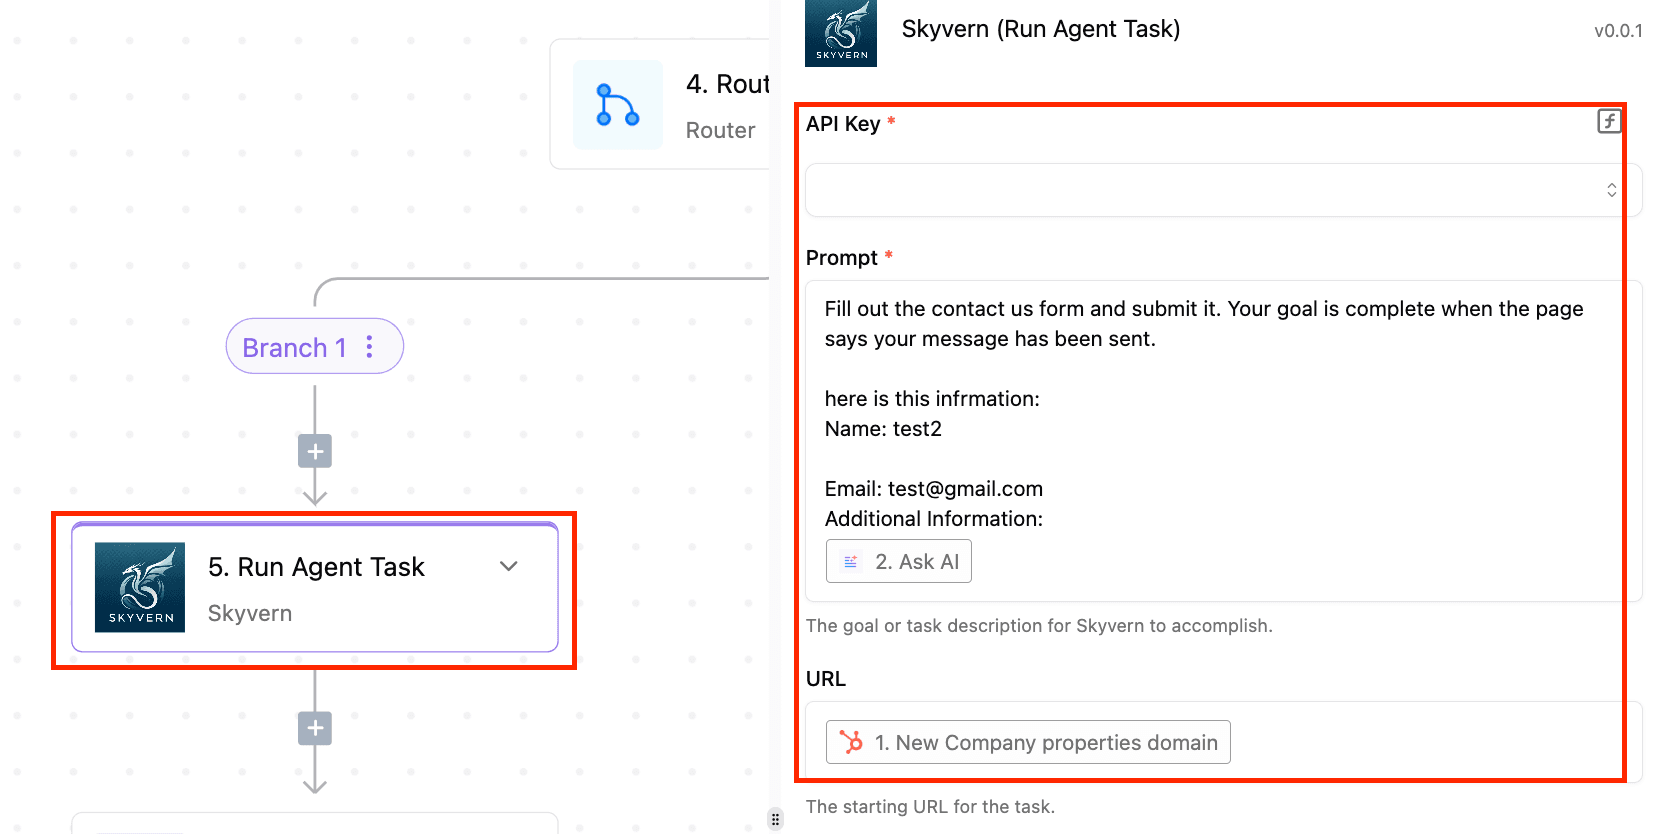
Step 7: Add Skyvern
This step is used to automatically fill out the new company’s contact form on their website. We will use Skyvern to automate the web browsing and form filling. For this specific action, we will select the Run Agent Task action from the Skyvern piece.
This is where you will need your Skyvern API key, a prompt for the agent to know what to do, and the URL you want the agent to browse.
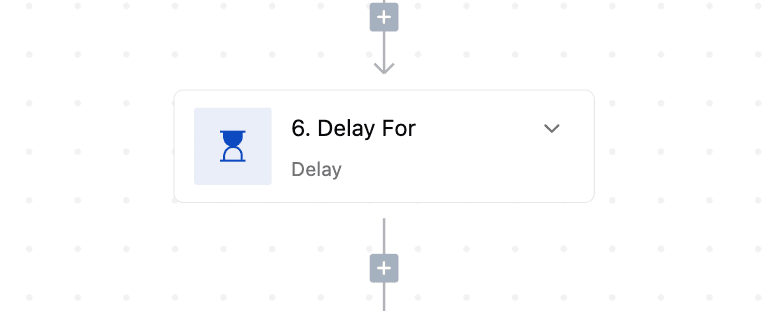
Step 8: Add a Delay Step
This step simply helps you to make the workflow pause for some time before continuing. In this case, we want to delay the flow for 8 minutes to ensure that the agent in the previous step has truly finished filling the contact form and submitted it before the automation system proceeds to the next step.
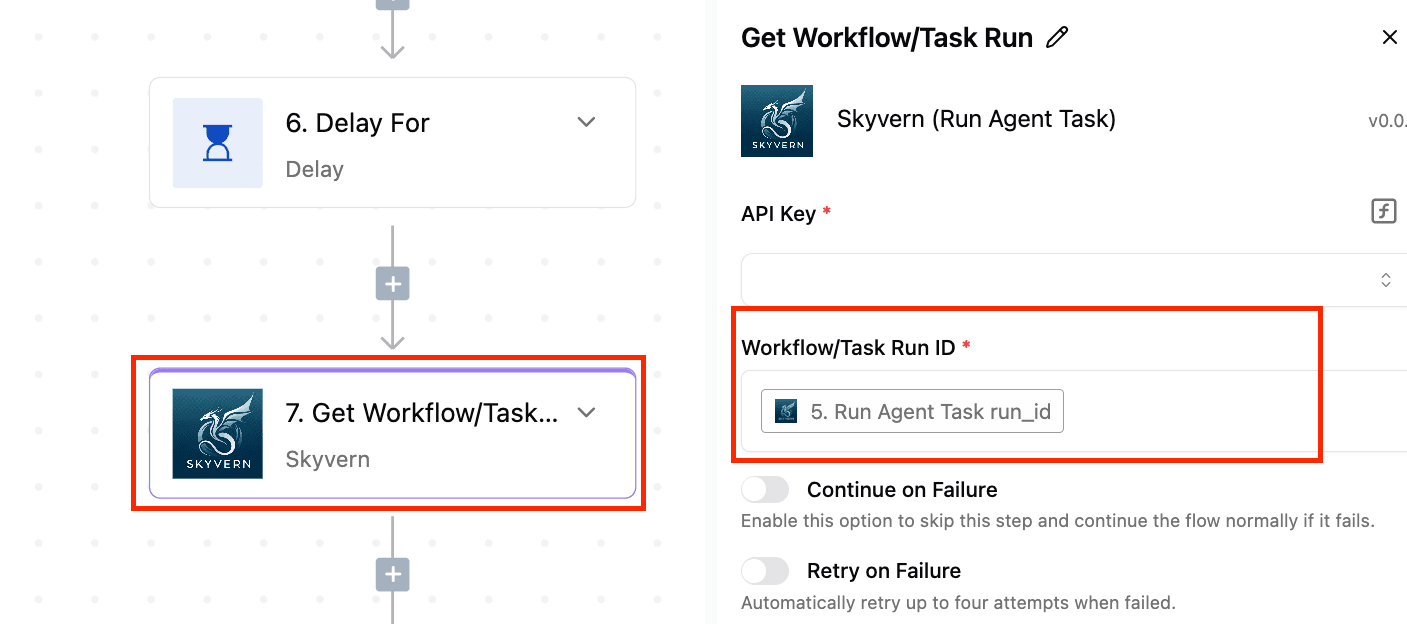
Step 9: Check Task /Workflow Status on The Browser
Here we want to check if the agent has completed the task assigned to it with Skyvern.
So we will select the Get Workflow/Task action from the Skyvern Piece. Then we need to provide the ID of the task we want to check.
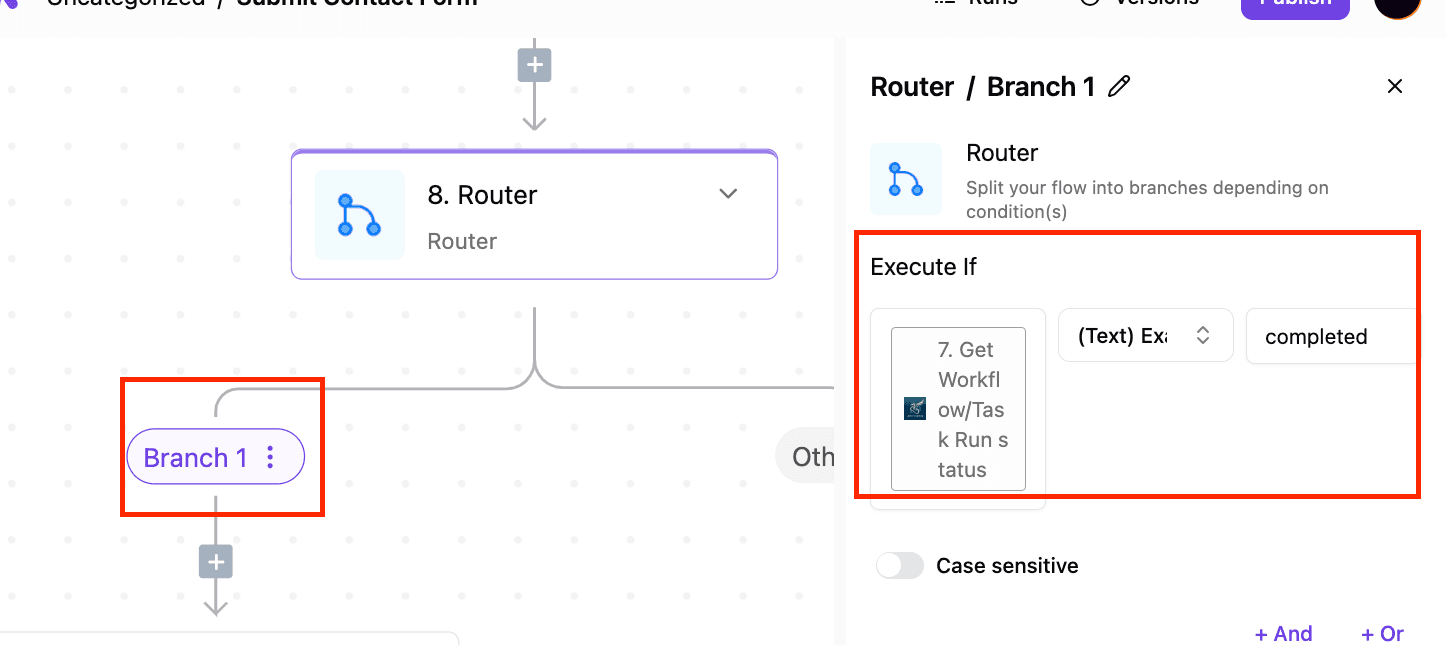
Step 10: Add the Router Piece
At this point, we want to use the router piece to check if the workflow has been completed
Branch 1 will be used to trigger the next action if the workflow has been completed
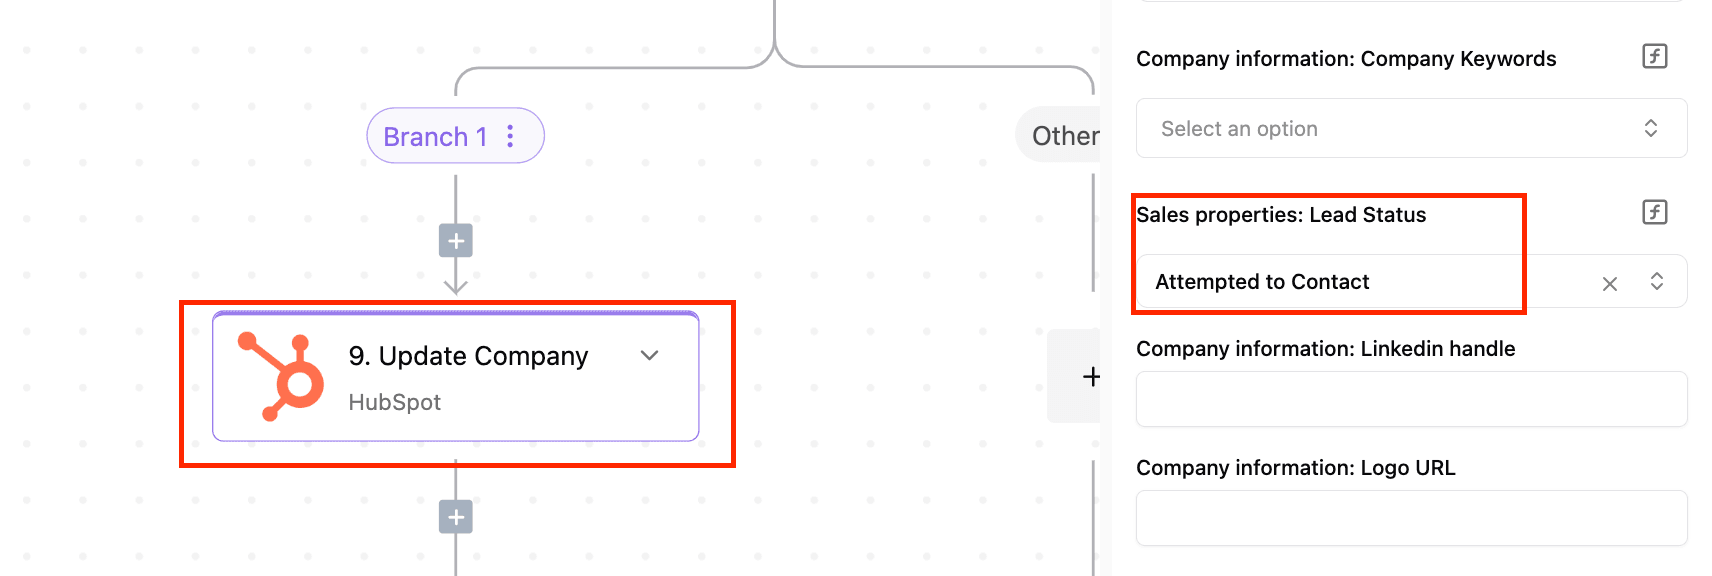
Step 11: Update Company On Hubspot
This step is used to update the company details on Hubspot after it has been confirmed that the workflow on the browser has been completed. Here we want to update the lead status to Attempted to Contact
🛠 Other Use Cases of Skyvern + Activepieces
Here are more real-world workflows you can build using this combo:
- Job Applications: Auto-apply to roles with tailored messages
- Invoice Collection: Log into vendor portals and fetch files
- Procurement: Check inventory and place orders on commerce sites
- Gov Forms: Navigate and complete regulated submissions
📌 What’s Next?
- Start building: You can explore the Skyvern integration directly in Activepieces.
- Follow us on social for use cases, tutorials, and tips.
- LinkedIn: Skyvern | Activepieces
- Twitter:Skyvern | Activepieces

Written by
Ginikachukwu Nwibe
Content Writer at Activepieces